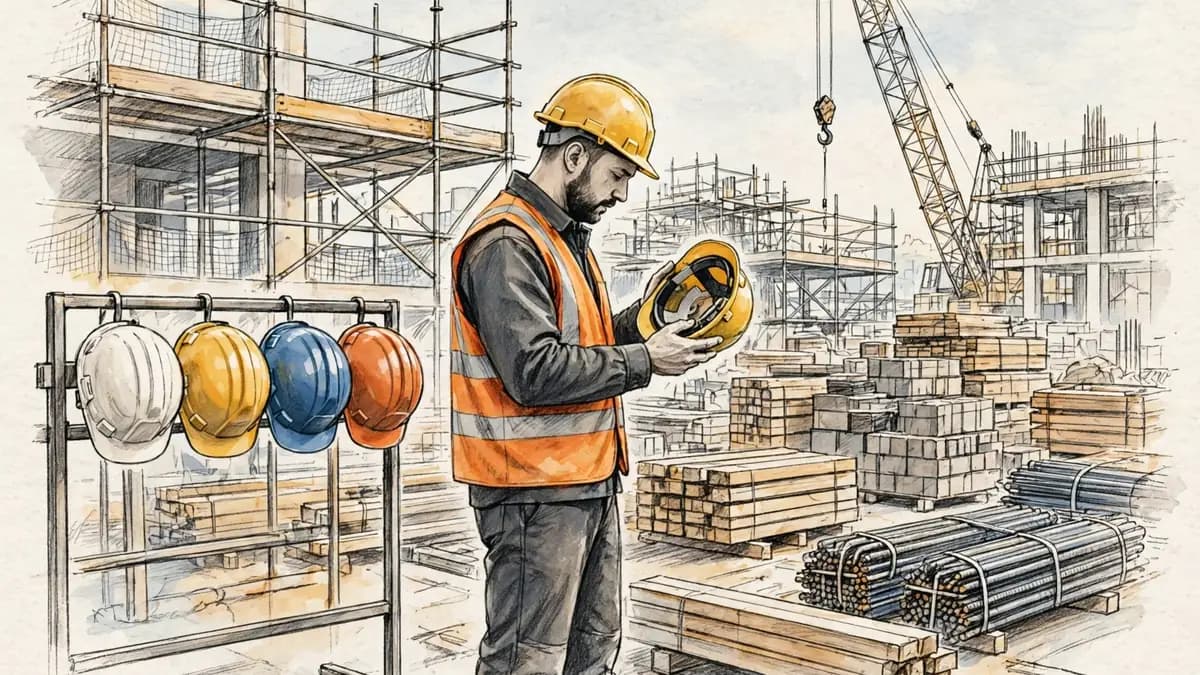
A hard hat is three ratings in one shell. The Type rating covers impact direction, the Class rating covers electrical protection, and the style covers fit and comfort. Read the label inside the shell to find all three. Colour tells you nothing about protection, because no standard fixes what a colour means.
Choose in the right order. Match the Type to the way impact can reach the head, match the Class to the electrical exposure, then pick a style that fits the weather and the work. A Type II, Class E hat and a Type I, Class C hat look almost identical from the outside. The label is the only reliable difference.
When the law requires a hard hat
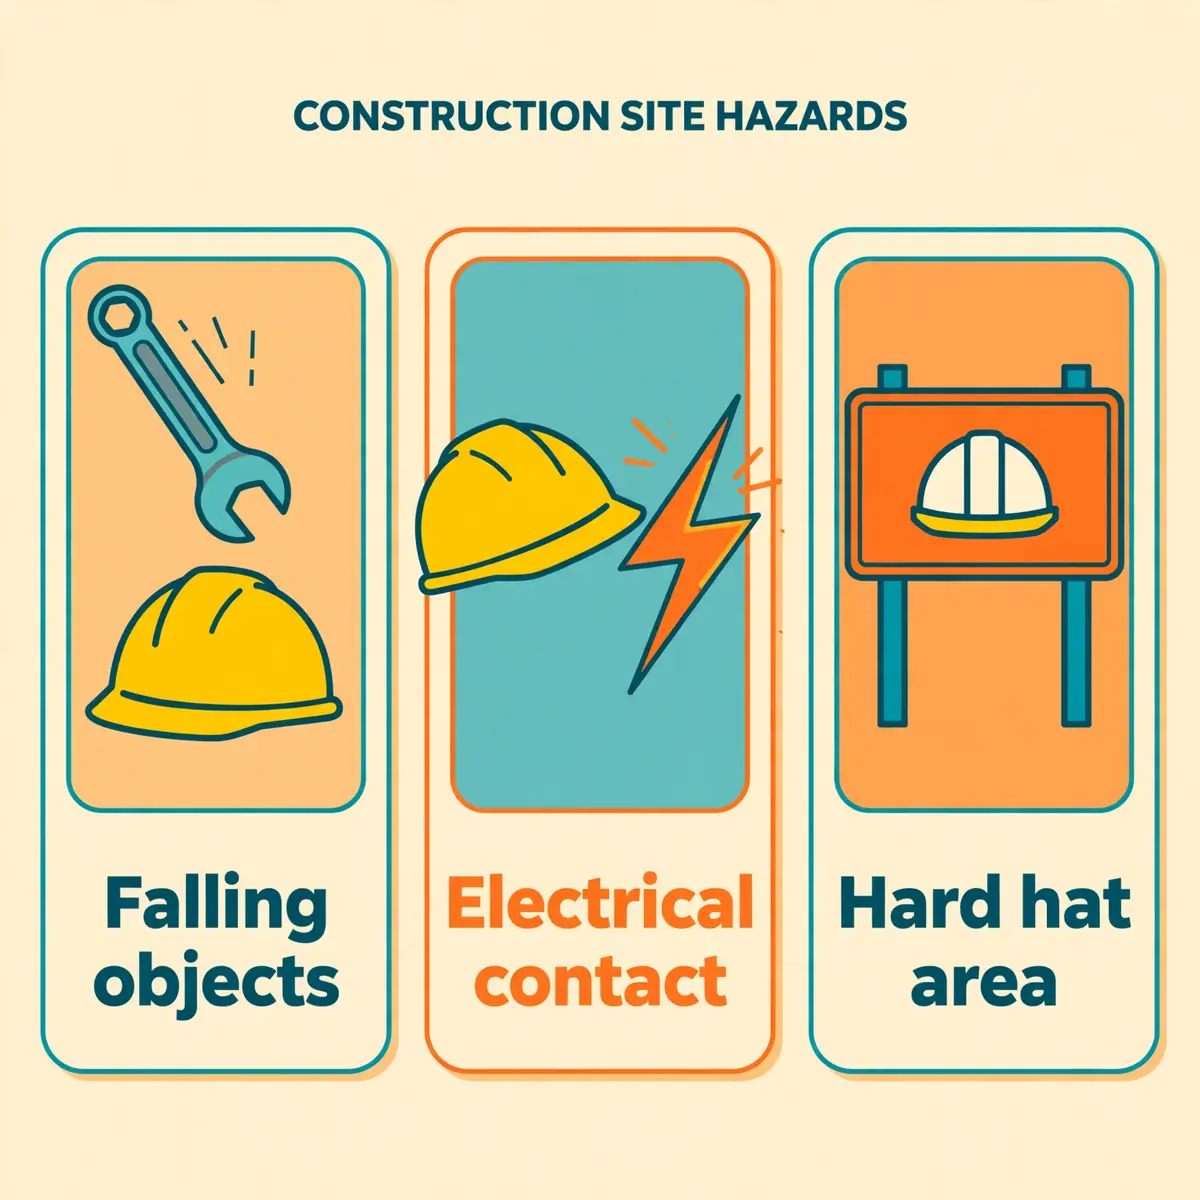
In the United States, the duty sits with the employer. The Occupational Safety and Health Administration (OSHA) requires employers to make sure each affected employee wears a protective helmet where the head could be injured by falling objects. The same rule covers work near exposed electrical conductors that could contact the head. Head protection is a duty, not a personal choice.
Construction has its own version of the same duty. OSHA's construction rule requires protective helmets where workers face possible head injury from impact, falling or flying objects, or electrical shock and burns. Both rules point to the same performance standard for the helmet itself. Employers must provide helmets that meet a recognised consensus standard, and workers must wear them in the marked areas.
What counts as a head hazard
A head hazard is any condition that can strike the head or let the head strike something hard. Falling tools, dropped materials and debris from work above are the most common examples. Moving equipment, swinging loads and low beams create a different risk, because the head can move sideways into a fixed object.
Electrical contact is a separate hazard with its own rules. A conductor does not need to fall on a worker to hurt them. A head that brushes an exposed live part can complete a circuit. That is why the OSHA rules name electrical shock alongside falling objects, and why the Class rating matters as much as the Type rating.
Who must provide the hard hat
The employer provides the head protection and makes sure it fits the hazard. Workers must wear the helmet the employer provides in areas where the hazard exists. A supervisor who lets a crew work bareheaded under an overhead load is failing the same duty as an employer who issues the wrong class for electrical work.
Visitors need protection too. Anyone who enters a hard-hat area, including a client, a delivery driver or an inspector, must wear a helmet that matches the hazards of that area. Sites that keep spare helmets at the gate do so because the duty covers every person in the area, not only the crew.
AlertA hard hat area starts where the hazard starts, not where the sign stands. Treat any space under overhead work, near moving loads or beside exposed conductors as a hard-hat area until a risk assessment says otherwise.
Type I vs Type II: which way can impact come from
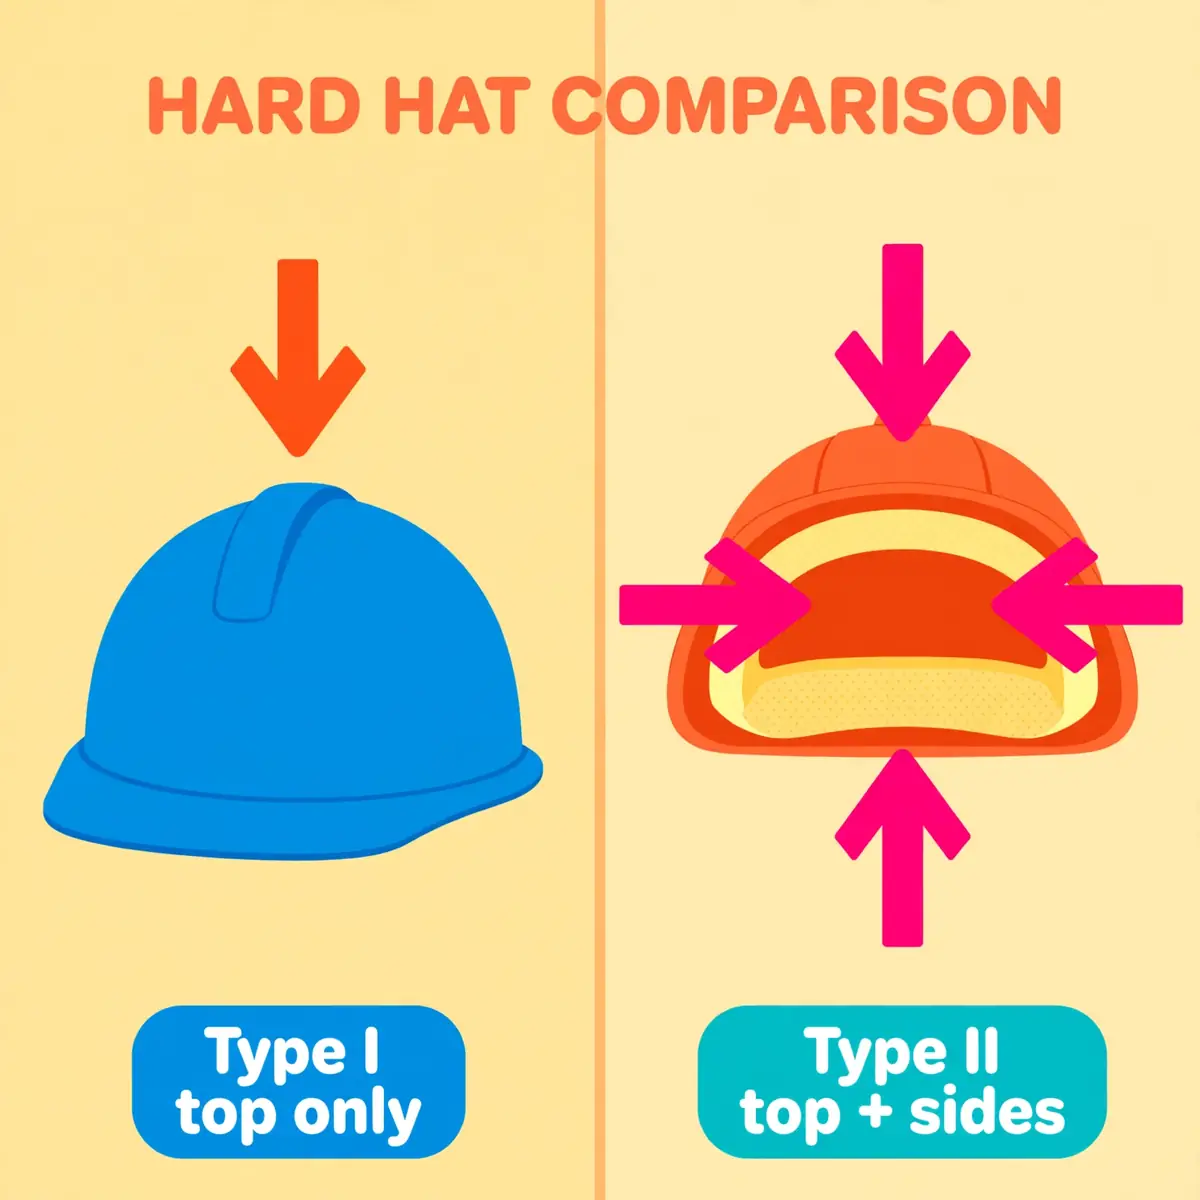
Under the American National Standards Institute (ANSI) and International Safety Equipment Association (ISEA) standard ANSI/ISEA Z89.1, hard hats fall into two Types. Type describes impact direction only. It says nothing about electrical protection, colour or brim style. The newest edition is Z89.1-2026, released in September 2026. It adds optional Type I+ and Type II+ ratings for tested chin strap retention. Most hats on site still carry the 2014 edition, reaffirmed in 2019, and OSHA's rules incorporate earlier editions of the same standard.
Type I hard hats are tested for impact to the top of the head only. A falling tool, a dropped bolt or debris from work above is the hazard they are built for. Type I is the traditional hard hat shape, and it remains the most common choice on open construction sites where the main risk comes from above.
Type I: top impact only
Type I shells are tested with a striker dropped onto the crown, and with a pointed striker that must not penetrate the shell. The suspension inside spreads the force of a blow across the head instead of letting it concentrate on one spot. That combination handles the classic falling-object case well.
Type I suits open yards, scaffolding and general construction where side clearance is good and nothing moves at head height. It is usually lighter and cooler than Type II, because it needs no foam liner around the sides. Lighter weight matters on a long shift, but it is not a reason to choose Type I where side impact is a real risk.
Type II: top and lateral impact
Type II hard hats are tested for top impact and for lateral impact to the front, back and each side. The extra test is an off-center impact test that Type I helmets are not required to pass. Most Type II shells carry a foam liner bonded inside, which absorbs side strikes instead of passing the force straight to the neck.
Type II is the right default where a worker could fall sideways into a fixed object. It also fits where swinging loads pass at head height, or where work happens in confined spaces and low-clearance areas. Utility work, work near moving vehicles and work in tunnels all point toward Type II. The extra liner makes the hat warmer and heavier, so fit and sweatbands matter more.
Type I vs Type II at a glance
The table below compares the two Types on the points that decide a purchase. Use it with the hazard assessment, not instead of it. A site with both overhead and lateral hazards needs Type II, even if most of the day looks like ordinary construction work.
| Feature | Type I | Type II |
|---|---|---|
| Impact protection | Top of head only | Top, front, back and sides |
| Extra test | None beyond crown impact | Off-center lateral impact test |
| Liner | Suspension only | Suspension plus foam liner |
| Typical use | General construction, open yards | Confined spaces, moving equipment, tunnels |
| Weight and heat | Lighter, cooler | Heavier, warmer |
WarningA Type I hard hat gives no tested protection against a side blow. Never issue Type I where beams, pipes, vehicle edges or swinging loads can strike the head from the side.
What the 2026 edition adds
The 2026 edition leaves Type I, Type II and the three Classes exactly as they were. It adds an optional tier on top of them. A Type I+ hat carries a chin strap, passes retention testing, and adds front, rear and side impact protection to the top-impact Type I shell. A Type II+ hat adds the same chin strap and retention testing to the existing Type II impact protection.
The 2026 edition also renames the high-visibility mark from HV to EV, for enhanced visibility, with no change to the visibility performance itself. The new tier is voluntary, and OSHA has not yet adopted the 2026 edition, so a hat marked Z89.1-2014 remains compliant. When a hazard assessment calls for tested retention, the "+" marking gives buyers a label to point at. The 2026 revision summary sets out the new designations in full.
Classes G, E and C: electrical protection
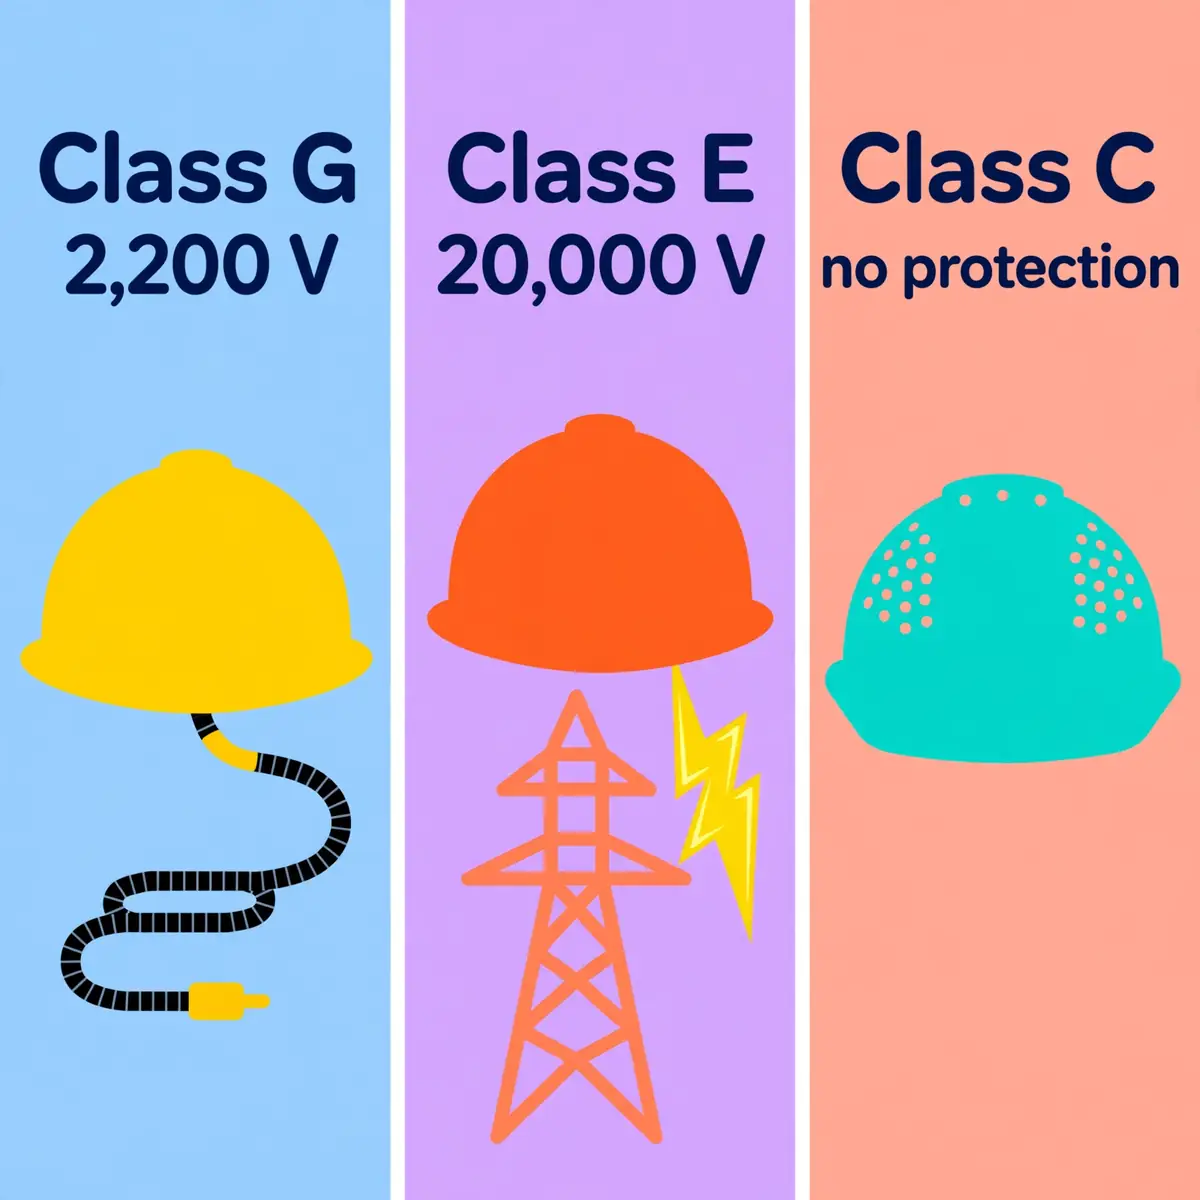
Class covers electrical protection, and it is independent of Type. A hard hat can carry any combination, such as Type I Class E or Type II Class G. The two ratings sit on the same label inside the shell, and both must match the job. ANSI/ISEA Z89.1 defines three Classes, and the difference between them is the voltage the shell is proof-tested against.
Class G stands for General. These shells are proof-tested at 2,200 volts phase-to-ground, and they suit general construction and industrial work where low-voltage exposure is possible but not the main hazard. Class G is the most commonly bought class, because most sites have some low-voltage equipment nearby.
Class E: high-voltage work
Class E stands for Electrical. These shells are proof-tested at 20,000 volts phase-to-ground, and they are the right choice for work near energised conductors and high-voltage utility work. OSHA's construction rule adds a specific condition here: head protection for workers exposed to high-voltage electric shock and burns must also meet the electrical insulation section of the standard.
The Class E rating protects the head only. It is not whole-body shock protection, and it does not replace insulating gloves, sleeves or tools. Utility and substation crews treat the Class E shell as one layer in an electrical safety programme, not as a complete solution on its own.
Class C: no electrical protection
Class C stands for Conductive. These shells give no electrical protection and are not tested for electrical performance. They are often vented for airflow, and they suit hot work where no electrical exposure exists. A Class C hat is comfortable, light and cool, but it must never be worn near exposed conductors.
Ventilation is the reason a shell ends up in Class C. Holes in the shell break the insulating barrier, so a vented shell cannot pass the dielectric test for Class G or Class E. Any vented hard hat is automatically Class C, whatever the brand or the price.
Class E is not arc-flash protection
A Class E rating comes from a dielectric test, and it is not an arc-flash rating. Where an arc-flash hazard exists, the National Fire Protection Association (NFPA) 70E standard governs the required head protection separately. A Class E hard hat alone does not satisfy an arc-flash requirement, and arc-rated face protection and clothing may also be needed.
Read the NFPA 70E requirements before choosing head protection for electrical work with arc-flash risk. The boundary distances and the arc rating of the full protective ensemble decide what is worn, not the hard hat label alone.
| Class | Proof test | Electrical protection | Typical use |
|---|---|---|---|
| Class G (General) | 2,200 volts | Low-voltage conductors | General construction, manufacturing |
| Class E (Electrical) | 20,000 volts | High-voltage conductors | Utilities, power generation |
| Class C (Conductive) | Not tested | None | Hot, non-electrical work |
WarningNever wear a Class C hard hat near exposed electrical conductors. Vents and conductive materials in the shell offer no insulation, and the shock risk is the same as wearing no hat at all.
Styles: cap, full brim, vented and safety helmets
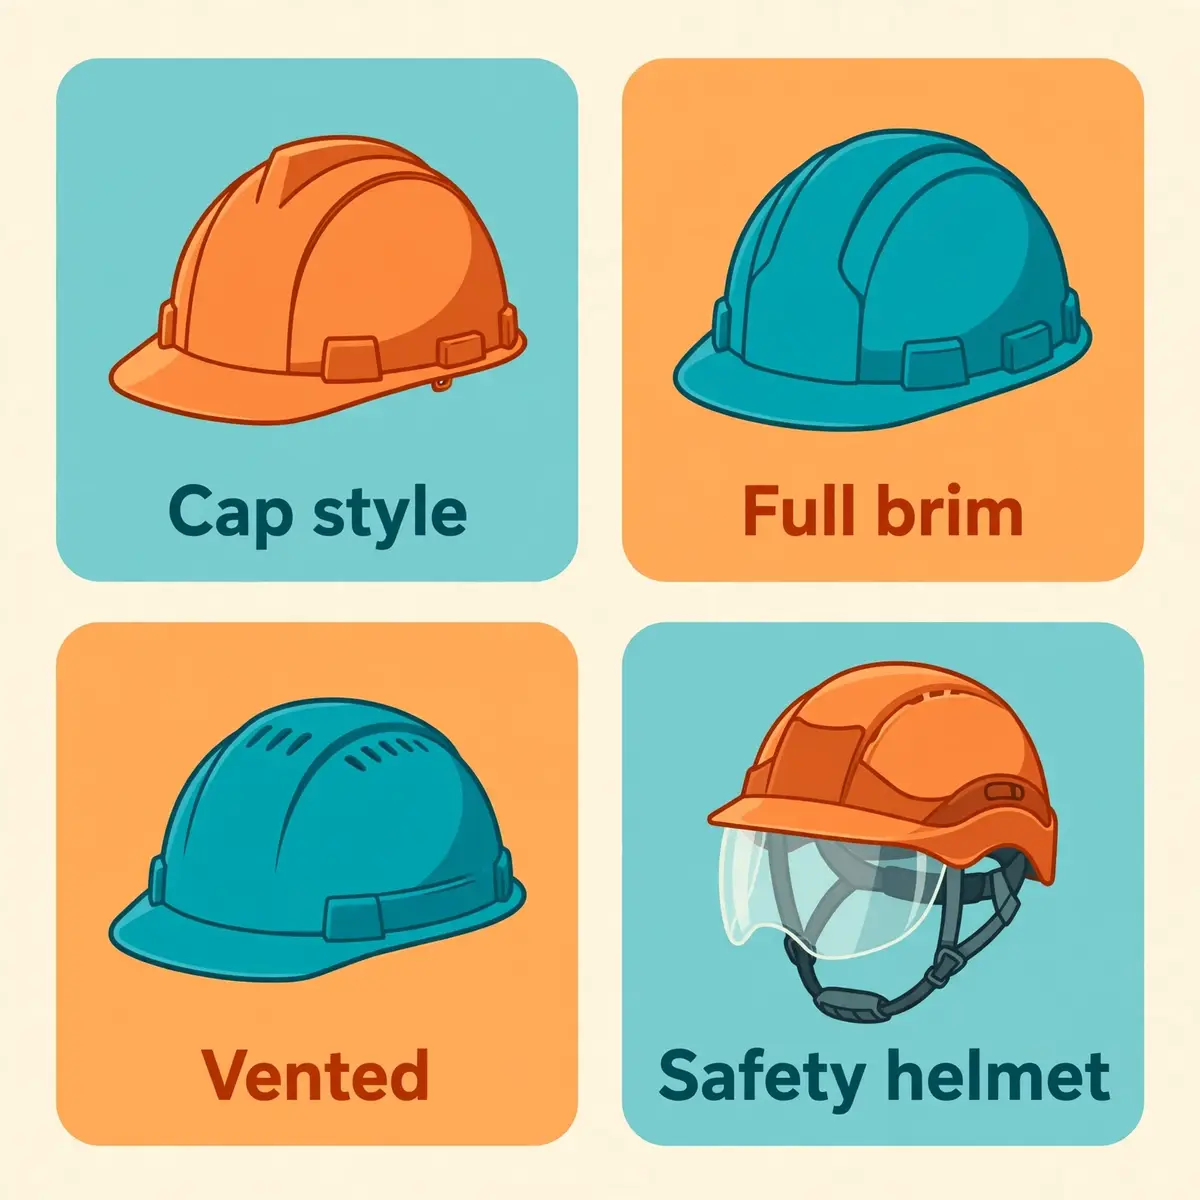
Type and Class handle protection. Style handles fit, comfort and how the hat feels after eight hours on the head. Style choices sit on top of the Type and Class ratings, and they never change them. A cap-style Type II Class E hat and a full-brim Type II Class E hat protect the head in exactly the same way.
Cap style is the traditional shape, with a short brim at the front only. It is lighter, sits closer to the head, and pairs easily with face shields and earmuffs. That is why it remains the default across most construction and industrial sites. Full brim goes around the whole head, which gives shade and keeps rain and debris running off on all sides.
Cap style vs full brim
Cap style suits indoor work and sites where accessories matter, because the short brim leaves room for a face shield, a welding hood or earmuffs. It is also the lighter option, which helps on long shifts. The trade-off is less protection from sun, rain and debris falling at an angle.
Full brim suits outdoor work with heavy sun or rain exposure, and utility work where debris can arrive from any side. The 360-degree brim shades the neck and ears and sheds water in every direction. The trade-off is more weight and a wider profile, which can catch on low beams and scaffold tubes.
Vented vs non-vented
Vented shells have holes that let hot air escape, which improves comfort in hot conditions. The cost is the electrical rating: a vented shell is automatically Class C. Non-vented shells keep the full dielectric barrier, so they are required wherever Class G or Class E protection is needed.
Choose vented only where the hazard assessment shows no electrical exposure at all. A hot day is not a reason to trade away electrical protection. Crews that work near live equipment in summer need a non-vented shell and a different way to manage heat, such as shade, water and rest breaks.
Safety helmets: a newer category
Not every piece of head protection on a site is technically a hard hat. The 2014 update to ANSI/ISEA Z89.1 formally recognised a separate category, the safety helmet, which looks closer to a climbing helmet than a traditional hard hat. The difference is retention. A safety helmet includes a chin strap, which keeps it on the head during a fall, a tip or an awkward-angle impact.
A standard hard hat protects against falling objects. A safety helmet also protects against the head hitting something else, or the helmet coming off during a fall. That is why safety helmets have caught on fastest with crews doing structural steel work, elevated tasks and anything with significant fall risk beyond straight overhead hazards.
Bump caps are not hard hats
A bump cap is a close-fitting cap with a thin protective insert, made for scrapes under racking and machine frames. Bump caps are not tested to the impact and penetration levels of ANSI/ISEA Z89.1, and they must not be issued where hard hats are required. Mixing the two on one site without clear zoning is a common audit finding.
Use bump caps only where the risk is a minor bump against a fixed object, never where anything can fall on the head. If the hazard assessment calls for a hard hat, a bump cap is not a lighter substitute. It is a different product for a different risk.
What hard hat colours mean
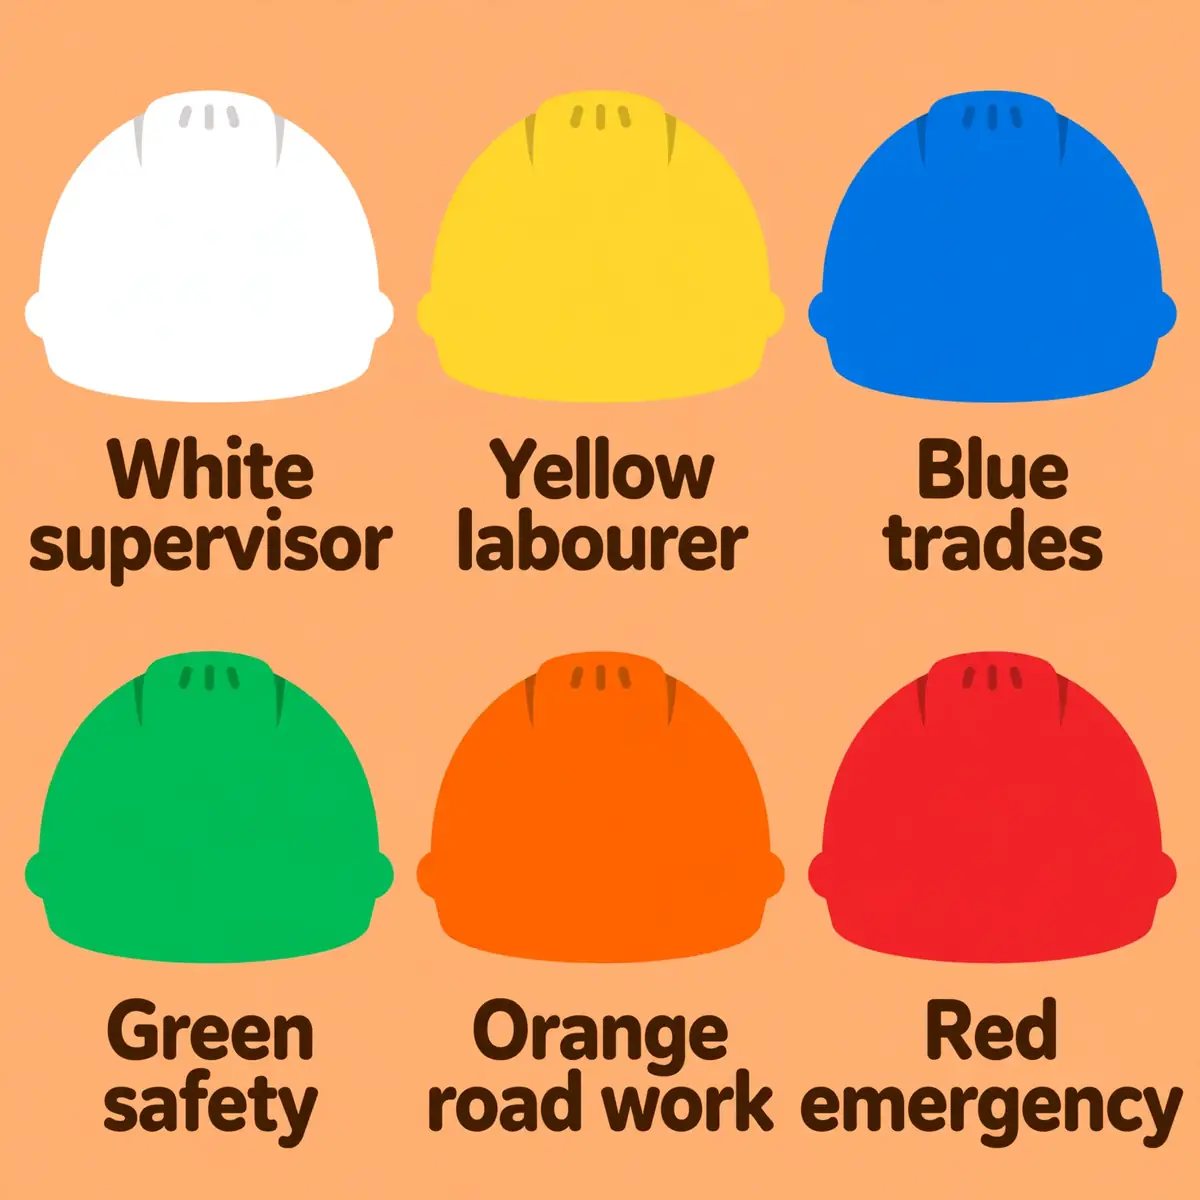
Colour is the one part of hard hat types that has nothing to do with any standard. No ANSI, CSA (Canadian Standards Association) or EN standard assigns a meaning to any colour, and no code-required colour scheme exists. What a colour signals depends on the employer or the site. A white hat can be Class C and a yellow hat can be Class E, so colour never proves protection.
That said, some conventions show up regularly enough to recognise. They are patterns, not rules, and every site should confirm its own plan in writing. Never assume what a colour means on a site you have not worked on before.
Common colour conventions
The table below lists the conventions most sites use. Treat each row as a starting guess to check against the site plan, not as a fact. Green is the least consistent colour of all: some sites use it for safety officers, others for new workers, and some for neither.
High-visibility colours add another layer. Orange and yellow-green shells help drivers and plant operators spot workers near moving vehicles, especially at night. A hi-vis shell still needs the right Type and Class for the task, because visibility is not protection.
| Colour | Commonly worn by |
|---|---|
| White | Supervisors, engineers, managers |
| Yellow | General labourers, operators |
| Blue | Electricians, carpenters, technical trades |
| Green | Safety officers, or new workers |
| Orange | Road workers, traffic control, surveyors |
| Red | Emergency personnel, first aid responders |
| Brown | Welders, high-heat work |
Why colour still matters on site
Colour helps supervisors spot roles from a distance. A supervisor can see at a glance whether a new worker is near a hazard, or whether the electrician is in the right zone. That visibility is useful, but it only works when the whole site follows the same written plan.
New workers need the plan explained on day one. Tell them which colour they wear, what the other colours mean on this site, and that colour never replaces the label check. A worker who picks a hat by colour alone can end up with the wrong Type or Class for the task.
TipWrite the site colour plan into the induction pack and post it at the gate. A plan that lives only in the supervisor's head fails the first time a visitor or a new starter arrives.
How to read the label inside the shell
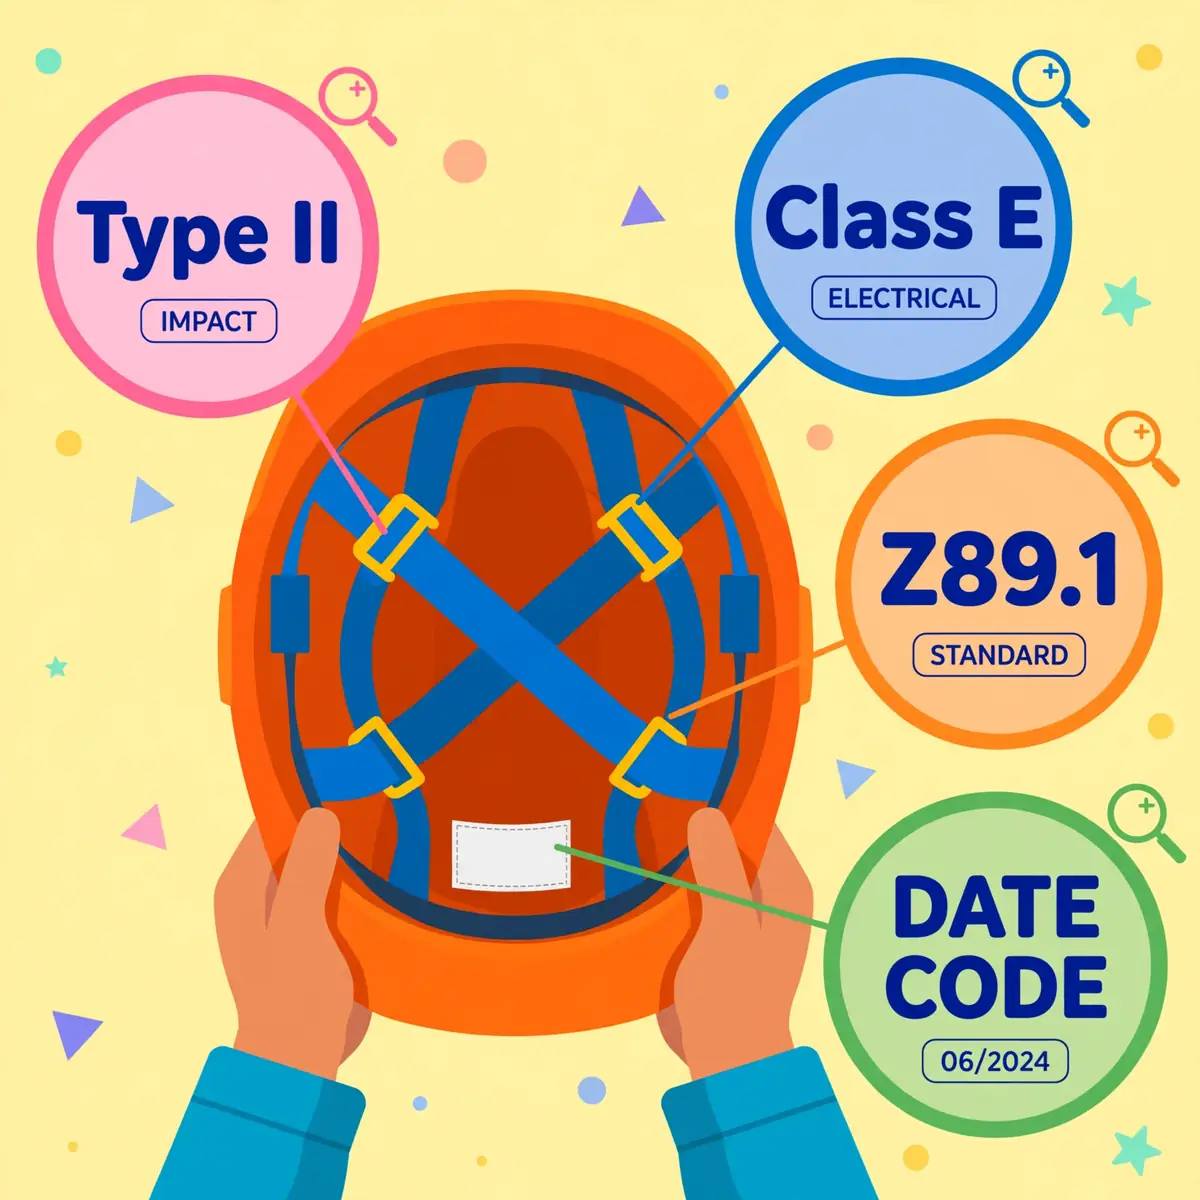
Turn the hat over. The permanent marking inside the shell states the standard edition, the Type, the Class, the manufacturer and the date code. That label is the only authoritative record of what the hat protects against. Brand, colour and price tell you nothing that the label does not already say better.
Read the label before the first use, and read it again whenever the hat changes hands. A hat that has lost its label has lost its proof of rating. If the marking is missing, faded or unreadable, treat the hat as undocumented and replace it. Guesswork is not a control method.
What each marking means
The standard edition tells you which version of ANSI/ISEA Z89.1 the hat was tested against. The Type tells you the impact direction, and the Class tells you the electrical rating. The date code tells you when the shell was made, which sets the clock for the replacement schedule.
Two extra marks appear on some shells. A reverse-donning arrow shows the hat was tested for wear with the peak at the back. An LT mark shows the hat passed low-temperature testing. Both marks matter only when they are present: without the arrow, the hat must be worn peak forward.
Markings that change the rules
Some hats carry optional marks that change how they can be used. The list below covers the marks a buyer is most likely to see. Check the manufacturer's instructions for any mark you do not recognise, and keep the instructions with the PPE file.
- Reverse-donning arrow: the hat may be worn backwards, with the peak at the back.
- LT mark: the hat was tested for use at low temperatures.
- HT mark: the hat was tested for use at high temperatures.
- Date code: the month and year the shell was made, moulded into the shell.
WarningDrilling holes for lights, painting the shell heavily or fitting unapproved accessories can void the Type and Class claim. Use only accessories the manufacturer lists for that exact shell.
How to choose the right hard hat
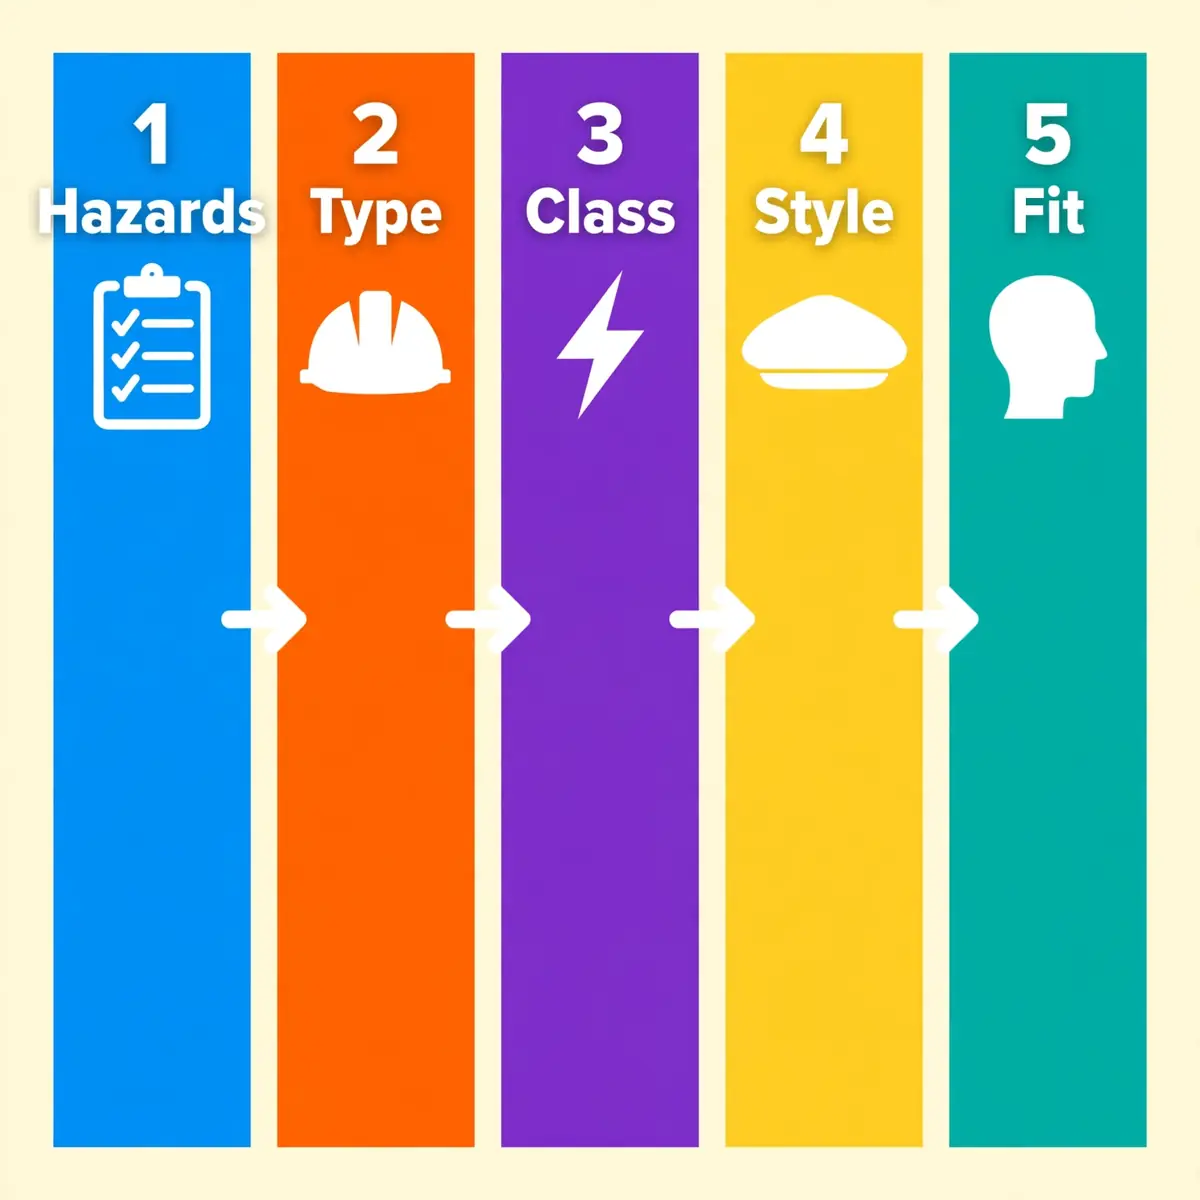
Choosing a hard hat is a stacking exercise. Start with the hazard that matters most, then work down through Type, Class and style. The hazard assessment comes first, because it names the impact directions and the electrical exposure the hat must handle. A risk assessment that lists falling objects, side strikes and live conductors gives the buyer everything needed to specify the hat.
Do not start with comfort or colour. A comfortable hat with the wrong rating is a comfortable way to be unprotected. Comfort decides which compliant hat gets worn all day, but it never decides the rating. Pick the rating first, then choose the most comfortable shell that carries it.
Step-by-step selection
Work through the five steps below in order for every new role or task. Record the decision in the personal protective equipment (PPE) file so the next buyer reaches the same answer. A written selection record also makes audits simple, because the reasoning is visible.
- List the hazards: falling objects, side strikes, electrical exposure, sun, rain and heat.
- Pick the Type: Type I for overhead impact only, Type II where side impact is possible.
- Pick the Class: Class E near high voltage, Class G for low voltage, Class C only with no electrical risk.
- Pick the style: cap or full brim, vented or non-vented, hard hat or safety helmet.
- Check fit and accessories: suspension size, chin strap, face shield and earmuff compatibility.
Worked examples
Three common jobs show how the steps combine. A general construction labourer on an open site faces falling objects and low-voltage equipment, so a Type I Class G cap-style hat fits. A utility linesperson near high-voltage conductors faces overhead and side impact plus high voltage, so a Type II Class E hat with a chin strap fits.
An HVAC technician crawling through ceiling voids faces side strikes from beams and hangers, with no live conductors in the void. A Type II Class C vented hat fits that task, because the lateral risk is real and the electrical risk is absent. The same technician switches to a Class G hat before working near a live panel.
When to choose a safety helmet instead
Choose a safety helmet with a chin strap where the worker could fall and the hat could come off. Structural steel work, tower climbing and work at height all carry that risk. A traditional hard hat protects against falling objects, but it is not designed to stay on the head during a fall.
Fall protection and head protection belong together on elevated work. A harness keeps the worker attached to the structure, and a safety helmet keeps the head protected if the worker swings or falls. Read the fall protection requirements alongside the head protection rules when planning work at height.
TipKeep two classes on the van where the work varies. A Type II Class G hat and a Type II Class C vented hat cover most mixed days, and the label check before each task takes seconds.
Fit, wearing it right and accessories
A hard hat only works when the shell clears the skull and the suspension absorbs the blow. The shell and the suspension work as a system. The shell spreads the impact load and resists penetration. The suspension holds the hat in place and absorbs energy. A tight shell transfers impact badly, and a loose shell shifts on the head.
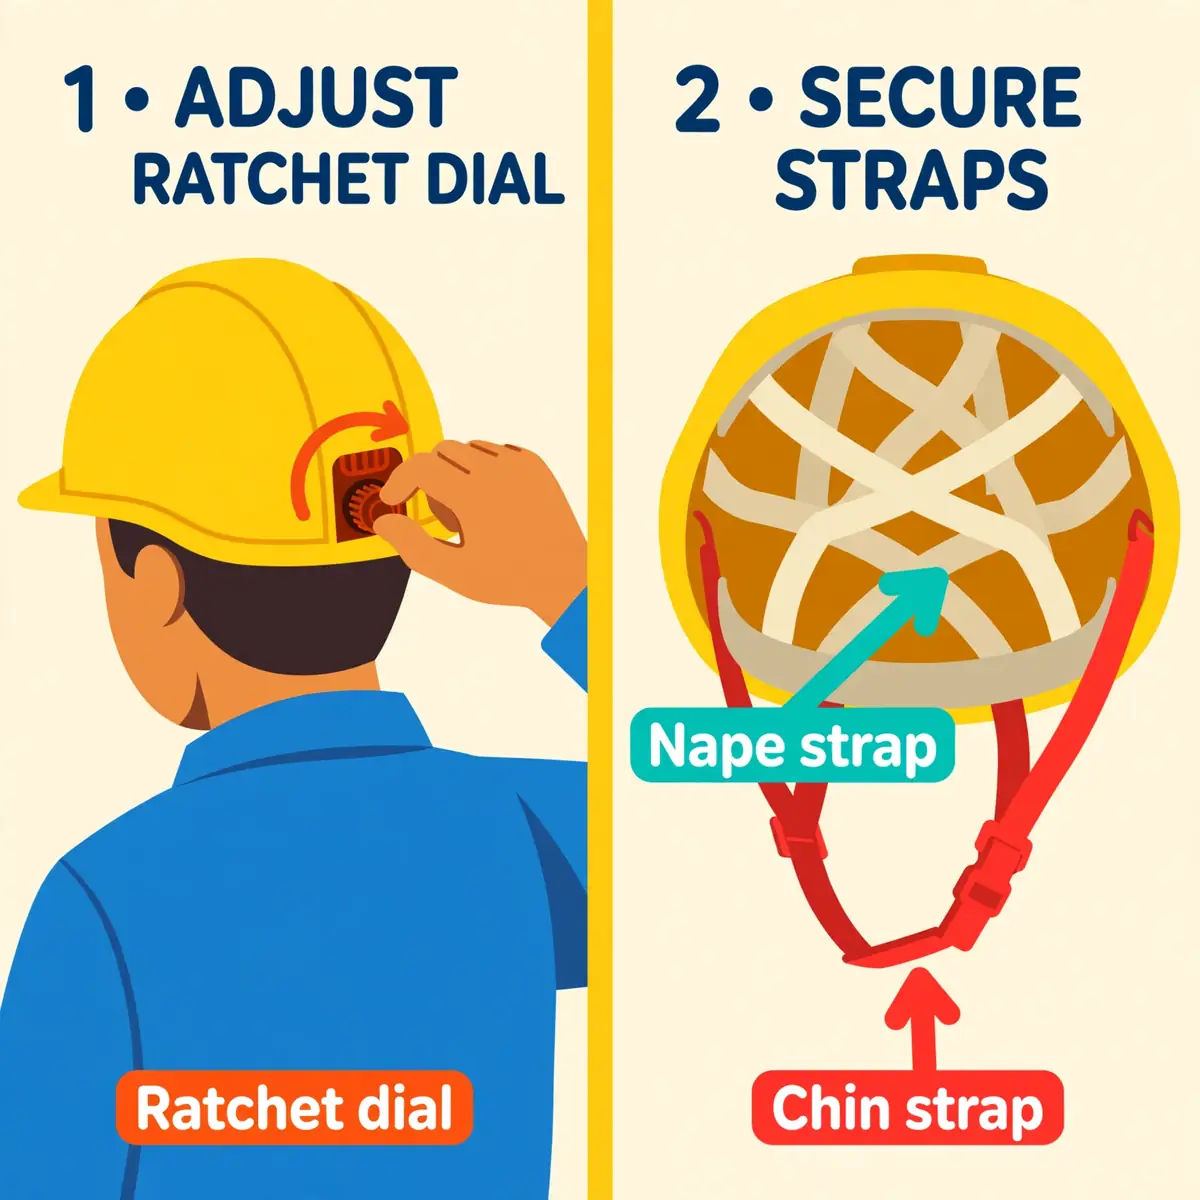
Fit starts with the headband. Adjust the ratchet dial or pin-lock at the back so the band sits snugly without pressure. Check that the hat does not fall off when you bend forward. Check that it does not shift when you turn your head side to side. Most suspensions fit head sizes 6.5 to 8. Speak with the employer or the manufacturer if a larger or smaller suspension is needed.
How to put it on and adjust it
Put the hat on with the peak at the front, unless the label carries a reverse-donning arrow. Set the headband so it sits level, about a finger's width above the eyebrows. Tighten the ratchet until the hat stays put when you bend forward, then loosen it one click if it presses.
Adjust the nape strap so it sits at the back of the head, not riding up onto the crown. If a chin strap is fitted, fasten it and adjust it so it holds the hat without pulling it down. A chin strap drawn over the brim or peak is fitted wrong, and it will not hold the hat in a fall.
What not to wear underneath
Do not wear a baseball-style hat or a bulky hood under a hard hat. Both interfere with the suspension and change the clearance between the shell and the skull. Winter liners are the exception, but only liners made for the hat and secured inside it. Check that a liner does not push the shell up or loosen the fit.
Bandanas and welder's caps need the manufacturer's approval before they go under a hat. Any extra layer that changes the fit also changes the protection. When in doubt, ask the manufacturer rather than guessing on site.
Accessories that fit the shell
Face shields, earmuffs, visors and lights all attach to a hard hat, but only accessories the manufacturer lists for that exact shell keep the rating valid. An unapproved accessory can change the impact performance or break the electrical insulation. Keep the manufacturer's accessory list with the PPE file.
Stickers and decals do not damage the shell on their own, but check company rules before adding them. Paint is different: solvents in paint can weaken the shell material, and heavy paint can hide cracks. The ANSI standard advises against painting hard hats, and the manufacturer's instructions should be followed.
TipCheck the clearance between the shell and the top of the head after fitting a new accessory. A visor bracket or light mount that pushes the shell down onto the skull has broken the suspension gap the hat depends on.
Inspection, care and when to retire it
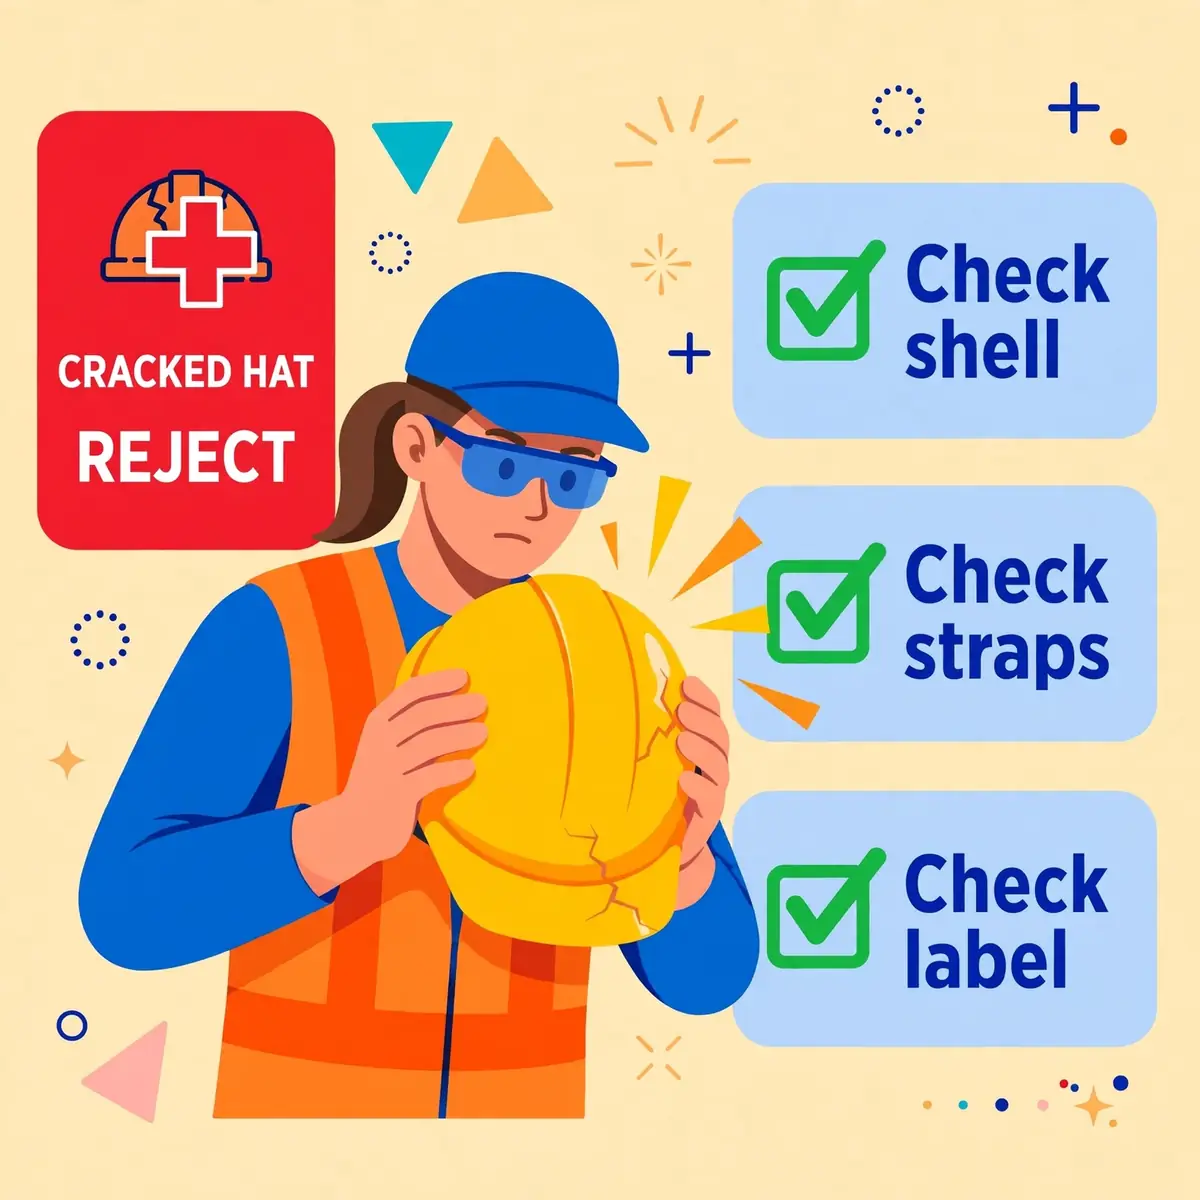
Inspect the shell, liner and suspension before every use, looking for cracks, dents, cuts and signs of wear. The check takes less than a minute, and it catches most failures before they matter. A hard hat that has taken a blow is finished, even if the shell looks unchanged. The damage that matters is often inside the shell or the suspension, where the eye cannot see it.
Heat, sunlight and chemicals age a shell. A weathered hat can turn dull in colour or chalky in appearance, and the material can grow stiff or brittle. Those signs mean the shell has lost strength, and the hat must be replaced. Store spare hats out of direct sunlight and away from heaters, so they do not weather while they wait.
Pre-use inspection checklist
Run through the checklist below at the start of every shift. Any failed item means the hat comes out of service. Do not pass a damaged hat to another worker, and do not keep it in the rack where someone else might pick it up.
- Shell: squeeze it with both hands and look for cracks, dents, gouges and chalky patches.
- Suspension: check straps for fraying, tears and cracked or missing cradles.
- Headband and ratchet: confirm the dial turns, the band holds its setting and the sweatband is clean.
- Label: confirm the Type, Class and date code are still legible inside the shell.
- Chin strap: check the strap and buckle for wear, and fasten it to confirm it holds.
- Accessories: confirm visors, earmuffs and lights are secure and undamaged.
Cleaning and storage
Clean the shell and suspension with mild soap and warm water, then let them dry away from direct heat. Never use solvents, petrol or harsh cleaners on a shell, because they can attack the material. Replace a dirty sweatband rather than washing it with chemicals that could damage the straps.
Store hats in a cool, dry place away from sunlight, and never leave one on the rear window shelf of a vehicle. Heat and ultraviolet light from the sun cook the plastic and weaken the shell over time. A hat stored badly can fail its rating before it ever takes a blow.
When to retire a hard hat
Retire the hat immediately after any significant impact, even with no visible damage. Retire it when the shell shows cracks, dents, chalkiness, stiffness or brittleness, and retire it when the suspension is frayed, torn or no longer holds its adjustment. Remove a retired hat from service and destroy it, so nobody picks it up by mistake.
Most manufacturers recommend replacing the shell every five years from the date of manufacture, and the suspension every one to three years depending on use. Those figures are manufacturer guidance, not a legal rule. The inspection result always wins: a hat that fails inspection at two years is finished, and a hat that passes inspection is still governed by the manufacturer's stated life.
Common mistakes
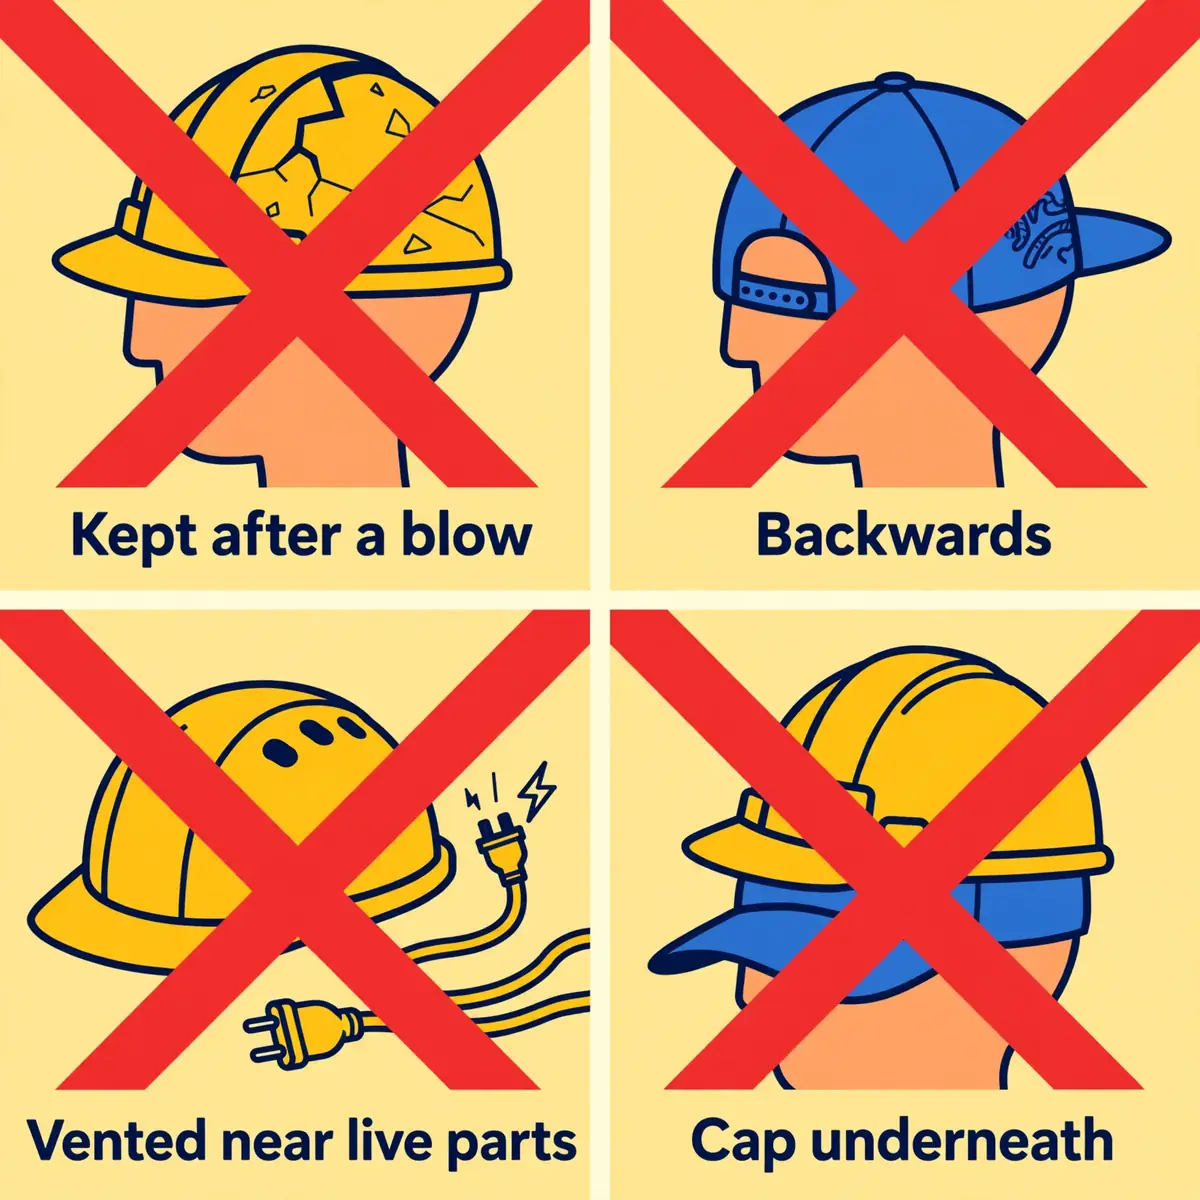
Most hard hat failures are not equipment failures. They are selection and use failures, and they repeat across sites. The mistakes below appear in audits again and again. Each one has a simple fix, and the fix costs far less than the injury it prevents.
The first mistake is choosing by colour or brand. Colour carries no rating, and a brand name is not a standard. The second mistake is wearing a vented Class C hat near live conductors because it feels cooler. The third is keeping a hat after a blow because the shell looks fine. All three come from treating the hat as clothing instead of protective equipment.
Mistakes that put workers at risk
The list below covers the mistakes that matter most. Supervisors can use it as a spot-check during site walks. Any one of them is worth a correction on the spot, because the worker is unprotected until it is fixed.
- Wrong Type for the task: Type I where side impact is possible, such as confined spaces and moving equipment.
- Wrong Class for the task: Class C near live conductors, or Class G where high voltage is present.
- Kept after a blow: a struck hat stays in service because the damage is invisible.
- Worn backwards without the arrow: the hat is reversed although the label has no reverse-donning mark.
- Painted or drilled: holes or heavy paint void the rating the label claims.
- Hat under a hat: a baseball cap underneath breaks the suspension clearance.
- No inspection: the hat is never checked, so cracks and frayed straps go unnoticed.
How supervisors can prevent them
Supervisors prevent these mistakes by checking the label, not the colour, during site walks. A thirty-second check of the Type, Class and date code inside the shell catches most errors. A short toolbox talk on the colour plan and the vented-hat rule covers the rest.
Keep a small stock of the right combinations on site, so nobody has an excuse to borrow the wrong hat. When the correct hat is in the store and the wrong hat is not, the right choice becomes the easy choice. Record the issue of each hat against the worker and the task, so the selection can be checked later.
WarningA hard hat that has taken a significant blow must be retired at once, even with no visible damage. Hidden damage in the shell or suspension leaves the next wearer unprotected.
UK and European rules: EN 397 and the 2025 revision
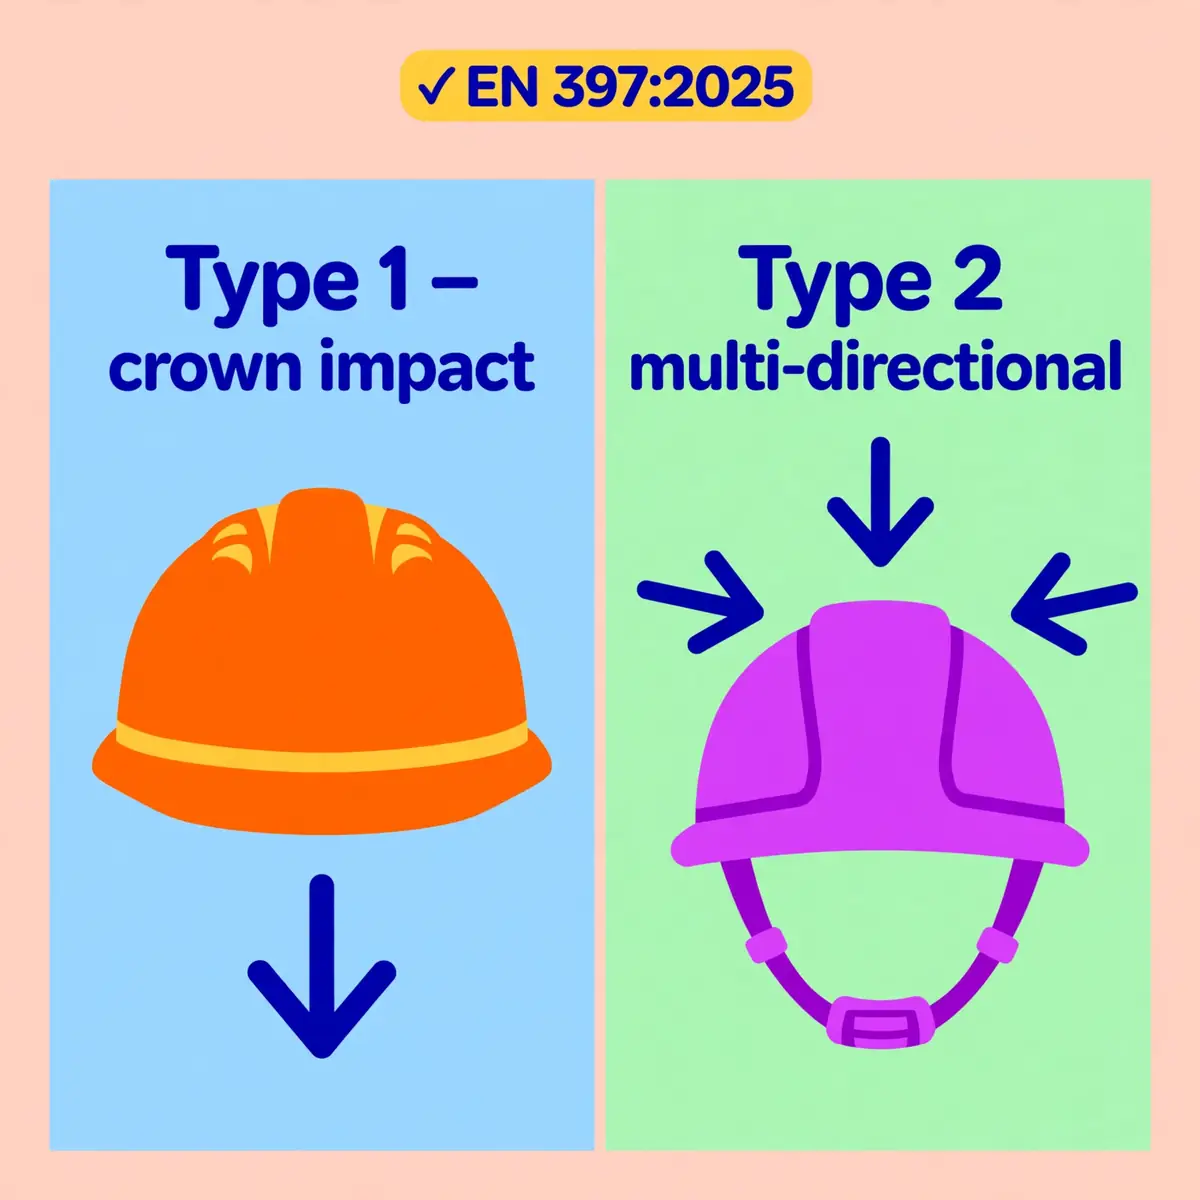
In the United Kingdom and Europe, the industrial helmet standard is EN 397 (European Norm 397), not ANSI/ISEA Z89.1. The two systems answer the same question in different ways. ANSI splits protection into Type and Class, while EN 397 has historically tested one performance level, centred on crown impact. Employers in the UK must provide head protection where a risk of head injury exists, and the helmet must suit the risk.
The 2025 revision changes the European picture. BS EN 397:2025 was published on 30 September 2025, and it supersedes BS EN 397:2012+A1:2012. The revision is the most significant change to the industrial helmet standard in about thirty years, because it adds a second helmet type for multi-directional impact.
EN 397:2025 Type 1 and Type 2
Type 1 covers crown impact, close to the old EN 397:2012 requirements. A 5 kg hemispherical striker creates a 49 joule impact on the crown, and the force transmitted to the test headform must stay below 5 kN. Penetration testing uses a 3 kg pointed striker dropped from 1 metre, which must not contact the headform. The chin strap is optional on Type 1, tested to stay connected under 150 newtons.
Type 2 adds off-crown protection. Crown shock absorption is tested at 98 joules, and off-crown testing applies 24.5 joules to the side, front and rear, with a transmitted force limit of 10 kN. The crown penetration test runs twice instead of once. A chin strap is mandatory on Type 2, tested at 500 newtons, so the helmet stays on the head during a fall.
What the 2025 revision changes in practice
Type 2 gives industrial buyers a route to multi-directional protection without reaching for a mountaineering standard. Work at height, scaffolding, tower work and restricted-space work all point toward Type 2, because the head can strike a surface from any angle in a fall. Type 1 remains right for ground-level work where the risk is a falling object from above.
The revision also moves electrical requirements to a separate standard, EN 50365:2023, and it standardises compatibility testing for attachments such as visors and ear defenders. Accessories must now be tested with the specific helmet they attach to. Existing EN 397:2012 approvals remain valid until the certificate reaches its expiry date, so the changeover is gradual.
Choosing between the US and UK systems
Use the standard the jurisdiction recognises. A US site follows OSHA and ANSI/ISEA Z89.1, while a UK site follows EN 397 and the Personal Protective Equipment at Work Regulations. A helmet certified to one system is not automatically compliant under the other, so check the marking against the local rules before issuing it.
Workers who move between US and UK sites need both markings understood, not assumed. The Type I and Type II labels of ANSI do not map exactly onto the Type 1 and Type 2 labels of EN 397:2025. The words look alike, but the tests behind them differ. Read the standard edition on the label, and match the helmet to the jurisdiction where the work happens.
AlertEN 397:2025 Type 2 is not the same as ANSI Type II. The names look alike, but the tests, the energy levels and the chin strap rules differ. Never treat the two as interchangeable.
Frequently Asked Questions
What is the difference between Type I and Type II hard hats?
Type I hard hats protect against impact to the top of the head only. Type II hard hats protect against top impact and lateral impact to the front, back and sides, through an extra off-center impact test. Choose Type II where side strikes from beams, vehicles or confined spaces are realistic.
What do Class G, Class E and Class C mean?
Class G hard hats are proof-tested at 2,200 volts for low-voltage work. Class E hard hats are proof-tested at 20,000 volts for high-voltage work near energised conductors. Class C hard hats give no electrical protection and are often vented, so they must never be worn near electrical hazards.
What do hard hat colours mean?
Colours are site conventions, not a standard. White often marks supervisors, yellow often marks general labourers, blue often marks technical trades, and green often marks safety officers or new workers. Always follow the written colour plan for the site, because conventions vary.
How do I choose the right hard hat?
List the hazards first, then pick the Type for the impact direction, the Class for the electrical exposure, and the style for the weather and the work. Check the fit, the chin strap and the accessory compatibility last. Read the label inside the shell to confirm all three ratings before the first use.
Can I wear my hard hat backwards?
Only if the label carries a reverse-donning arrow. The arrow shows the hat was tested for wear with the peak at the back. Without it, wear the hat peak forward, and check the manufacturer's instructions if you are unsure.
How often should a hard hat be replaced?
Most manufacturers recommend replacing the shell every five years from the date of manufacture and the suspension every one to three years. Replace any hat at once after a significant impact, and replace it sooner if inspection finds cracks, chalkiness, stiffness or frayed straps.
Are vented hard hats safe for electrical work?
No. A vented shell is automatically Class C, which gives no electrical protection. Never wear a vented hard hat near exposed electrical conductors, even for a short task.
What is the difference between a hard hat and a safety helmet?
A hard hat protects mainly against falling objects, while a safety helmet adds a chin strap and a design that stays on the head during a fall. Safety helmets suit work at height, structural steel and any task where the head could strike a surface or the helmet could come off.
Can I paint my hard hat or add stickers?
Stickers do not damage the shell on their own, but check company rules first. Paint can weaken the shell, because solvents attack the material, and heavy paint can hide cracks. The ANSI standard advises against painting hard hats, so follow the manufacturer's instructions.
Do I need a different hard hat in the UK?
Yes, in most cases. UK and European sites use EN 397 helmets, and the 2025 revision adds Type 1 for crown impact and Type 2 for multi-directional impact. An ANSI/ISEA Z89.1 hard hat is not automatically compliant under UK rules, so check the marking against local requirements.
Sources
- OSHA — 29 CFR 1910.135, Head protection
- OSHA — 29 CFR 1926.100, Head protection (construction)
- Canadian Centre for Occupational Health and Safety — Headwear: Selecting Protective Headwear
- Canadian Centre for Occupational Health and Safety — Headwear: Care of
- British Safety Industry Federation / JSP — Introducing EN 397:2025 (PDF)
- Occupational Health & Safety — Updated Head Protection Standard Adds Type I+ and Type II+ Designations