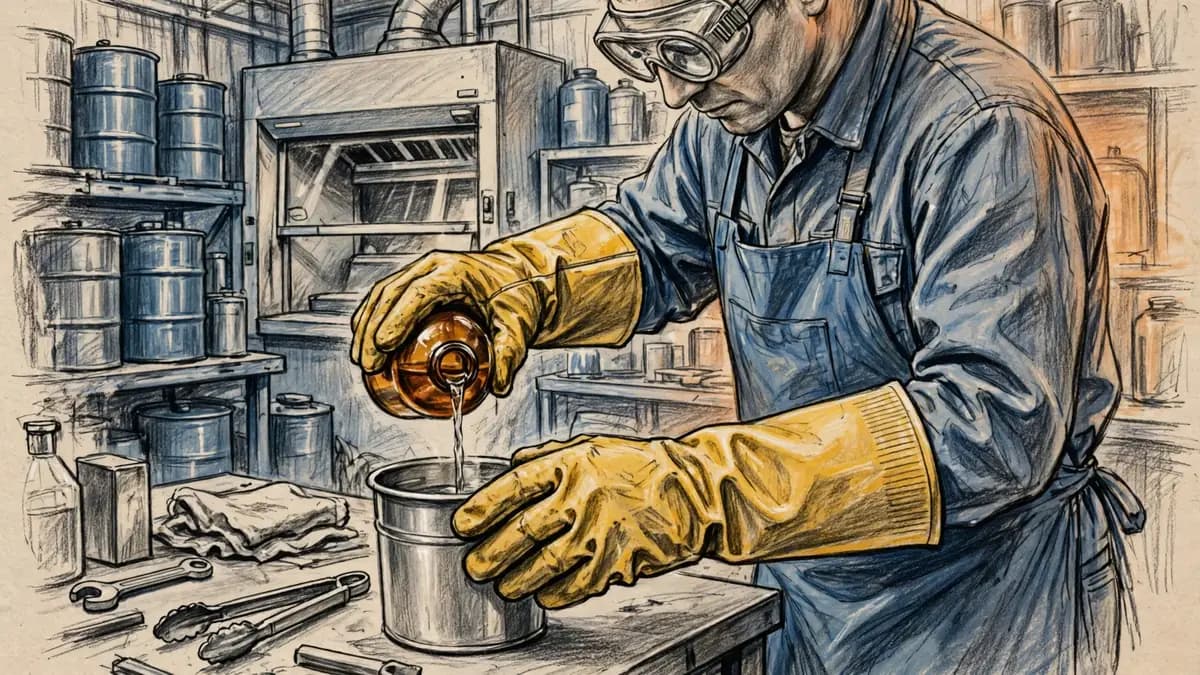
A chemical-resistant glove is a glove whose material has a published breakthrough time for the exact chemical in use, long enough to cover the task. No single material resists every chemical. Nitrile handles oils and many solvents, butyl handles ketones and gases, and Viton handles aromatics. The right glove is always matched to the chemical, never to the shelf.
Start with Section 8 of the chemical's safety data sheet. It names the glove material the manufacturer tested. Then check that material against the manufacturer's permeation chart for the exact chemical and concentration, and set a change-out time before the breakthrough time runs out.
What "chemical-resistant" actually means
A glove earns the label "chemical-resistant" only for the chemicals it has been tested against. The same glove can hold back one solvent for eight hours and fail against another in under ten minutes. That is why the label on the box is a starting point, not a promise. The promise sits in the manufacturer's permeation data for the exact chemical.
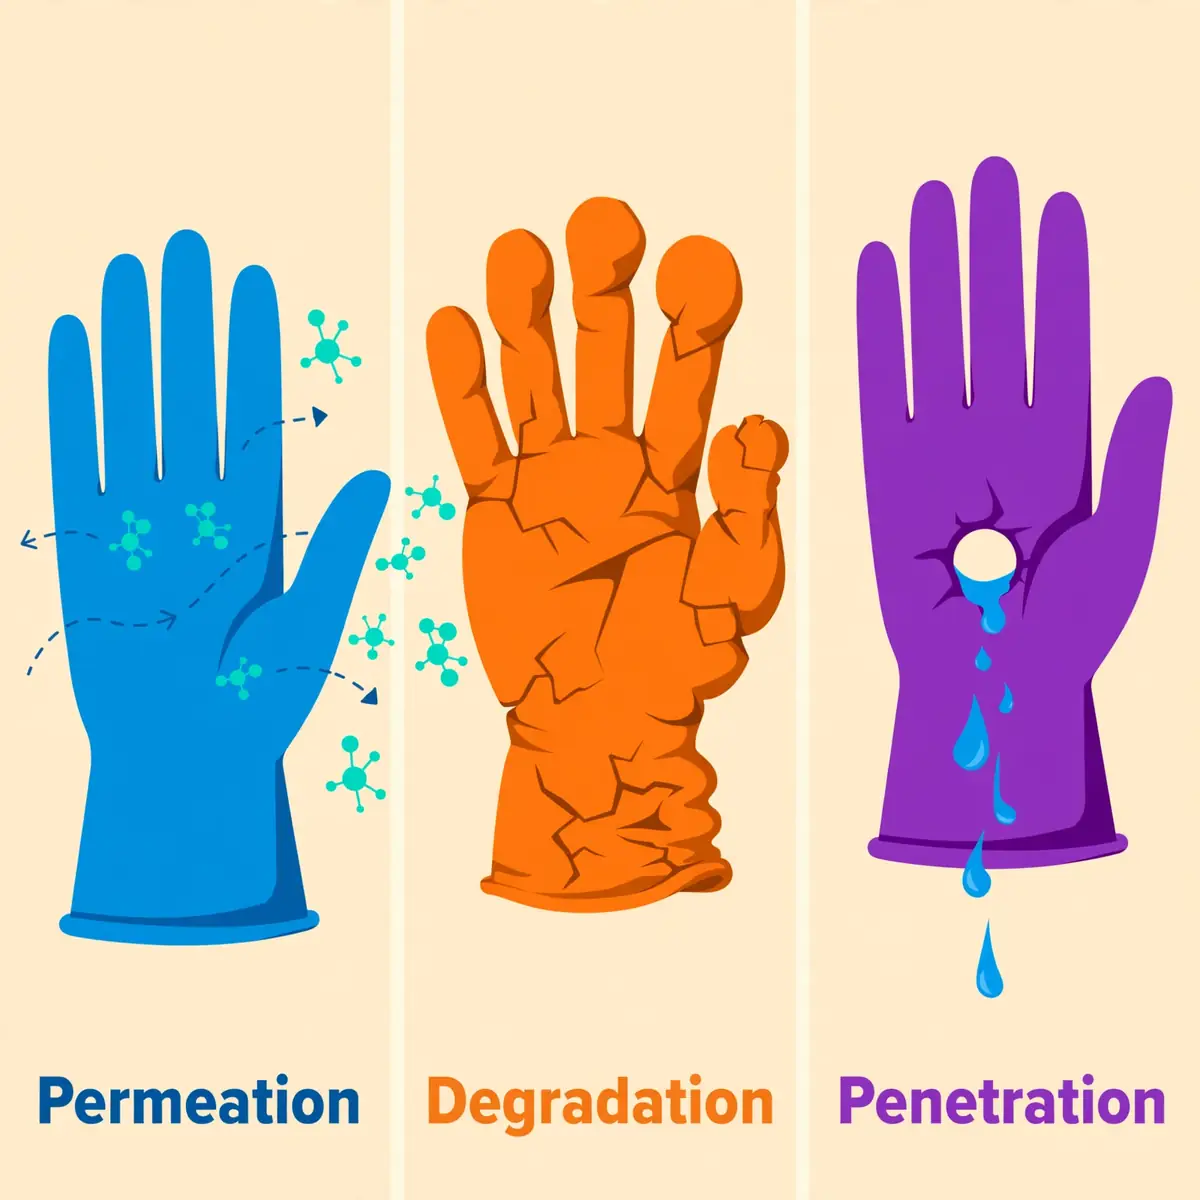
Three different failures can put a chemical on the skin, and a glove can pass one while failing another. Knowing which failure you are guarding against decides what to check before the work starts.
Permeation: the invisible failure
Permeation is the movement of a chemical through intact glove material at molecular level. No hole, tear or visible change is needed. The glove looks clean and whole while the chemical is already reaching the skin underneath. This is the most dangerous of the three failures, because nothing about the glove warns the wearer.
Skin absorption adds to the danger. Some chemicals pass through the skin into the body, so the exposure bypasses respiratory protection entirely. A worker can wear a respirator and still be exposed through the hands. That is why permeation data, not appearance, decides whether a glove is still protective.
Degradation: the visible failure
Degradation is physical damage to the glove material caused by the chemical. The material swells, softens, hardens, cracks or dissolves. Unlike permeation, degradation usually shows itself, which makes it the least dangerous failure: the wearer can see it and react.
A degraded glove can let a chemical through even before its breakthrough time. Check for discoloration, stiffness, swelling, tackiness or cracking before and after each use. Retire any glove that shows these signs, even if its scheduled change time has not arrived.
Penetration: the physical failure
Penetration is bulk flow of a chemical through pinholes, seams, punctures or other physical defects. It is a manufacturing or damage problem, not a chemistry problem. A glove with the right material still fails if it has a hole in it.
Pre-use inspection catches most penetration risk. Stretch the glove gently, look for pinholes and weak seams, and check the fingertips and palm where wear shows first. No chart accounts for a hole, so inspection is a separate step from reading the data.
WarningNever judge a chemical glove by how it looks. Permeation leaves no mark, so a clean, intact glove can already be failing.
How breakthrough time works
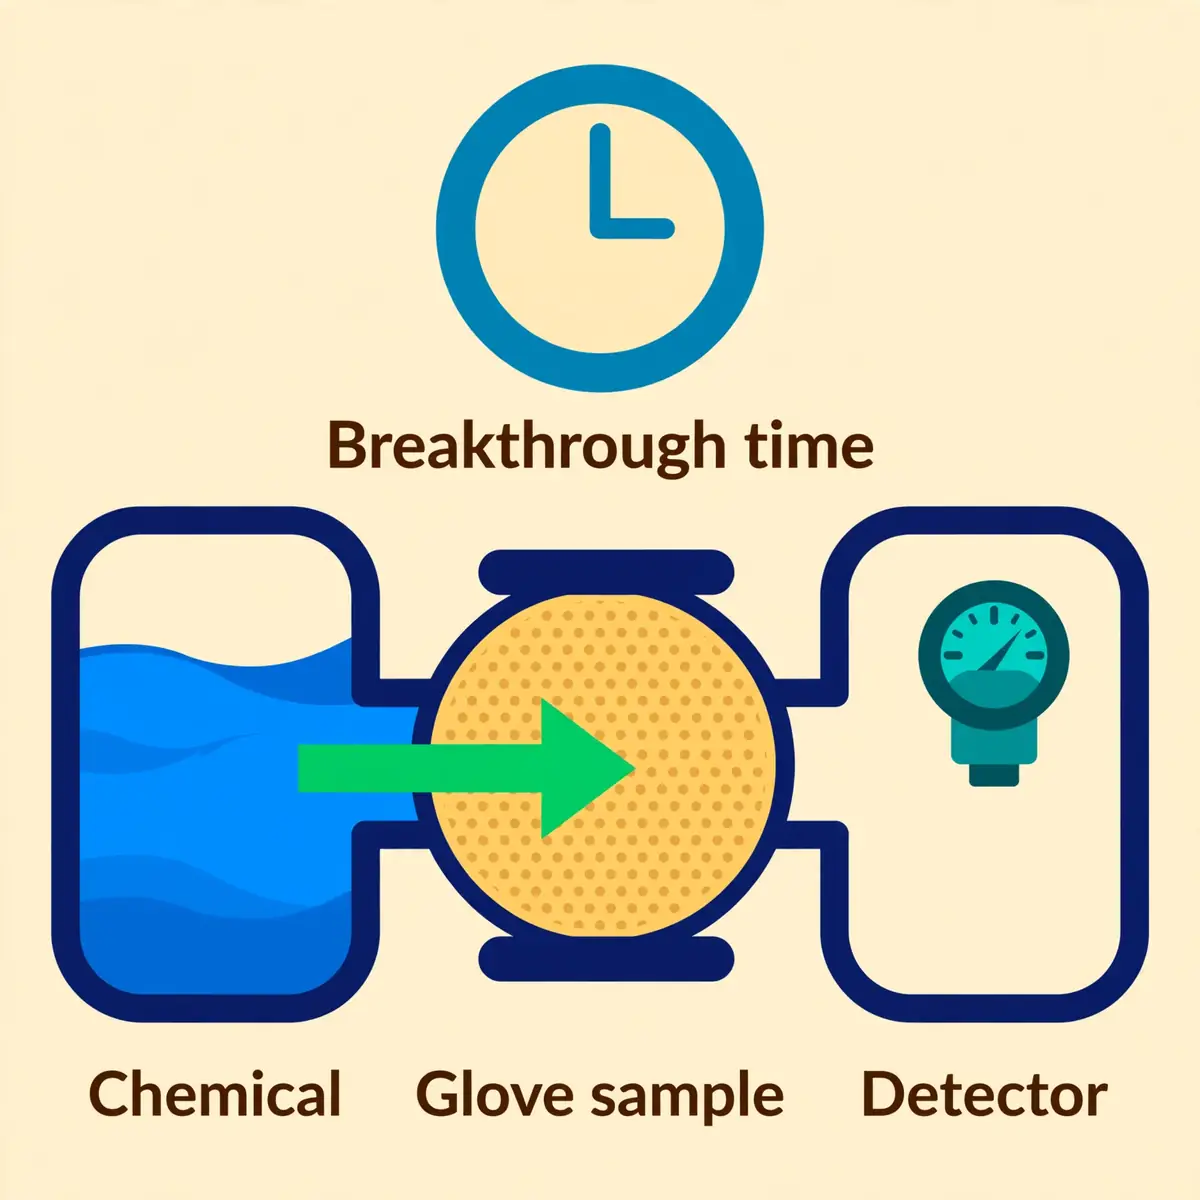
Breakthrough time is the time it takes for a chemical to pass through a glove material to the inside, measured under laboratory conditions. It is the single number that turns a material name into a usable decision. Everything else on the chart — the class, the rating, the recommendation — is built from it.
The test puts a sample of glove material in a cell, with the chemical on one side and a detector on the other. The clock runs until the detector finds the chemical crossing through. That time is the breakthrough time for that chemical, at that concentration, at that temperature, for that exact glove product.
Two test methods, two thresholds
Two standards measure the same thing with different thresholds. Under ASTM F739, the American test method, the standardized breakthrough time is the point where the permeation rate reaches 100 nanograms per square centimetre per minute. Under EN 16523-1, the European test method, breakthrough is recorded when the rate reaches 1.0 microgram per square centimetre per minute. Both numbers describe the same event; they are not interchangeable, so note which standard a chart used.
The threshold matters because a glove is considered to have failed once breakthrough time has passed, even if it still looks and feels fine. The rate after breakthrough keeps rising, so wearing the glove longer only increases the dose on the skin. Plan the work around the number, not around the glove's appearance.
What shortens breakthrough time in real work
Lab numbers come from still, room-temperature samples under continuous contact. Real work is harder on a glove. Heat speeds permeation, so a glove rated at room temperature fails faster against a warm chemical. Movement and stretching thin the material as the hand works. Higher concentration shortens the time. Mixtures behave differently from single chemicals, because one component can carry another through the material.
That gap is why a safety margin is not optional. A common working rule is to change the glove well before the published breakthrough time. For example, at half the published time for hot, stretched or continuous work — and immediately after any known contact. The chart gives the lab number; the schedule adds the margin for the real job.
Breakthrough time is not safe wear time
Manufacturers state it plainly: permeation times do not equal safe wear time. Safe wear time also depends on how the glove is put on, the surrounding temperature, the chemical's toxicity and the task itself. A long breakthrough time against a highly toxic chemical still calls for a short change interval and strict handling.
Breakthrough data also varies across the glove itself. Published data for one Ansell chemical glove shows breakthrough times that differ between the palm and the cuff of the same glove. Formaldehyde at 37% took over 480 minutes at the palm and under 7 minutes at the cuff. Read the data for the part of the glove that touches the chemical, and treat the shortest number as the controlling one.
TipTreat the published breakthrough time as a maximum, then plan the change-out earlier. A margin of half the published time is a sound starting point for hot or continuous work.
Reading the label: EN ISO 374 types and ANSI/ISEA 105 classes
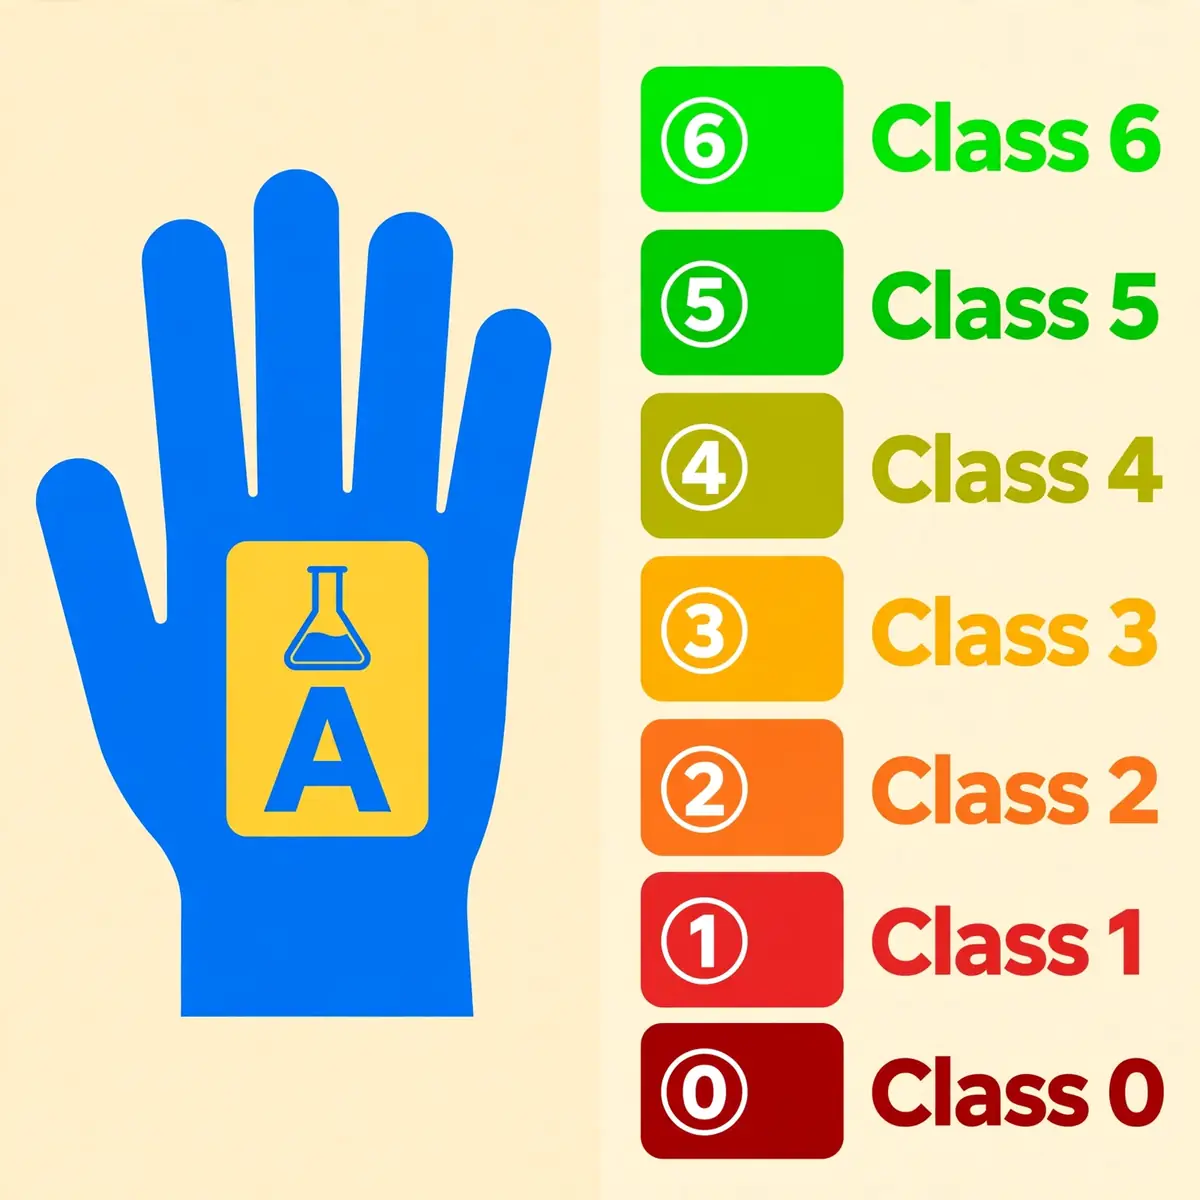
A chemical glove's label carries its rating in code. Two systems appear on gloves sold around the world: the European EN ISO 374 type letters and the American ANSI/ISEA 105 classes. Both are built from breakthrough times, and both are specific to the chemicals tested. Neither one means "resists all chemicals".
Learning to read both takes a few minutes and removes most of the guesswork from buying. The label tells you how broad the protection is and how long it lasts — for the chemicals named on it.
EN ISO 374 Types A, B and C
EN ISO 374-1:2016+A1:2018 sorts chemical gloves into three types by how many of 18 test chemicals they hold back. Type A holds back at least six of the 18 at level 2, which is 30 minutes or more. Type B holds back at least three at level 2. Type C holds back at least one at level 1, which is 10 minutes or more.
The 18 test chemicals each carry a letter code, from A for methanol to T for formaldehyde. The flask pictogram on the glove shows the type letter with the code letters of the chemicals it was tested against. A Type A glove is the broadest choice, but it is still only tested against its six named chemicals. A chemical outside that list may break through in minutes, so always check the manufacturer's compatibility chart for the actual substance, including its concentration and temperature.
The six permeation levels
EN ISO 374 also grades each chemical result on a six-level scale:
- Level 1: a breakthrough time over 10 minutes.
- Level 2: over 30 minutes.
- Level 3: over 60 minutes.
- Level 4: over 120 minutes.
- Level 5: over 240 minutes.
- Level 6: over 480 minutes.
The type tells you breadth and the level tells you depth. A Type A glove with level 6 results is broad and deep. A Type C glove with a level 1 result is narrow and shallow.
Remember that the levels describe single chemicals under lab conditions. They do not cover mixtures, and they do not include wear, stretching or heat. Use them to compare gloves for the same chemical, not to promise a safe wear time on the job.
ANSI/ISEA 105 classes 0 to 6
The American standard, ANSI/ISEA 105, translates the same breakthrough data into a 0 to 6 class that appears on many United States glove charts and packs. Each class is a minimum breakthrough time for one chemical at a time:
- Class 0: breakthrough in under 10 minutes.
- Class 1: at least 10 minutes.
- Class 2: at least 30 minutes.
- Class 3: at least 60 minutes.
- Class 4: at least 120 minutes.
- Class 5: at least 240 minutes.
- Class 6: at least 480 minutes.
The class is specific to one chemical at a time. The same glove can rate class 6 against one chemical and class 0 against another. A high class on the pack proves nothing about the chemical in your hand. Check the class for the exact chemical, and match it to the contact time the task needs. Splash-only work can accept a lower class than immersion, where class 6 is the target.
The rest of the EN ISO 374 family
Two companion parts cover the other failure modes. EN ISO 374-2 tests penetration resistance, checking that the glove does not leak air or water. EN ISO 374-4 measures degradation, grading how much the material's physical properties change after contact with a chemical. EN ISO 374-5 covers protection against micro-organisms, which matters where gloves also guard against blood and other infectious material.
For chemical work, the type letter and the permeation levels are the numbers that decide the purchase. The penetration and degradation results support the choice but do not replace it. Ask the supplier for the declaration of conformity or test report that names the standard, the edition and the level for each claim.
The materials: which glove for which chemical
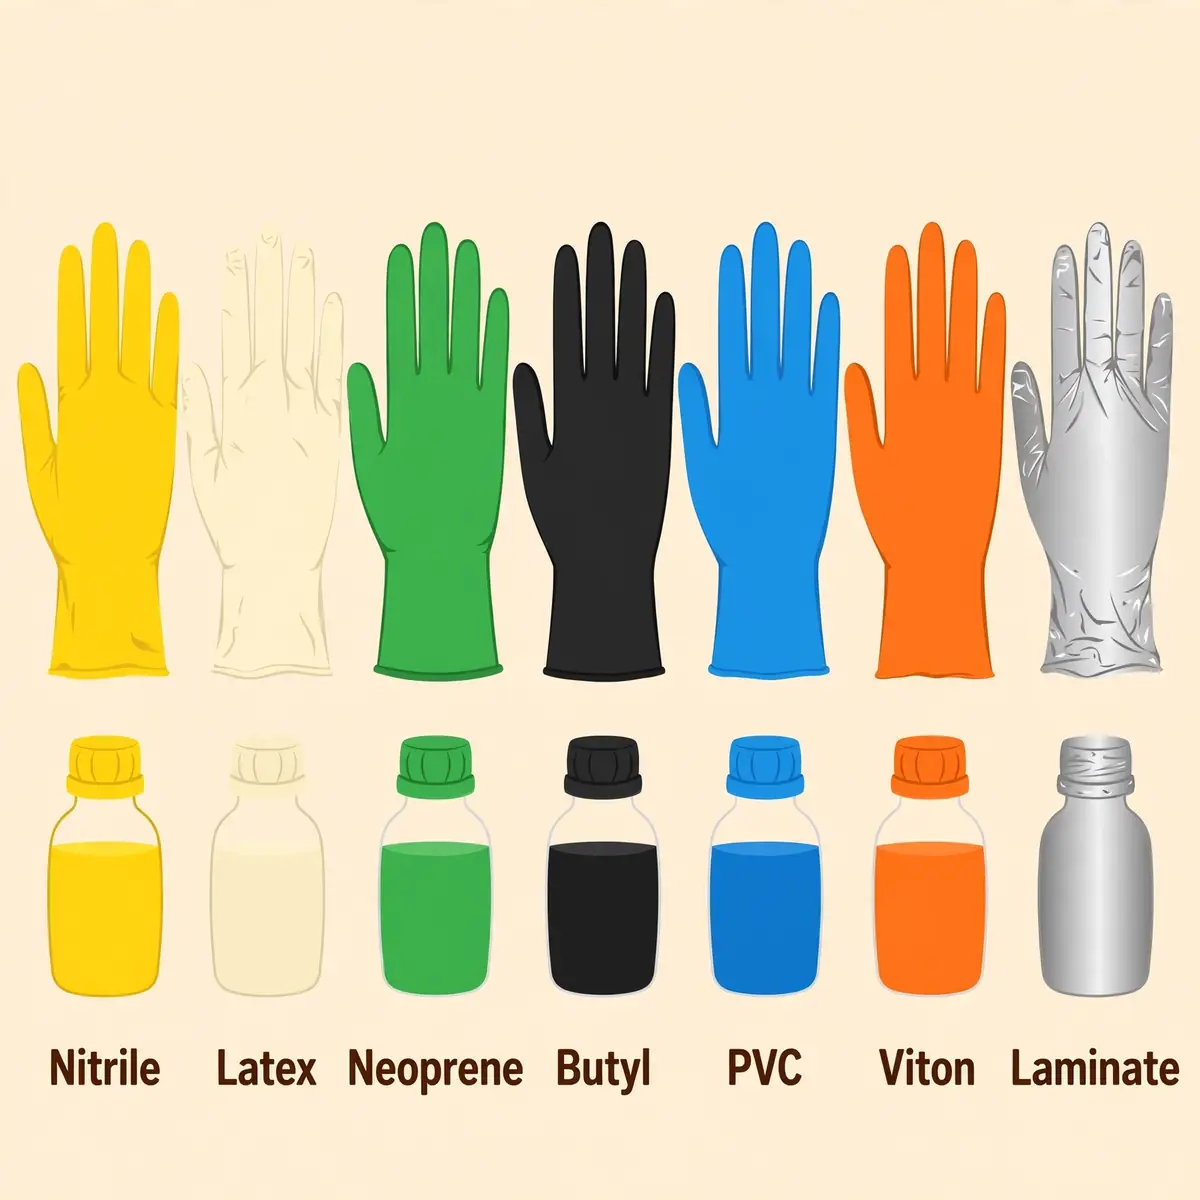
No glove material resists every chemical, so the material follows the substance. Seven materials cover nearly all chemical glove work. The table below gives the usual starting points; confirm every choice against the manufacturer's chart for the exact chemical and concentration before use.
| Material | Resists well | Weak against | Typical use |
|---|---|---|---|
| Nitrile | Oils, fuels, greases, many solvents, caustics | Ketones, strong oxidizers, some chlorinated solvents | General chemical handling, automotive, lab |
| Natural rubber latex | Acids, bases, alcohols, water-based chemicals | Oils, fuels, organic solvents; latex allergy risk | Aqueous chemicals, biological work |
| Neoprene | Acids, bases, alcohols, peroxides, broad balance | Aromatic and chlorinated solvents | Mixed-chemical environments |
| Butyl rubber | Ketones, esters, strong acids, gases, glycol ethers | Aliphatic and aromatic hydrocarbons | Ketones, gas and vapour work |
| PVC / vinyl | Acids, bases, salts, water-based chemicals | Most organic solvents, oils | Aqueous acids and bases, food handling |
| Viton (fluoroelastomer) | Aromatic and chlorinated solvents | Ketones, esters; high cost | Toluene, benzene, chlorinated solvents |
| Laminate film | Most chemical classes | Poor mechanical strength | Aggressive chemicals, as an inner glove |
Each material below has its own strengths, weaknesses and typical jobs. Read the one that matches your chemical first, then check the chart before you buy.
Nitrile: the general default
Nitrile is the common default for general chemical handling. It resists oils, fuels, greases, many solvents and caustics, and it is the usual choice for automotive work, lab bench work and biological fluids. It tears visibly when punctured, so a failure is obvious, and it avoids latex allergy entirely.
Its weakness is specific and common. Nitrile performs poorly against ketones such as acetone and methyl ethyl ketone. It is only fair against chlorinated solvents and aromatic hydrocarbons such as toluene and benzene. Standard disposable nitrile exam gloves give under 10 minutes against aggressive solvents such as acetone. Never treat "nitrile" as one product. A thin disposable exam glove and a thick unsupported chemical glove are built from related but different formulations, at very different thicknesses. Their breakthrough times against the same chemical differ too.
Natural rubber latex: strong for water-based chemicals
Natural rubber latex resists dilute acids, alkalis and salts in water, plus alcohols and many water-based chemicals. It is flexible and comfortable, with good dexterity and grip. For aqueous work without solvents, it is a sound and cheap choice.
Its limits are oils, fuels and organic solvents, which attack it quickly. Latex also carries an allergy risk. Natural rubber proteins cause allergy in some wearers, and the accelerators used in making the glove cause contact dermatitis in others. Where latex is used, choose low-protein, powder-free gloves, and keep nitrile and vinyl alternatives available for anyone with an allergy.
Neoprene: the broad all-rounder
Neoprene offers broader all-round resistance than nitrile when nitrile is inadequate. It handles acids, bases, alcohols and peroxides, and it keeps its flexibility across a wide temperature range. For mixed-chemical environments where no single chemical dominates, neoprene is often the best balance of breadth and cost.
It is only fair against many organic solvents, and weak against aromatic and chlorinated solvents. It is also less widely stocked than nitrile, so the exact product and its chart matter more. Check the chart for each chemical in the mix rather than assuming neoprene covers them all.
Butyl rubber: the ketone and gas specialist
Butyl rubber is the standard answer for ketones and esters. It resists acetone and methyl ethyl ketone, strong acids, glycol ethers and gases. It is the best material where vapours matter, because gases permeate most other rubbers quickly. For ketone work and gas or vapour work, butyl is the first material to check.
Its weakness is hydrocarbons: butyl performs poorly against aliphatic and aromatic hydrocarbons such as petrol and benzene. It is also soft and tears more easily than nitrile or neoprene, so it suits careful handling rather than rough mechanical work. Wear a sturdier outer glove over it where abrasion or puncture is likely.
PVC and vinyl: cheap for aqueous work
PVC and vinyl gloves resist acids, bases, salts and water-based chemicals at low cost. They suit cleaning, food handling and light aqueous work where the chemical is mild and the contact is short. They are a practical choice when large numbers of gloves are needed for low-risk tasks.
They are the weakest of the common materials against organic chemicals. Most organic solvents and oils attack them quickly, and vinyl is the weakest of the three disposable materials for chemical work. Use PVC only where the chart confirms the exact chemical, and never for solvent work.
Viton: the aggressive-solvent specialist
Viton, a fluoroelastomer, resists aromatic and chlorinated solvents that defeat most other materials, including toluene, benzene and chlorinated solvents. Where a job involves aggressive organic solvents and nothing else works, Viton is usually the answer. Its breakthrough times against those chemicals are among the longest available.
Its limits are cost and chemistry. Viton is expensive, it performs only fairly against ketones and esters, and it is weaker against strong bases. It also has poor mechanical wear resistance compared with nitrile. Reserve Viton for the chemicals that need it, and confirm the exact product's data before ordering.
Laminate film: the broadest barrier
Multi-layer laminate film, usually polyethylene and EVOH layers, resists nearly every chemical class, including the aggressive and exotic chemicals that defeat single elastomers. It is the broadest chemical barrier available in a glove, and it is the right choice where no single rubber gives a safe breakthrough time.
Its weakness is mechanical: laminate film has poor strength, tears easily and offers little grip or dexterity. Wear it as a thin inner glove under a sturdier outer glove. Treat the outer glove as the mechanical protection while the laminate provides the chemical barrier. Change both on the laminate's schedule.
How to choose in six steps
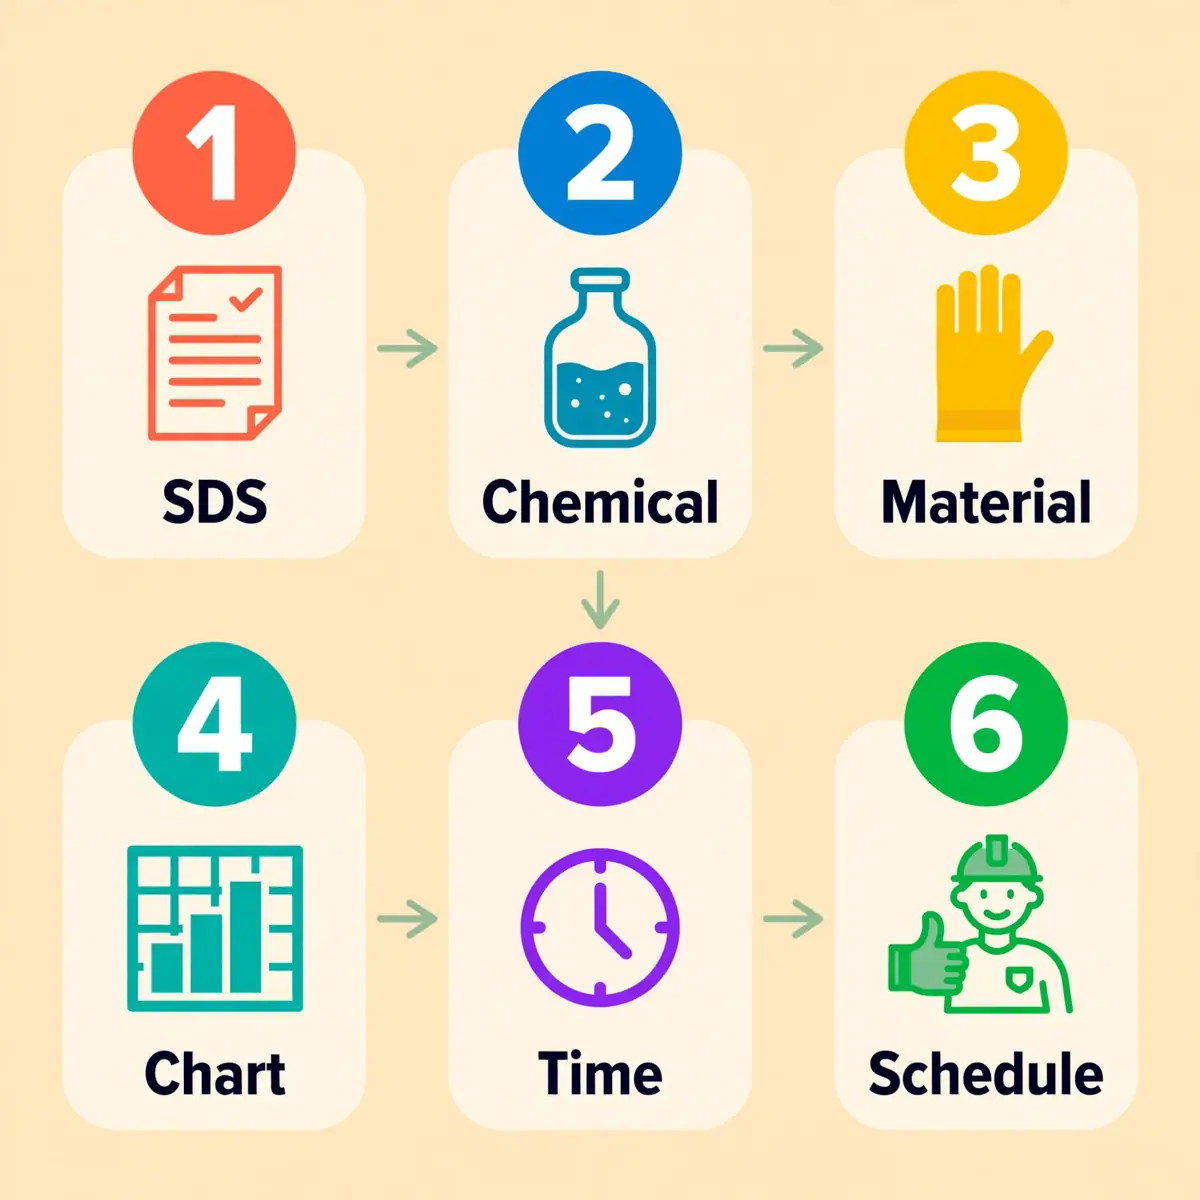
Choosing a chemical glove is a short procedure, not a guess. Work the steps in order and write the result down. Skipping a step is how the wrong glove arrives: a cut glove bought for a chemical job, or a disposable glove bought for immersion work.
- Open Section 8 of the safety data sheet and note the recommended glove material and any breakthrough time.
- Name the chemical family and the exact chemical, concentration and temperature.
- Pick the material that resists that family, using the table above.
- Confirm the exact product's breakthrough time for that chemical on the manufacturer's chart.
- Match the breakthrough time to the contact time and the type of contact: splash, intermittent or immersion.
- Set a change-out time before the breakthrough time, and write it on the job instruction.
Step 1: start with the safety data sheet
Section 8 of the safety data sheet, "Exposure controls / personal protection", frequently names a recommended glove material directly. It is the chemical manufacturer's own recommendation, based on the tests it ran. Check it before opening any catalogue.
If Section 8 names no material, it still gives what the next steps need. That is the exact chemical name, its concentration, its skin hazards and its exposure limits. The product label also carries hazard information. Where both are silent, contact the product supplier or the glove manufacturer for help before choosing.
Step 2: name the chemical, not the category
"Acid" is not a chemical. Sulfuric acid and acetic acid behave very differently against the same glove. A glove rated well against a dilute acid can fail quickly against the concentrated form. Name the exact compound, its concentration and its temperature, and note whether the work involves a mixture.
For mixtures, select on the component with the shortest breakthrough time. Solvents can carry active ingredients through the material. A glove that resists two chemicals individually may not resist the mixture as well as the weaker one alone. Where the mixture is novel or unusual, ask the manufacturer to confirm, or treat it as the worst-case single component.
Steps 3 and 4: match the material, then the product
Use the material table to pick the family that resists the chemical, then look up the specific product on the manufacturer's chart. "Nitrile" is a material family, not a single product. A 4-mil disposable nitrile exam glove and a 15-mil unsupported nitrile chemical glove have meaningfully different breakthrough times against the same chemical.
Match the chart to the exact product line, the exact chemical and the concentration in use. Charts that do not state a concentration are a rough starting point, not a final answer. If your chemical is not on the chart, contact the manufacturer; do not assume a similar chemical's result applies.
Steps 5 and 6: match the time, then set the schedule
Compare the breakthrough time with the contact the task really involves. Splash-only work can accept a shorter breakthrough time than immersion, where the glove sits in the chemical. Brief, repeated contact still accumulates exposure, so use the total contact time across the task, not the longest single touch.
Set the change-out time before the breakthrough time elapses, with a documented safety margin. Change the glove immediately after any known contact, any visible damage or any sign of degradation. Change gloves between different chemical tasks to avoid cross-contamination. The schedule, not the glove's appearance, decides when it comes off.
Worked example: degreasing with acetone
A maintenance worker degreases parts with an acetone-based cleaner. The safety data sheet names ketones. Nitrile is ruled out for immersion: it resists oils but performs poorly against ketones. A disposable nitrile glove is fine for incidental oil contact but not for acetone immersion. Butyl is the correct elastomer for acetone and methyl ethyl ketone. The worker selects a reusable butyl glove and confirms its acetone breakthrough rating on the manufacturer's chart. For the water-based wash step afterwards, a thick latex glove handles the aqueous, alkaline portion. One job, two glove changes, each matched to its chemical.
The same logic applies to methyl ethyl ketone, which is also a ketone. Butyl covers both, while nitrile fails both, so one material choice serves the whole ketone family on that line.
Worked example: cleaning with a dilute acid
A cleaner uses a dilute acid descaler on washroom tiles. The safety data sheet names a dilute acid at low concentration. Nitrile or PVC both resist aqueous acids. A reusable nitrile glove with a gauntlet cuff is a sound choice, confirmed on the chart at the stated concentration. The same glove would be the wrong choice at full concentrate, which is why the concentration on the sheet matters more than the chemical name alone.
Keep the concentrate separate from the dilute working solution. The same acid at full strength needs a different check, and the glove that suits the dilute form may fail against the concentrate.
Worked example: handling toluene
A worker handles toluene, an aromatic hydrocarbon. Nitrile rates fair to poor against aromatics, and butyl is poor against aromatic hydrocarbons, so both common defaults fail. Viton resists aromatics, and a laminate inner glove covers the most aggressive cases. The worker checks Viton's toluene breakthrough time for the exact product and sets a change-out time inside it. A sturdier outer glove protects the Viton where the work is rough.
Check the chart for the exact Viton product, because formulations differ between makers. Where the work also involves ketones, neither Viton nor butyl covers both families, so the task needs two gloves or a laminate inner glove.
Worked example: mixing pesticide
A worker mixes pesticide concentrate before spraying. The product label and safety data sheet govern here. Many pesticide labels state the glove material required, and the concentrate is far more hazardous than the diluted spray. Nitrile or neoprene usually cover the common formulations, but the label's instruction wins over any general table. The worker changes gloves after mixing, before handling clean equipment, and never reuses a disposable glove for the next batch.
Wash hands after removing the gloves, and keep the mixing gloves away from clean equipment. Concentrate on a glove can contaminate a sprayer handle, a door handle or a phone.
AlertIf the chemical is not on the manufacturer's chart, stop and ask the manufacturer. Guessing from a similar chemical is how breakthrough times get overestimated.
Reading a manufacturer's permeation chart
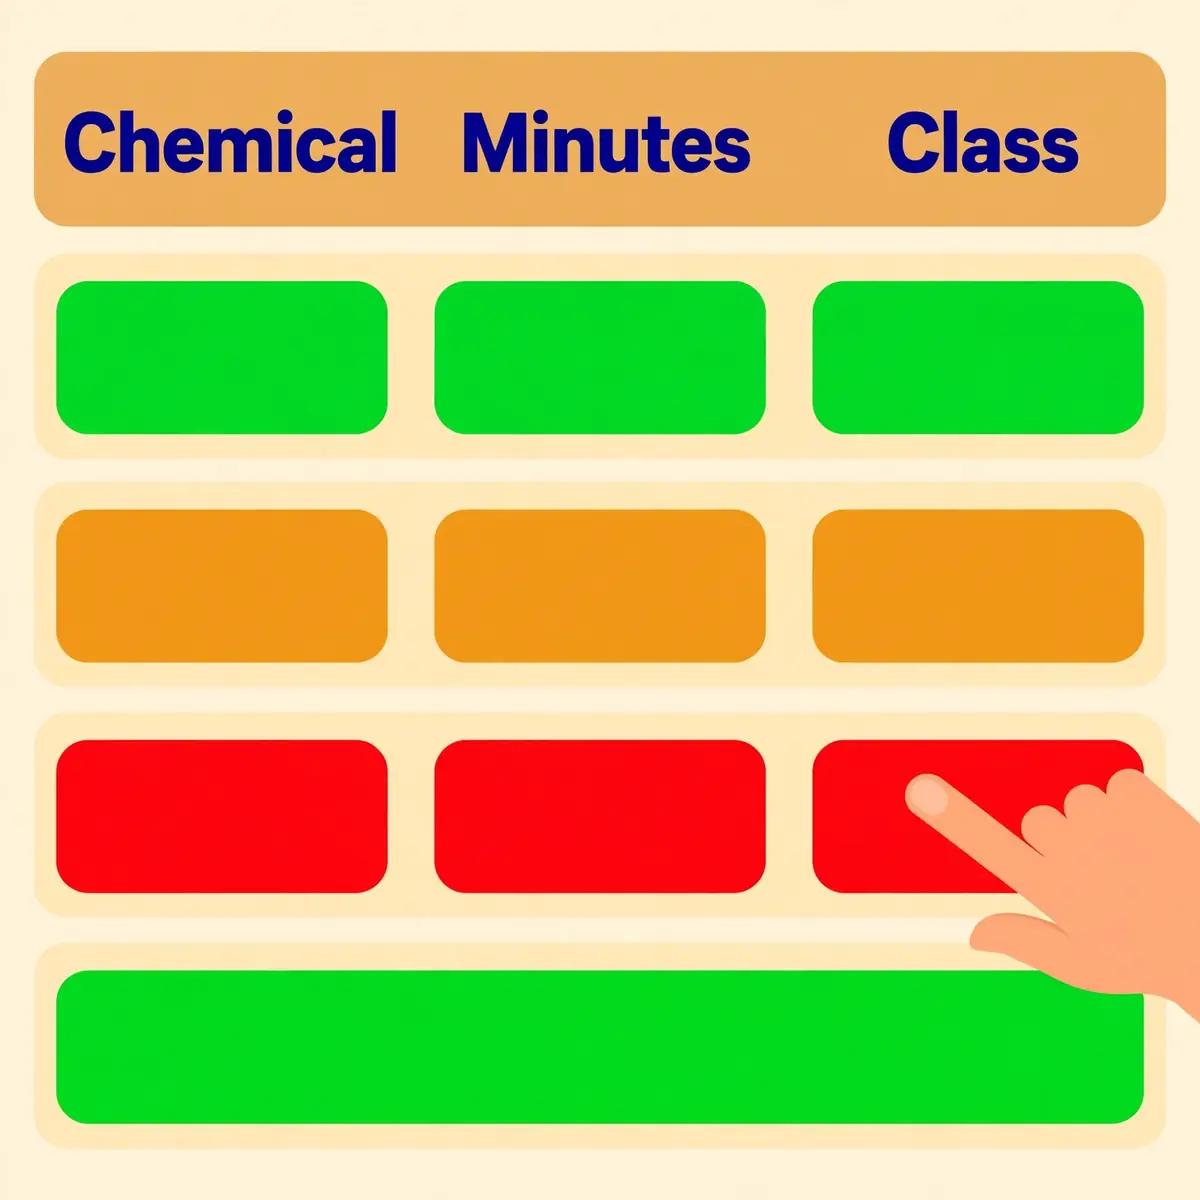
Ansell, MAPA, Kimberly-Clark and other glove makers publish free chemical-resistance charts online. Each chart lists, for one glove product, a rating against a long list of individual chemicals. The rating is usually the ANSI/ISEA 0 to 6 class or a manufacturer letter grade, with the breakthrough time beside it. Reading one correctly takes five checks.
- Match the exact chemical, not the category, and the exact concentration.
- Match the glove product, not just the material family.
- Read the degradation rating beside the breakthrough time.
- Check whether the number is for the palm or the cuff.
- Note the test method, so ASTM F739 and EN 16523-1 numbers are not mixed.
Check the chemical and the concentration first
Look up the specific compound. Sulfuric acid and acetic acid behave very differently against the same glove material. A glove rated well against a 10% acid solution is not automatically safe against the concentrated acid. Concentration changes permeation behaviour, so a chart that does not state it should be treated as a rough starting point.
Where the chart gives a breakthrough time, compare it with the task's contact time and apply the safety margin from the earlier section. Where it gives only a letter grade, ask the supplier for the underlying breakthrough time before relying on the glove for anything beyond splash contact.
Check the product, not just the material
Different manufacturers formulate the same material differently, test against different chemical lists and publish charts in different formats. A chart from one maker says nothing about another maker's glove, even in the same material. Always confirm against the current chart for the specific glove product in use, and cross-check it against Section 8 of the chemical's safety data sheet.
Thickness is part of the product, not the material. For a given material, a thicker glove generally gives a longer breakthrough time and better cut and puncture resistance, at the cost of dexterity. But thickness alone does not determine resistance: material chemistry matters more, and a thick glove in the wrong material still fails fast.
Read the degradation rating too
Charts usually carry two values per chemical: the breakthrough time and a degradation rating. A glove can show a long breakthrough time while degrading quickly, and a degraded glove can let the chemical through before its breakthrough time. A poor degradation rating means the combination was not tested for permeation at all in some guides, because the material fails physically first.
Choose gloves with an excellent or good degradation rating for the chemical in use. If the rating is poor, pick another material even when the breakthrough number looks attractive. The two numbers answer different questions, and both must pass.
What to do when your chemical is not listed
Charts rate single chemicals, and no chart lists every chemical. Where the exact chemical is missing, do not substitute a similar one and hope. Contact the glove manufacturer with the chemical name, concentration, temperature and contact time, and ask for a recommendation in writing. For a mixture, ask about the mixture itself, or select on the component with the shortest breakthrough time.
Where no data exists at all, the safe default is the broadest barrier available. A laminate film glove — worn as an inner glove under a sturdier outer glove, with a short change interval. Record the decision and the reason, so the next person doing the task does not have to guess again.
Writing the glove specification
Turn the chart checks into a written specification for each task. Name the glove product, not only the material, and state the maker, the product line and the minimum thickness. List the chemicals, concentrations and contact times it must cover, with the breakthrough time or ANSI/ISEA 105 class required for each.
Require the data from the supplier before the first order, and accept a substitute product only when its published breakthrough data meets or beats the listed product for the same chemicals. Set the change-out rule per chemical in the same document, so the same task is protected the same way at every site.
TipSave the chart page or printout with the job instruction. A glove bought six months later may be a different product line with different data.
Disposable or reusable?
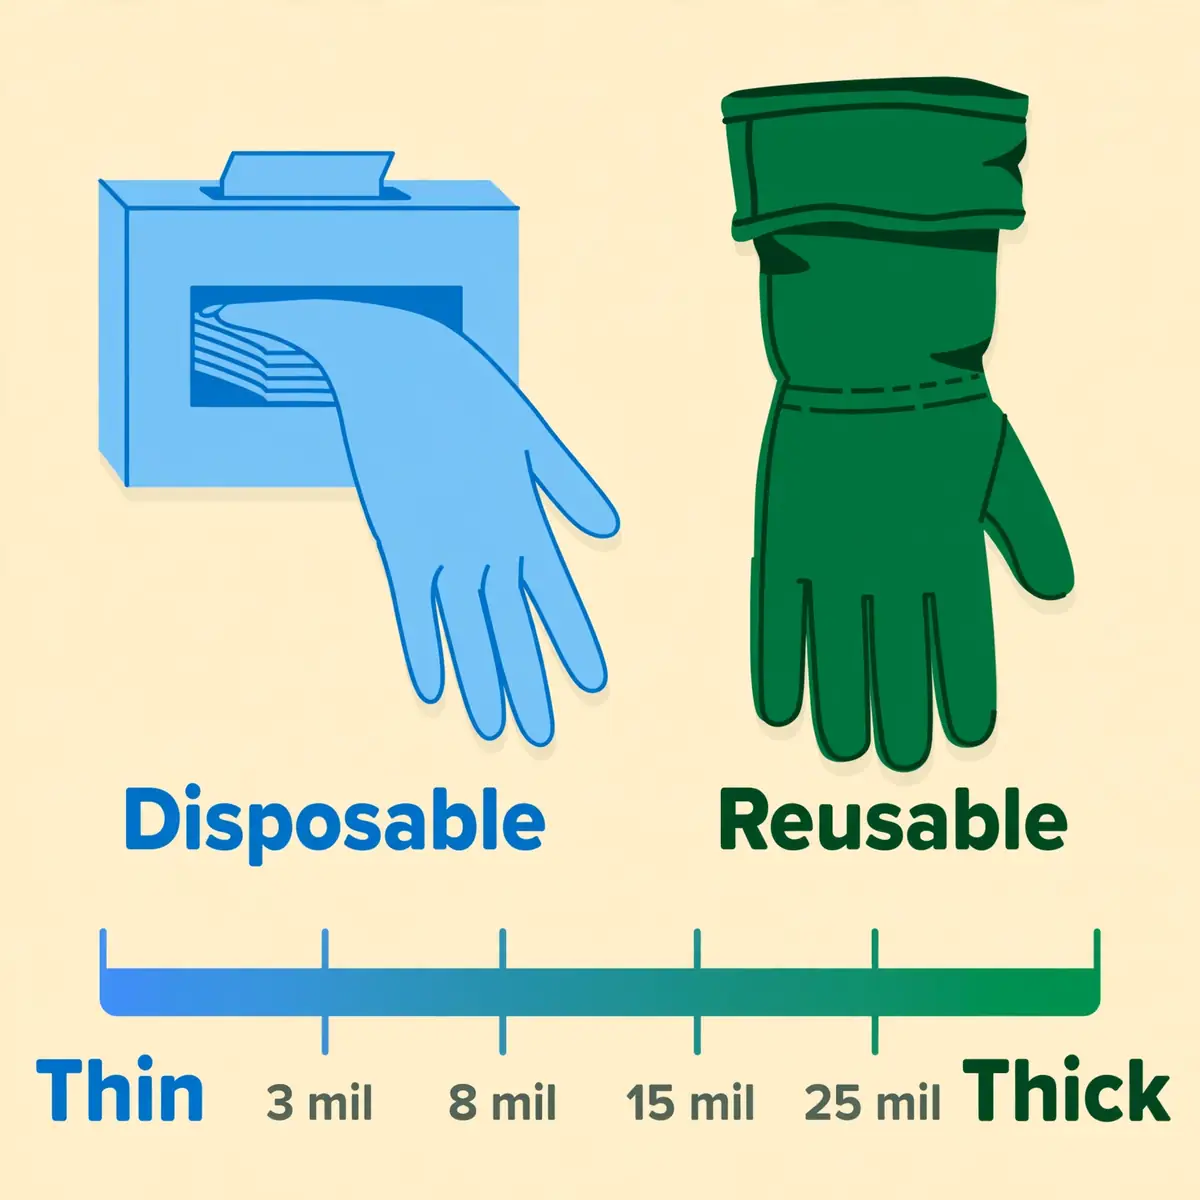
Disposable and reusable chemical gloves answer different jobs. Disposable gloves are thin, changed often and never reused. Reusable gloves are thicker, built for longer contact and cleaned or inspected between uses where the manufacturer allows it. The contact type decides which one fits: incidental splash or immersion.
Thickness is measured in mils, where 1 mil is 0.001 inch, or 0.0254 millimetres. Disposable exam-style gloves typically run 3 to 8 mils and are designed as a barrier against biological fluids and light contamination, not sustained chemical contact. Dedicated chemical-handling gloves commonly run 11 to 25 mils or more and are formulated and tested for longer breakthrough times.
When a disposable glove is enough
A disposable glove suits brief, incidental contact with a chemical its chart covers. That means a splash while pouring, a short wipe-down, or handling a sealed container. Nitrile is the usual disposable choice, because it resists many solvents and oils and tears visibly when punctured. Latex suits aqueous work where no allergy is involved, and vinyl suits only light, short aqueous tasks.
Disposable gloves are thin by design, so they give minimal protection against cuts, punctures and heat. Never use them for work that involves intentional direct chemical contact, immersion or sharp objects. Throw a disposable glove away when it is taken off, and never wash and reuse one.
When the job needs a reusable glove
Immersion, repeated contact and long tasks need a reusable chemical glove. Thicker material gives a longer breakthrough time for the same chemical, better puncture resistance and a gauntlet cuff that protects the forearm. Supported gloves, with a fabric liner, add comfort and strength; unsupported gloves, with no liner, are easier to clean and dry.
Reusable gloves are not permanent. They retire at the end of their breakthrough time or change-out schedule, even if they look undamaged. They also retire at the end of the shift where guidance calls for it. Wash a reusable chemical glove only if the manufacturer says it can be washed. Never wash one that has been soaked in a chemical it was not rated for.
Double gloving: a backup, not a fix
Double gloving means wearing a thinner glove, often of a different material, underneath the primary glove. It is a standard mitigation in two situations:
- Working with a chemical known to have a short breakthrough time against the available primary material.
- Tasks with elevated puncture or tear risk, where an inner glove provides a backup barrier if the outer glove is compromised.
It is not a substitute for selecting the correct primary material. A poorly matched outer glove doubled with another poorly matched glove still fails quickly against the target chemical. Choose the right primary material first, then add the inner glove as a backup, and change both on the shorter of the two schedules.
Thickness against dexterity
Every mil of thickness trades dexterity for protection. A 0.1-millimetre disposable nitrile glove gives high dexterity for pipetting but minimal protection against concentrated corrosives. A glove of 0.5 millimetres or more shields hands during bulk chemical transfers but makes handling small vials difficult.
Match the thickness to the task's real dexterity need, not to habit. Where fine work is needed with a hazardous chemical, choose a thinner glove with a short change interval and a strict schedule. It beats a thick glove that the worker takes off to feel what they are doing. A glove that comes off is no protection at all.
Fit, cuffs and comfort
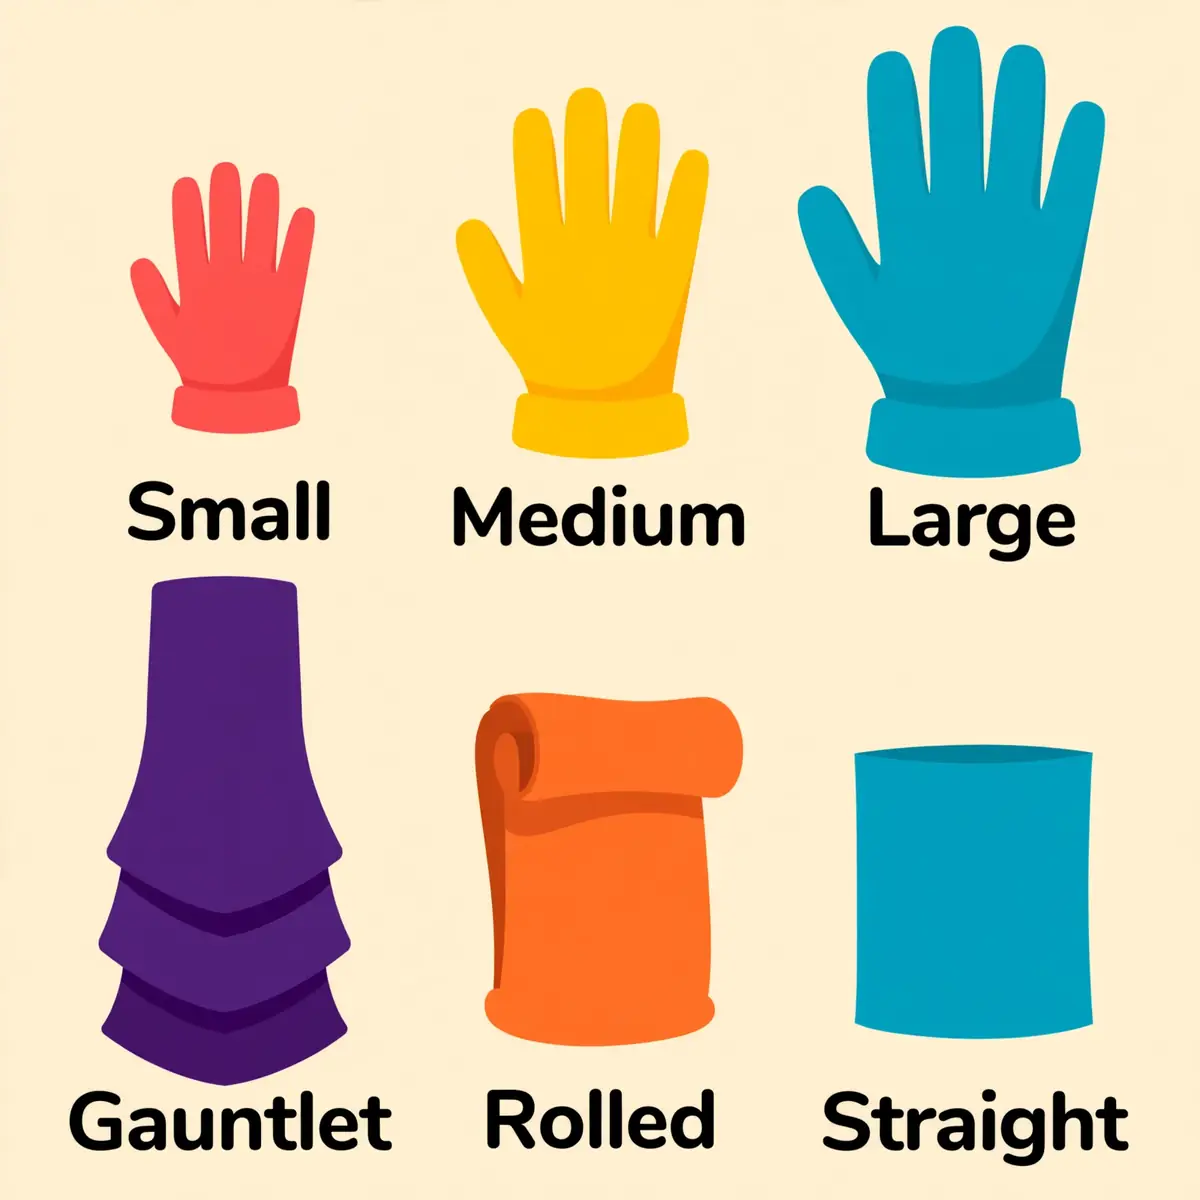
A chemical glove that does not fit is a glove that will be removed, torn or bypassed. Fit decides whether the protection stays on for the whole task. Gloves come in sizes from small to extra-extra-large, and a proper fit needs a full size run on the shelf, not one size for the crew.
Comfort is not a luxury here. A tight glove tires the hand and tears at the seams. A loose glove catches on equipment and reduces grip. Workers should try the glove on the real task, in every size the crew needs, before the specification is fixed.
Getting the size right
Measure the hand around the knuckles and along the middle finger, then check the maker's size chart — sizes vary between makers. The glove should fit snugly without pinching, with the fingertips reaching the ends of the fingers and no excess material bunching in the palm.
Stock the full size range and let workers choose their own size. A glove that is a size too small restricts blood flow and tears. A size too large folds at the fingertips and lets chemical pool inside. Involve workers in the selection: they are the ones who will notice a bad fit before anyone else does.
Cuff styles and length
The cuff decides whether a chemical runs inside the glove. A gauntlet cuff is extended to protect the wrist and forearm, slides on and off easily and suits immersion and splash work. A rolled cuff adds strength and acts as a barrier against chemical runoff. A straight cuff fits snugly and keeps chemicals from running inside.
Length follows the exposure. Gloves of 9 to 12 inches give complete hand protection. Lengths of 12 to 18 inches protect the hand and forearm to the elbow, which suits immersion and splash work. Where liquid can run down the arm, wear the glove cuff over the sleeve, not under it. Runoff then drips off the glove rather than inside it.
Allergy: latex protein and accelerators
Two different allergies affect glove wearers. Natural rubber latex protein causes allergy in some people, with reactions from skin irritation to severe responses. The accelerators used to make rubber gloves. Chemicals such as thiurams and carbamates — cause contact dermatitis in others, and they appear in nitrile and neoprene gloves as well as latex.
Where latex gloves are used, choose low-protein, powder-free gloves only, and keep an alternative available for anyone affected. Where a worker reacts to accelerators, ask the supplier for accelerator-free gloves. Record who needs which alternative, so a substitute order does not accidentally reintroduce the allergen.
Lined or unlined, grip and sweat
A flock lining or fabric support makes a reusable glove easier to put on and take off, and absorbs sweat on long tasks. An unlined glove is easier to clean and dry, and suits short tasks and frequent changes. Cotton liners absorb chemicals, so a coated glove with a knitted liner can let a chemical wick through to the skin within seconds. Check the lining's role before choosing a lined glove for chemical work.
Grip matters where hands are wet or oily. Textured palms and fingers, or a coated palm, hold containers and tools that a smooth glove drops. Sweat inside a glove also softens skin and makes it more permeable, so long tasks need a glove change for comfort as well as for chemistry.
Putting them on, taking them off and checking them

A chemical glove protects only when it is inspected, put on cleanly and taken off without touching the outside to bare skin. Most workers receive no training in taking gloves off, and the removal step is where contamination most often reaches the skin. Build the sequence into the job instruction and practise it before the chemical work starts.
Inspection and removal take a minute. Skipping them saves nothing and risks the exposure the glove was bought to prevent.
Pre-use inspection
Before each use, confirm the glove is the product the task calls for, and that it is clean, undamaged and within its useful life. Look for tears, punctures, pinholes, thin spots and weak seams. Stretch or flex the glove gently to open small defects, and check for signs of degradation from earlier use: swelling, stiffness, softening, tackiness, discoloration or cracking.
Check the cuff and the fit, so the glove covers the wrist and sleeve gap and does not restrict grip. Discard any glove that fails a check. A passed inspection says nothing about permeation, which is why the change-out schedule still applies after inspection passes.
Putting them on
Wash and dry hands before putting gloves on, and check that hands are free of cuts or skin damage that needs covering first. Pull the glove on without stretching it sharply, and smooth it over the hand so no air pockets sit at the fingertips. Pull the cuff over the sleeve where liquid can run down the arm.
Where the task needs it, put the inner glove on first, then the outer glove, and check that both cuffs sit flat. A designated clean area for putting gloves on keeps the outside of a fresh glove from picking up contamination before the work begins.
Taking them off without touching the outside
Take gloves off so the contaminated outside never touches bare skin. Peel the first glove off from the cuff, turning it inside out as it comes off, and hold it in the gloved hand. Slide a bare finger under the cuff of the second glove. Peel it off inside out over the first glove, and drop both into the waste container. Wash hands immediately afterwards.
Wipe gloves clean before taking them off where the task allows, and use a designated area for removal that is cleaned regularly. The lab safety rules cover the wider laboratory routine, including hand washing and glove removal. If a splash reaches the skin, the first aid kit guide covers what to do after a splash or a sharps injury.
Setting a change-out schedule
Build the schedule from the breakthrough time, not from appearance. For any chemical with a known, short breakthrough time relative to the task, change the glove well before that time elapses, with a documented safety margin. Change it immediately after any known contact with the chemical, after any visible sign of degradation or damage, and between different chemical tasks.
Write the schedule on the job instruction with the clock time, not just the interval. A worker who knows the glove comes off at 10:30 will change it. A worker told to change it "regularly" will wait until it looks worn. Record the change on the task sheet where the work is audited.
WarningNever wait for visible damage before changing a chemical glove. Permeation has no visible sign, so the schedule is the only warning you get.
Care, storage and retirement
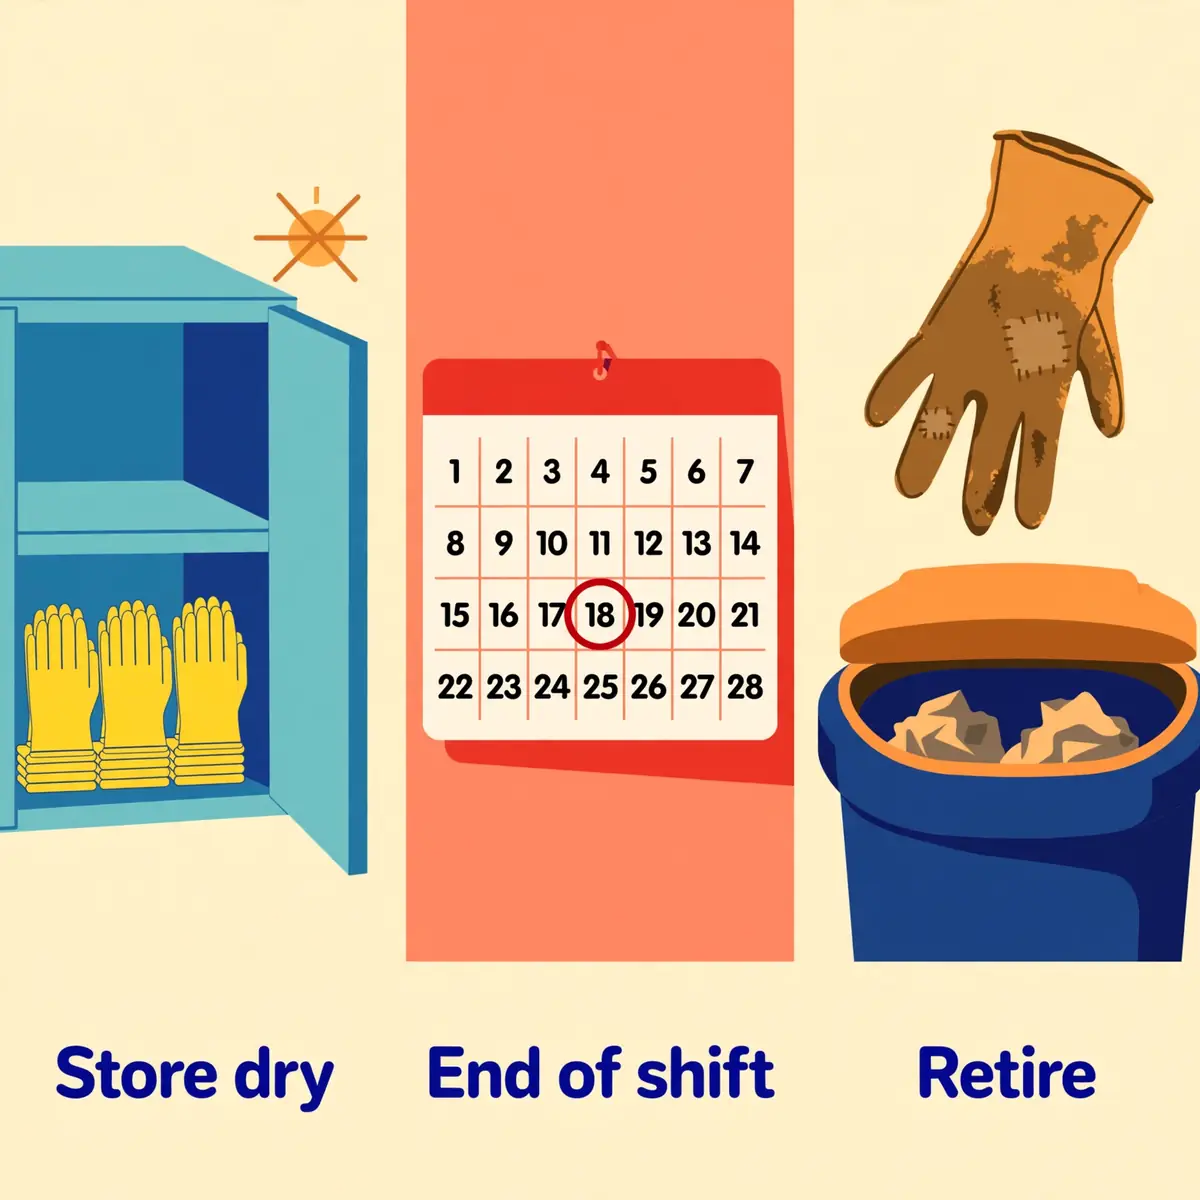
Reusable chemical gloves last longer and protect better when they are cleaned, stored and retired on a plan. A glove left crumpled in sunlight, or washed in the wrong way, can fail long before its chart says it should. The care rules come from the manufacturer, not from habit.
For the full glove-choice procedure across every hazard, the broader safety gloves guide covers cut, impact, heat, cold and electrical protection alongside chemicals.
Cleaning reusable gloves
Wash a reusable chemical glove only if the manufacturer says it can be washed, and follow its instructions for temperature and detergent. Heat and bleach damage many glove materials and coatings, and a glove soaked in a chemical it was not rated for should be discarded, not washed. Disposable gloves are never washed or reused.
Clean the outside of a reusable glove before taking it off where the task allows, so the inside stays clean for the next use. Dry gloves away from direct heat and sunlight, with air circulating, and keep pairs together so the left and right hands match.
Storage
Store gloves dry, away from heat, sunlight and chemicals. Do not store them crushed under heavy objects, which can crease the coating and weaken the seams. Keep them in their bag or original packaging where the maker supplies one. Keep them away from ozone sources such as electric motors, which degrade rubber.
Check stored gloves before reissue. Rubber ages even on the shelf, so respect the maker's shelf-life date and retire old stock rather than issuing it. A glove that has gone stiff or tacky in storage has already degraded and should not be used.
When to retire a glove
Retire a chemical glove at the end of its breakthrough time or change-out schedule, even if it looks undamaged. Retire it immediately for holes, tears, worn-through coating, stiffness, cracking, swelling, discoloration or loss of grip. HSE guidance is blunt on this point: throw chemical-protective gloves away at the end of the shift. They may look clean and undamaged inside but they will not be.
No glove is tested to give more than eight hours of protection against chemical permeation, and wear, stretching and abrasion are not included in any testing. Treat the end of the shift as a hard stop for chemical gloves, and start the next shift with a fresh pair.
Common mistakes
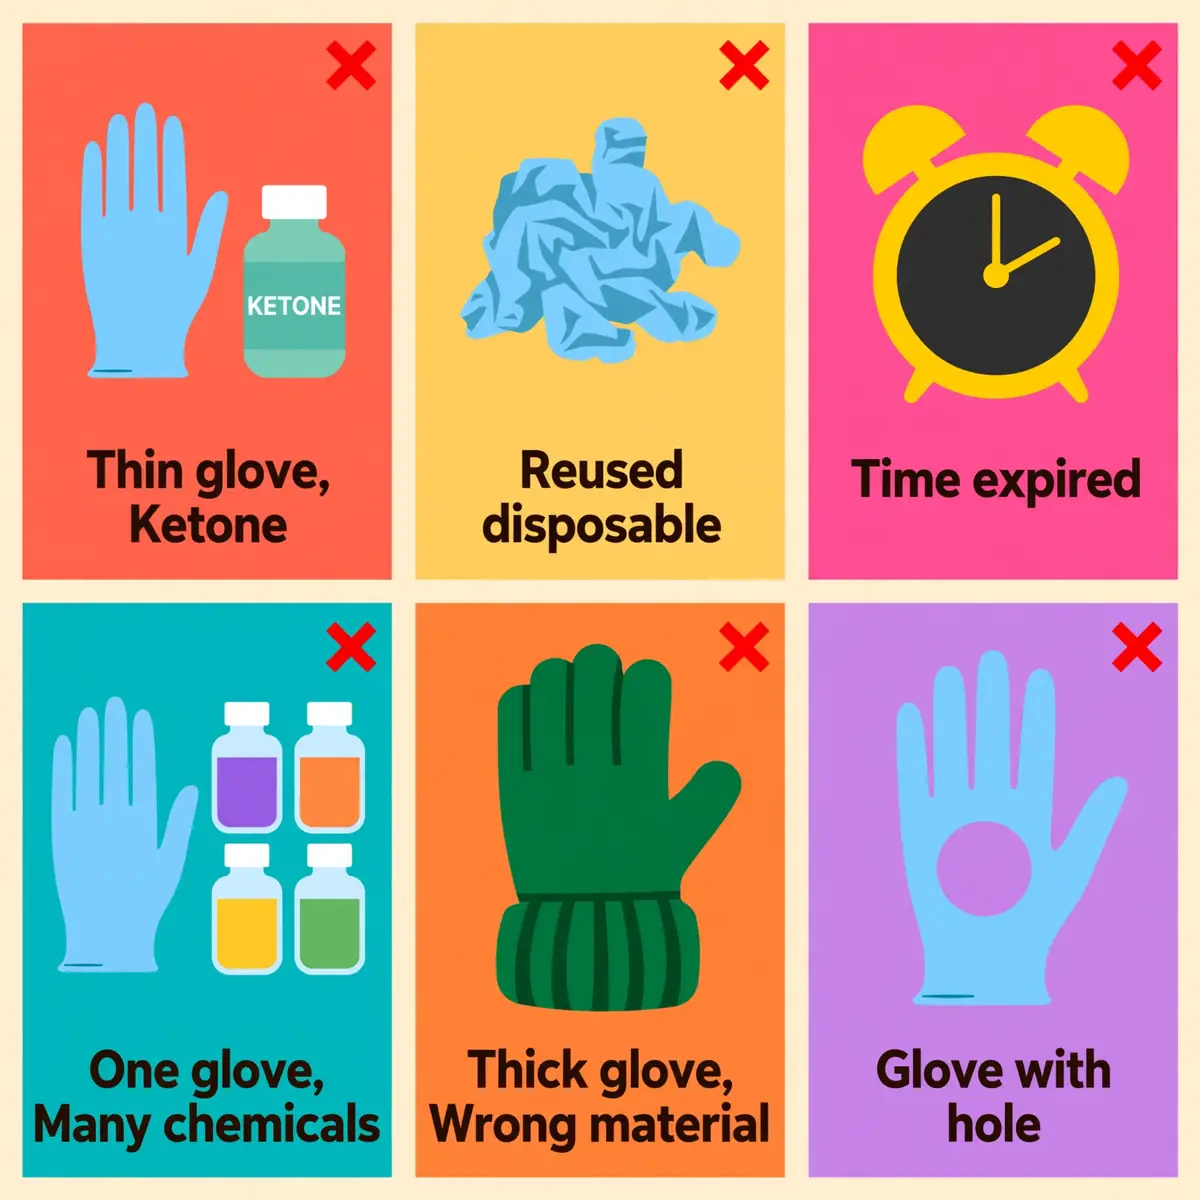
Most chemical glove failures come from selection mistakes, not from defective gloves. The same errors appear in incident reports and audits year after year. Each one below is easy to avoid once it is named.
- Treating nitrile as a universal glove, and using it against ketones such as acetone.
- Trusting thickness alone, and choosing a thick glove in the wrong material.
- Reusing a disposable glove, or washing one and putting it back on.
- Waiting for visible damage before changing a glove.
- Using one pair for every chemical on a mixed job.
- Ignoring concentration and mixtures when reading a chart.
- Skipping the pre-use inspection, or skipping the change-out schedule.
"Nitrile works for everything"
The most common glove-selection mistake is assuming any nitrile glove is safe for any organic solvent because nitrile is the lab's everyday glove. Nitrile rates poor against ketones such as acetone and methyl ethyl ketone, and fair to poor against chlorinated solvents and aromatic hydrocarbons. When a task involves a chemical that nitrile rates poorly against, the correct response is to switch materials. Do not keep using the familiar glove for convenience.
The fix is simple: check the material against the chemical family before the shift, and keep the alternative material on the shelf. A glove cupboard that stocks only nitrile forces the wrong choice.
One glove for every chemical
A single pair cannot cover every hazard on a mixed job. A cotton jersey glove gives almost no chemical protection. A glove chosen for one chemical may fail in minutes against the next one on the bench. Mixed work usually needs two or three pairs, and that is cheaper than the injury that follows one compromise glove.
Label each pair by task or chemical family, so the right glove is the easy one to reach. A shared glove shelf with no labels invites the compromise.
Reusing disposables and ignoring the schedule
Gloves cannot be maintained in the way tools can. They nearly always become contaminated inside the second time they are put on, and contamination works through the glove even while it is not being worn. Single-use gloves might offer better protection than a reused pair, precisely because they are fresh. Throw single-use gloves away when they are taken off, and throw chemical-protective gloves away at the end of the shift.
The cost argument fails too. A fresh disposable glove costs far less than a dermatitis case, a lost shift or a clinic visit. The saving from reuse is measured in pennies.
Buying the thickest glove by default
A thicker glove costs more, tires the hand faster and reduces dexterity. If a thinner glove covers the hazard and stays on, it is the better choice. Buy against the chart for the chemical in use, not against the thickest option on the shelf. The chemical hazards guide covers the separate risk of hot chemical splashes, which need a chemical glove as well as heat protection.
Ask the supplier for the breakthrough time of the thinner glove first. Where it covers the task with margin, it is the right glove, and the thicker one is money and dexterity wasted.
Law and standards
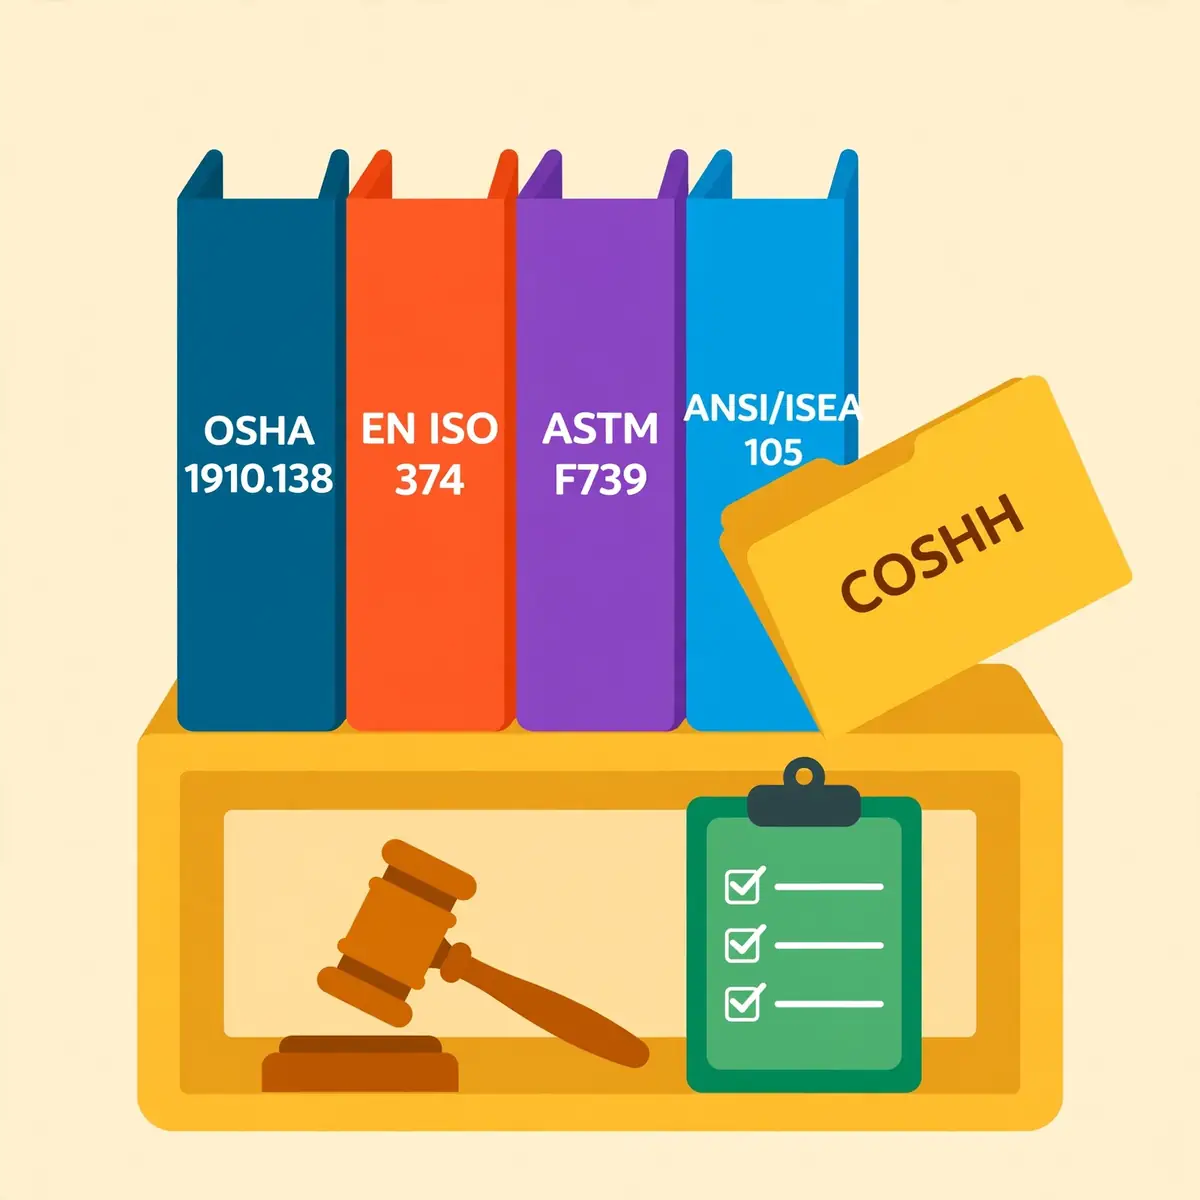
Chemical glove selection sits inside a legal frame in both the United States and the United Kingdom. The employer must assess the hazard, select suitable gloves and train workers to use them. The standards below supply the numbers that make that duty concrete.
Rules differ by country, so attribute each requirement to its jurisdiction. A United States regulation does not create a duty in the United Kingdom. A European standard is not law in the United States unless a regulation calls it up.
United States: OSHA
The Occupational Safety and Health Administration (OSHA) sets the United States duties. Under 29 CFR 1910.138(a), employers shall select and require employees to use appropriate hand protection. The duty applies when hands are exposed to hazards such as skin absorption of harmful substances and chemical burns. Under 1910.138(b), selection must rest on an evaluation. The evaluation covers the performance characteristics of the hand protection, the task, the conditions, the duration of use and the hazards identified.
Two other rules frame the choice. Under 29 CFR 1910.132(d), the employer must assess the workplace to determine what hazards are present. The employer must then select protective equipment that protects against those hazards, and certify the assessment in writing. Under 29 CFR 1910.1200, every hazardous chemical must carry a safety data sheet in sixteen numbered sections, with Section 8 covering exposure controls and personal protection. The risk assessment guide covers the hazard assessment step, and OSHA training covers the training that follows it.
United Kingdom: COSHH and PPE at Work
In the United Kingdom, the Control of Substances Hazardous to Health Regulations 2002 (COSHH) require employers to control exposure to chemicals and protect workers' health. HSE's COSHH essentials sheet S101 gives the practical glove-selection advice:
- Involve workers in selecting protective gloves.
- Get up-to-date safety data sheets for all chemical products.
- Select gloves that are CE marked as Category III personal protective equipment to EN 374.
- Seek expert advice from the supplier or a health and safety professional where the choice is unclear.
The Personal Protective Equipment at Work Regulations 1992 require employers to provide suitable protective equipment, maintain it and train workers to use it. HSE's glove guidance adds the practical test: base the choice on the work, the wearer and the environment. Remember that no glove material protects against all substances and no glove protects against a specific substance forever.
The standards that supply the numbers
Three standards carry the test data. ASTM F739 is the American test method for measuring chemical permeation through protective clothing materials, and it defines the standardized breakthrough time. EN 16523-1 is the European test method behind the EN ISO 374 type letters and permeation levels. ANSI/ISEA 105 classifies hand protection, including the 0 to 6 chemical permeation scale used on United States charts and packaging.
For the full equipment picture, the PPE requirements guide covers the employer's wider duties on selection, maintenance and training. Keep the test report or declaration of conformity for each glove on file. An inspector or auditor can then see the standard, the edition and the level behind every claim.
AlertThe employer's duty is to select gloves on an evaluation of the task, the conditions, the duration and the hazards. Buying the nearest glove on the shelf is not an evaluation.
Frequently Asked Questions
What is the most chemical-resistant glove material?
There is no single most resistant material. Viton and butyl offer the broadest protection against aggressive organic chemicals, and multi-layer laminate film resists the widest range of chemical classes. For everyday mixed chemical work, neoprene and heavy nitrile give the best balance of breadth and cost. The right answer is always the material whose published breakthrough time covers your exact chemical.
How long do chemical gloves last once a chemical touches them?
They last until their breakthrough time for that chemical, and no longer. The breakthrough time is the laboratory time for the chemical to reach the inside at a set rate. Real work shortens it through heat, movement and stretching. Follow the manufacturer's change-out schedule and the chemical's safety data sheet, and change the glove at the scheduled time even if it looks undamaged.
Can I use nitrile gloves for acetone?
No. Nitrile performs poorly against ketones such as acetone and methyl ethyl ketone, and standard disposable nitrile exam gloves give under 10 minutes against aggressive solvents. Solvent work with acetone calls for butyl rubber, checked against the manufacturer's chart for the exact product. A disposable nitrile glove is fine for incidental oil contact, not for acetone immersion.
What is the difference between permeation and degradation?
Degradation is visible physical damage to the glove material: swelling, cracking, softening or dissolving. Permeation is invisible: the chemical moves through the intact material at molecular level, so the glove can look completely fine while no longer providing protection. Permeation is measured by breakthrough time, under ASTM F739 in the United States and EN 16523-1 in Europe.
How do I know what size chemical glove to wear?
Measure the hand around the knuckles and along the middle finger, then check the maker's size chart, because sizes vary between makers. Try the glove on the real task. It should fit snugly without pinching, with the fingertips reaching the ends of the fingers. Stock a full size run so every worker can choose their own size.
Can I reuse disposable chemical gloves?
No. Disposable gloves are designed for one use and should be thrown away when they are taken off. They nearly always become contaminated inside the second time they are put on, and washing does not restore them. Reusable chemical gloves are the only ones that can be cleaned, and only where the manufacturer says so.
Do I need a different glove for each chemical?
Often, yes. One material rarely covers every chemical on a mixed job. Assign one glove product per chemical family or hazard class, and change gloves between different chemical tasks. For mixtures, select on the component with the shortest breakthrough time. Where the same glove genuinely covers several chemicals on its chart, one product can serve them all.
Sources
- OSHA 29 CFR 1910.138 — Hand protection
- OSHA 29 CFR 1910.132 — General requirements for personal protective equipment
- OSHA 29 CFR 1910.1200 — Hazard communication
- HSE — Gloves: Choosing the right gloves to protect skin
- HSE COSHH essentials S101 — Selecting protective gloves
- Ansell — AlphaTec 58-735 permeation breakthrough times and degradation data per EN ISO 374:2016
- Ansell — Chemical Resistance Guide, 7th edition: permeation and degradation data
- Personal Protective Equipment at Work Regulations 1992 (UK)
- ASTM F739 — Standard test method for permeation of liquids and gases through protective clothing materials
- ANSI Blog — ANSI/ISEA 105-2024: Hand Protection Classification, including chemical permeation and degradation resistance