A hazmat suit is a full set of protective clothing and breathing equipment worn together as one ensemble. It shields the skin, eyes and lungs from chemicals, biological agents and radioactive dust.
The right suit depends on three things: what the hazard is, how it reaches the body, and how long the work lasts. Level A gives the highest protection, with a gas-tight suit and a self-contained breathing apparatus (SCBA). Level D is a work uniform for sites with no known chemical hazard. Most choices sit between those two ends, and the employer makes the choice after a hazard assessment, not the wearer on the day.
What a hazmat suit is
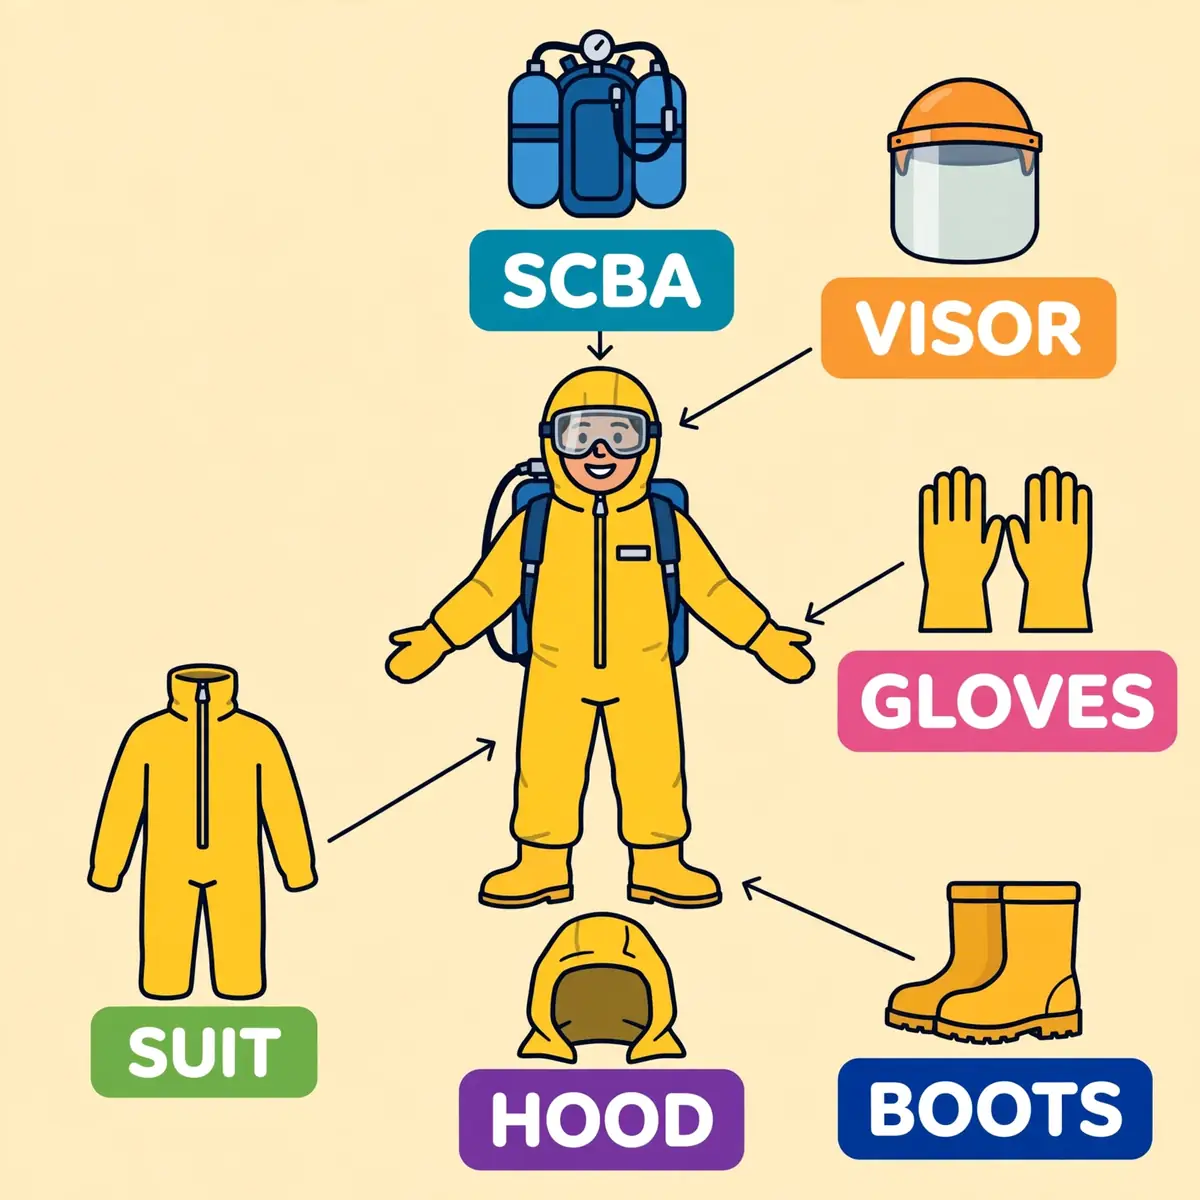
The words "hazmat suit" describe an ensemble, not a single garment. The ensemble combines respiratory protection, protective clothing, gloves, boots and eye protection, all worn at the same time. Each piece covers one route into the body, and the set only works when every piece is present and fits.
That matters because the suit alone never decides the protection. A gas-tight suit with the wrong respirator still leaves the lungs exposed. The right gloves with a torn suit still leave the skin exposed. Selection always covers the whole ensemble, and the level names (A, B, C and D) describe the whole ensemble too.
A suit is an ensemble, not a single garment
Protective clothing and breathing equipment form two halves of one system. The clothing half blocks contact with the skin and eyes. The breathing half supplies clean air or filters the air that is there. Gloves, boots, hoods and face protection close the gaps between the two halves.
The Occupational Safety and Health Administration (OSHA) and the United States Environmental Protection Agency (EPA) have long used four ensemble levels, A to D, to describe that system. Each level pairs one type of breathing protection with one type of clothing. The pairing is the point: the level tells a crew what to wear as a set. Nobody has to assemble it from parts under pressure.
Chemical protective clothing and PPE: the two halves
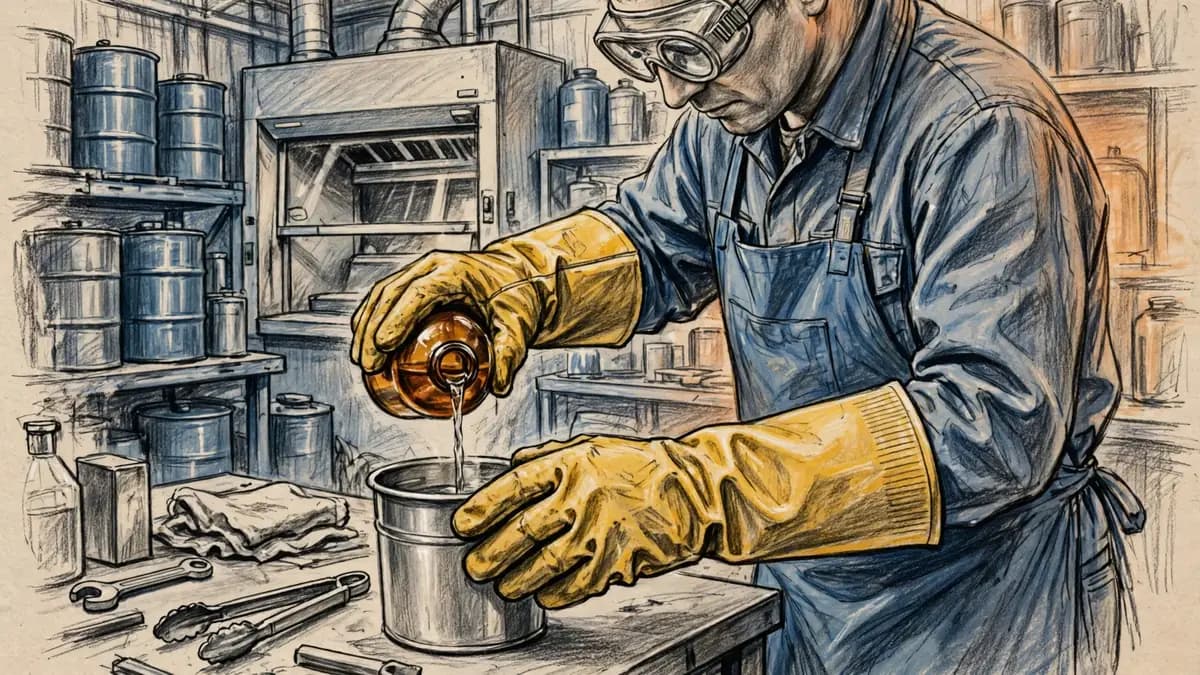
Chemical protective clothing (CPC) is the part of the ensemble that guards the skin and body against chemical splashes, dusts, gases and vapours. It includes hooded suits, coveralls, jackets, aprons, gloves and boot covers. Some CPC is a fully encapsulating suit that encloses the wearer and the breathing apparatus. Some is a simple splash garment worn over work clothes.
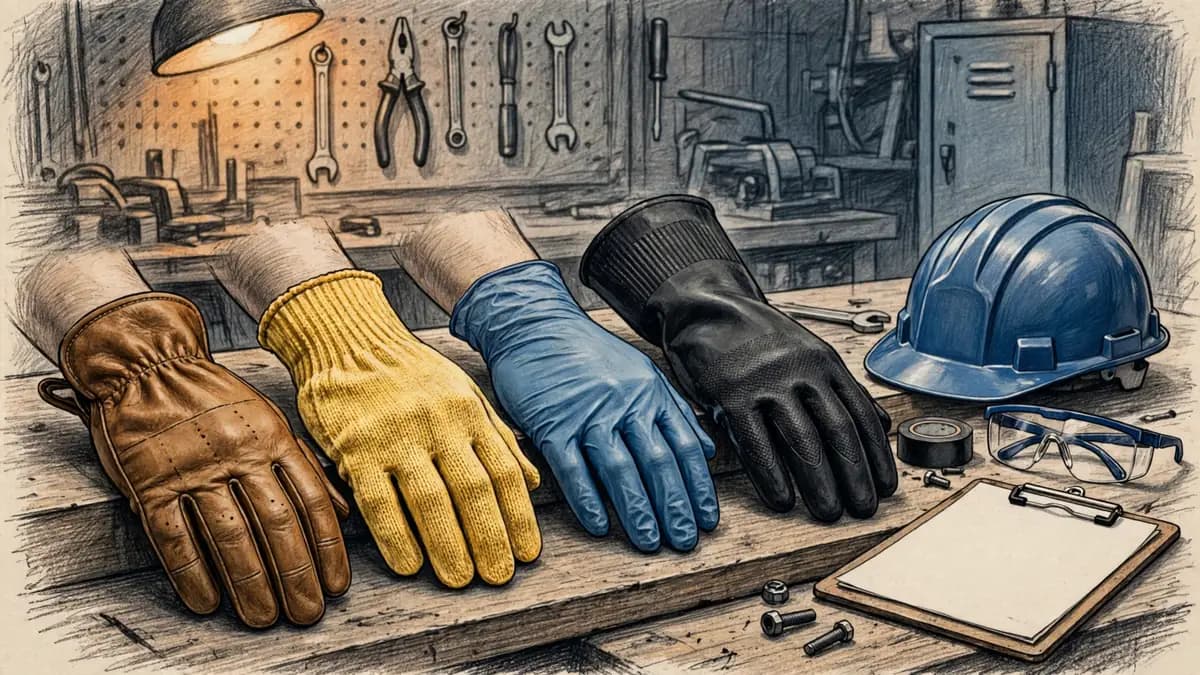
Personal protective equipment (PPE) is the wider set, and CPC sits inside it. PPE covers respiratory, head, eye, face, hearing, hand, foot and fall protection. A glove can be CPC and PPE at the same time, since it protects the hands from chemical contact and from injury. The two terms overlap, and the overlap is normal.
Where hazmat suits are used
Hazmat suits appear wherever people work with uncontrolled chemical, biological or radiological hazards. The main settings are hazardous waste site clean-up, emergency response to chemical spills, chemical manufacturing and process work, and decontamination after an incident. Pesticide application and asbestos removal use lighter garments from the same family.
The suit is the last line of defence, not the first. Engineering controls, ventilation and safe work methods come first, and PPE covers what those controls cannot remove. The hierarchy of controls ranks elimination and substitution above PPE for exactly that reason. A suit is what a worker wears when the hazard is still there after the higher controls have done their work.
The four levels of protection: A, B, C and D
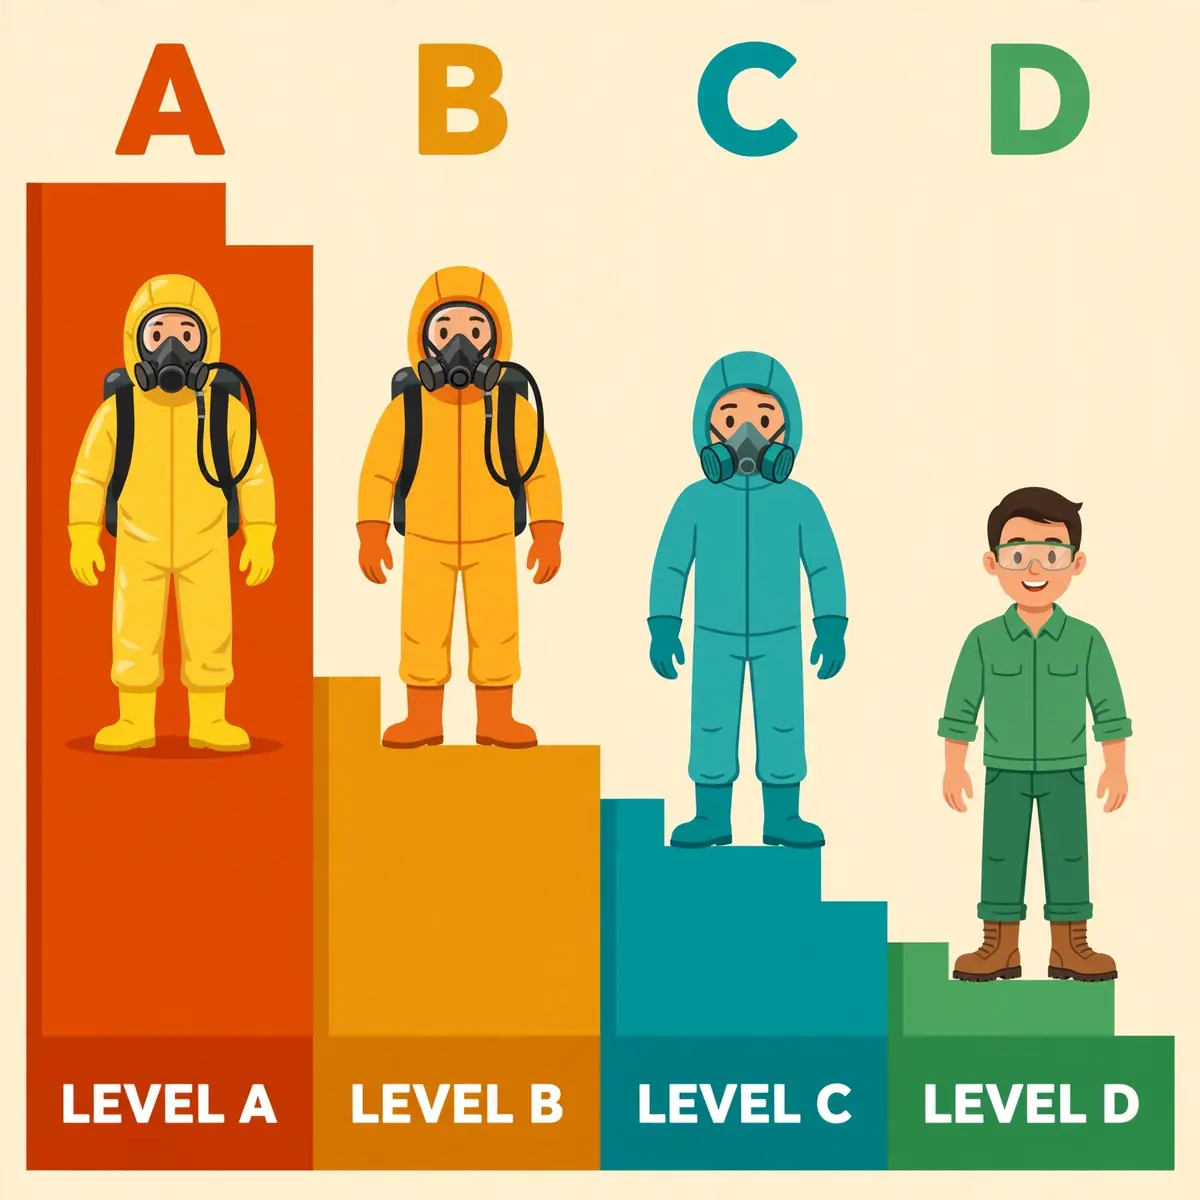
OSHA and the EPA describe four levels of protection, labelled A to D. Level A is the most protective and Level D is the least. The levels come from Appendix B to OSHA's hazardous waste operations standard, 29 CFR 1910.120, which adopted the EPA scheme. Appendix B is guidance that an employer uses to begin selection, and site information may call for combinations of PPE drawn from different levels.
Two things separate the levels. The first is breathing protection: SCBA at Levels A and B, an air-purifying respirator at Level C, and no respirator at Level D. The second is skin protection: a gas-tight encapsulating suit at Level A, hooded splash clothing at Levels B and C, and a work uniform at Level D.
| Level | Breathing protection | Skin and eye protection | Use when |
|---|---|---|---|
| A | Positive-pressure SCBA | Vapour-tight, fully encapsulating suit | Hazards are unknown or harm the skin |
| B | Positive-pressure SCBA | Hooded splash suit, not vapour-tight | Air is unsafe but skin risk is low |
| C | Air-purifying respirator | Hooded splash suit | Contaminant is known and a filter removes it |
| D | None | Work uniform, safety glasses | No air or splash hazard |
Level A: the highest protection
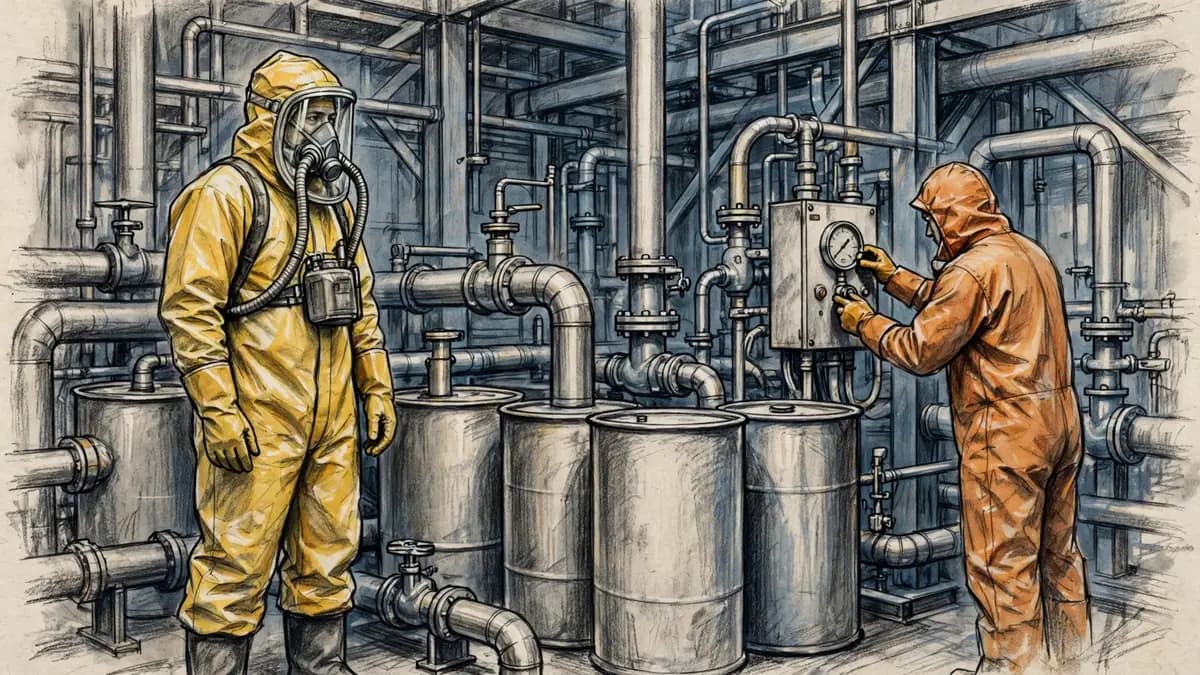
Level A gives the greatest protection for skin, eyes and lungs at the same time. The ensemble is a positive-pressure, full-facepiece SCBA (or a positive-pressure supplied-air respirator with an escape SCBA), a totally encapsulating chemical-protective suit, inner and outer chemical-resistant gloves, and chemical-resistant safety boots. A cooling unit, coveralls and a hard hat are common additions.
Appendix B calls for Level A when a substance needs the highest level of protection for skin, eyes and lungs, when a high skin hazard is known or suspected and contact is possible, when work runs in a confined or poorly ventilated area, or when instruments show high levels of unidentified vapours. It is also the choice when instruments cannot test the air but highly toxic substances are suspected. The suit encloses the wearer and the breathing apparatus, so nothing outside touches the skin or enters the lungs.
AlertChoose Level A when the hazard is unknown and a serious risk is suspected. Guessing a lower level at this point risks the worst outcome. The cost of over-protection is far smaller than the cost of exposure.
Level B: the same breathing protection, less skin protection
Level B keeps the highest level of respiratory protection and drops the skin protection one step. The ensemble is the same positive-pressure SCBA or supplied-air respirator, worn with hooded chemical-resistant clothing instead of an encapsulating suit. That clothing can be overalls and a long-sleeved jacket, coveralls, a chemical-splash suit, or disposable chemical-resistant overalls. Inner and outer chemical-resistant gloves and chemical-resistant safety boots complete the set.
Appendix B calls for Level B when the air needs high respiratory protection but the skin needs less, when oxygen is below 19.5%, or when instruments show vapours that have not yet been identified. The suit stops liquid splashes but is not vapour-tight, so gases and vapours can still reach the skin. Level B is often the starting point for first entry into a hazardous site, until air monitoring and hazard identification give a fuller picture.
Level C: air-purifying respirators
Level C pairs the same hooded chemical-resistant clothing with an air-purifying respirator, which filters the air instead of supplying it. The respirator can be a full-face or half-mask unit with the right cartridge, approved by the National Institute for Occupational Safety and Health (NIOSH). The ensemble is lighter and less cumbersome than Level B, since no air cylinder is carried.
Level C is allowed only when every one of its conditions is met. The contaminants must be identified and measured, the air-purifying respirator must be able to remove them, the concentrations must not exceed immediately dangerous to life or health (IDLH) levels, the air must hold at least 19.5% oxygen. The substance must not harm or be absorbed through exposed skin. Air-purifying respirators do not supply oxygen, so they are never used in oxygen-deficient air. The rules for those respirators sit in 29 CFR 1910.134, Respiratory Protection.
Level D: the basic work uniform
Level D is a work uniform with no respirator. Appendix B lists coveralls, gloves, chemical-resistant safety shoes or boots, and safety glasses or splash goggles, with a hard hat, face shield and escape mask as options. It is the minimum protection, used for nuisance contamination only.
Level D fits only where the air holds no known hazard and the work rules out splashes, immersion or unexpected inhalation of a hazardous chemical. It is the level for a characterised site where the hazard assessment has cleared the air and the task. If conditions change and a hazard appears, the level must rise. A disposable coverall worn for dust on a site with no chemical hazard in the air is a Level D garment, and the absence of a hazard is what makes it so.
Upgrading and downgrading during a job
Selection is an ongoing process, not a decision made once at the gate. A spill changes as it is contained, monitoring reveals new information, and a new task can raise or lower exposure. Appendix B warns that its lists do not fully address how a specific material performs against a specific hazard. Re-selection continues until enough is known about both.
Downgrading is reasonable when conditions improve: a contained release, identified contaminants, and monitoring that shows lower levels can allow a step from Level B to Level C. Upgrading is required when conditions worsen or a new hazard appears. When the picture is unclear, the safe move is the higher level. Either way, the change is recorded, the crew is told, and the new ensemble is checked before anyone re-enters.
Types of chemical protective suits
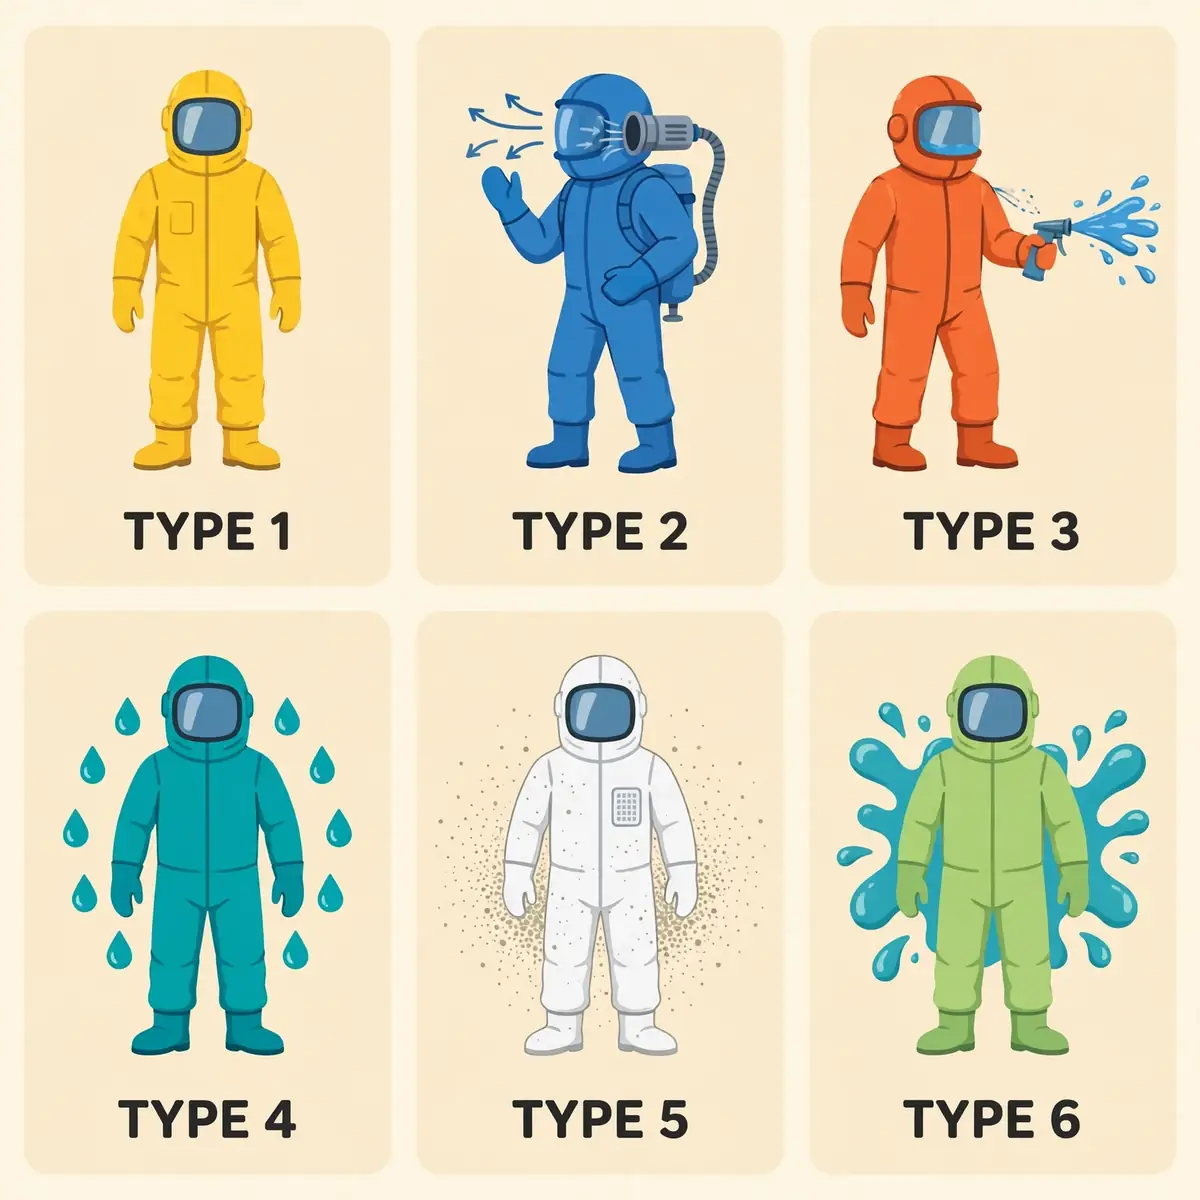
Garments have their own rating system, separate from the A to D levels. European standards sort chemical protective clothing into six types, numbered 1 to 6, by the form of exposure the garment resists. A type describes how the hazard reaches the wearer: as a gas, a liquid jet, a spray, a dust or a light splash. It does not describe which chemicals the material stops.
That distinction is the most common source of confusion in suit selection. A Type 1 suit resists gases, but it may still fail against a chemical its material cannot hold. The type answers how the hazard arrives. The material data answers whether the suit stops it. Both answers are needed before anyone enters.
| Type | Protection | Standard | Typical use |
|---|---|---|---|
| 1 | Gas-tight | EN 943-1 | Hazmat teams, chemical incidents |
| 2 | Non-gas-tight, positive pressure | EN 943-1 | Industrial chemical handling |
| 3 | Liquid-tight, jets | EN 14605 | High-pressure cleaning, spill response |
| 4 | Spray-tight | EN 14605 | Pesticide spraying, tank cleaning |
| 5 | Dry particles | EN ISO 13982-1 | Asbestos removal, powder handling |
| 6 | Limited splash | EN 13034 | General maintenance, painting |
Type 1: gas-tight suits
Type 1 suits are gas-tight and fully encapsulating, and they give the highest level of garment protection. They are worn where no chemical contact is permissible or where the exposure is unknown, which makes them the garment behind a Level A ensemble. The suit encloses the wearer together with the breathing apparatus. The apparatus is protected from the contaminated air as well.
EN 943-1 divides Type 1 into subtypes by how the breathing apparatus is worn. Type 1a carries the SCBA inside the suit. Type 1b carries it outside, which helps in confined spaces because the cylinder can be slipped off the shoulders and passed forward. Type 1c uses breathable air supplied through a continuous-flow airline. Emergency-team versions (1a-ET and 1b-ET) meet the extra requirements in EN 943-2. For detail on the breathing apparatus itself, the self-contained breathing apparatus guide covers SCBA types and use.
Types 3 and 4: liquid-tight and spray-tight suits
Type 3 suits are liquid-tight and resist strong liquid jets, such as a pressurised hose stream or a jet from a failed pipe. Type 4 suits are spray-tight and resist saturated liquid spray from any direction, such as pesticide spraying or tank cleaning. Both types fall under EN 14605, and both need taped seams, since a stitched seam alone lets liquid through under pressure.
The difference between the two is the force of the liquid. A jet hits one point with pressure behind it, while a spray arrives over a wide area at low pressure. A Type 4 suit that handles spray can fail against a jet aimed at a seam or a zip. The task decides which type fits: hose work and pressurised lines call for Type 3, while general spraying and washdown call for Type 4.
Types 5 and 6: particles and light splash
Type 5 suits protect against airborne solid particles, such as dusts, powders and fibres, under EN ISO 13982-1. They are the suits used for asbestos removal, dry pesticide handling and pharmaceutical powder work. They stop particles, not liquids or gases, and they are not a substitute for a liquid-tight suit where splashes are expected.
Type 6 suits give limited protection against light splashes and mist under EN 13034. They suit general maintenance, painting and light cleaning where only incidental contact is expected. A Type 6 garment is the lightest of the six. It is also the easiest to mistake for more protection than it gives. A light splash suit must never be used where a jet, a spray or a gas is present.
WarningType 2 suits are no longer specified in EN 943-1. The 2015 edition removed the non-gas-tight positive-pressure type, so a suit sold as Type 2 may follow an older edition. Check the standard and edition printed on the label before relying on it.
US levels and European types: two different systems
The A to D levels and the Type 1 to 6 types answer different questions, and mixing them up causes real mistakes. The level describes the whole ensemble: which respirator plus which garment, chosen for the hazard at a site. The type describes one garment: which form of exposure it resists. There is no such thing as a Level C suit, because Level C is an ensemble, not a garment rating.
A practical example makes the split clear. A disposable coverall can be the clothing layer of a Level B, Level C or Level D ensemble, depending on the respirator worn with it and the hazard present. The coverall's type (5 or 6) stays the same in all three cases. What changes is the respirator and the conditions that allow the level. When a supplier quotes a type, ask which chemical data supports it. When a site plan names a level, check that the respirator and the garment both match it.
NFPA 1990 and suit performance
In the United States, suit performance is tested against standards from the National Fire Protection Association (NFPA). NFPA 1990, the current edition of which dates from 2022, combines the older NFPA 1991 (vapour-protective ensembles), NFPA 1992 (liquid splash-protective ensembles) and NFPA 1994 (ensembles for CBRN terrorism incidents) into one standard for protective ensembles for hazardous materials and CBRN operations. Annex A to NFPA 1990 maps its ensemble classes to the OSHA and EPA levels.
Regulators do not certify suits. Instead, they require employers to select gear that suits the hazards and to train workers to use it. Manufacturers test their products against the NFPA performance criteria, and a compliant product carries a label saying so. When buying, look for that label, and ask for the manufacturer's permeation data for the chemicals on the site. The NFPA 1990 standard page confirms the consolidation and the current 2022 edition.
Suit materials: how chemicals get through
No material resists every chemical. A suit that holds one solvent for hours can fail against another chemical in minutes. Material selection is therefore chemical-specific, and it starts with the manufacturer's test data for the exact substances on the site. A suit chosen on price or habit, without that data, is a guess.
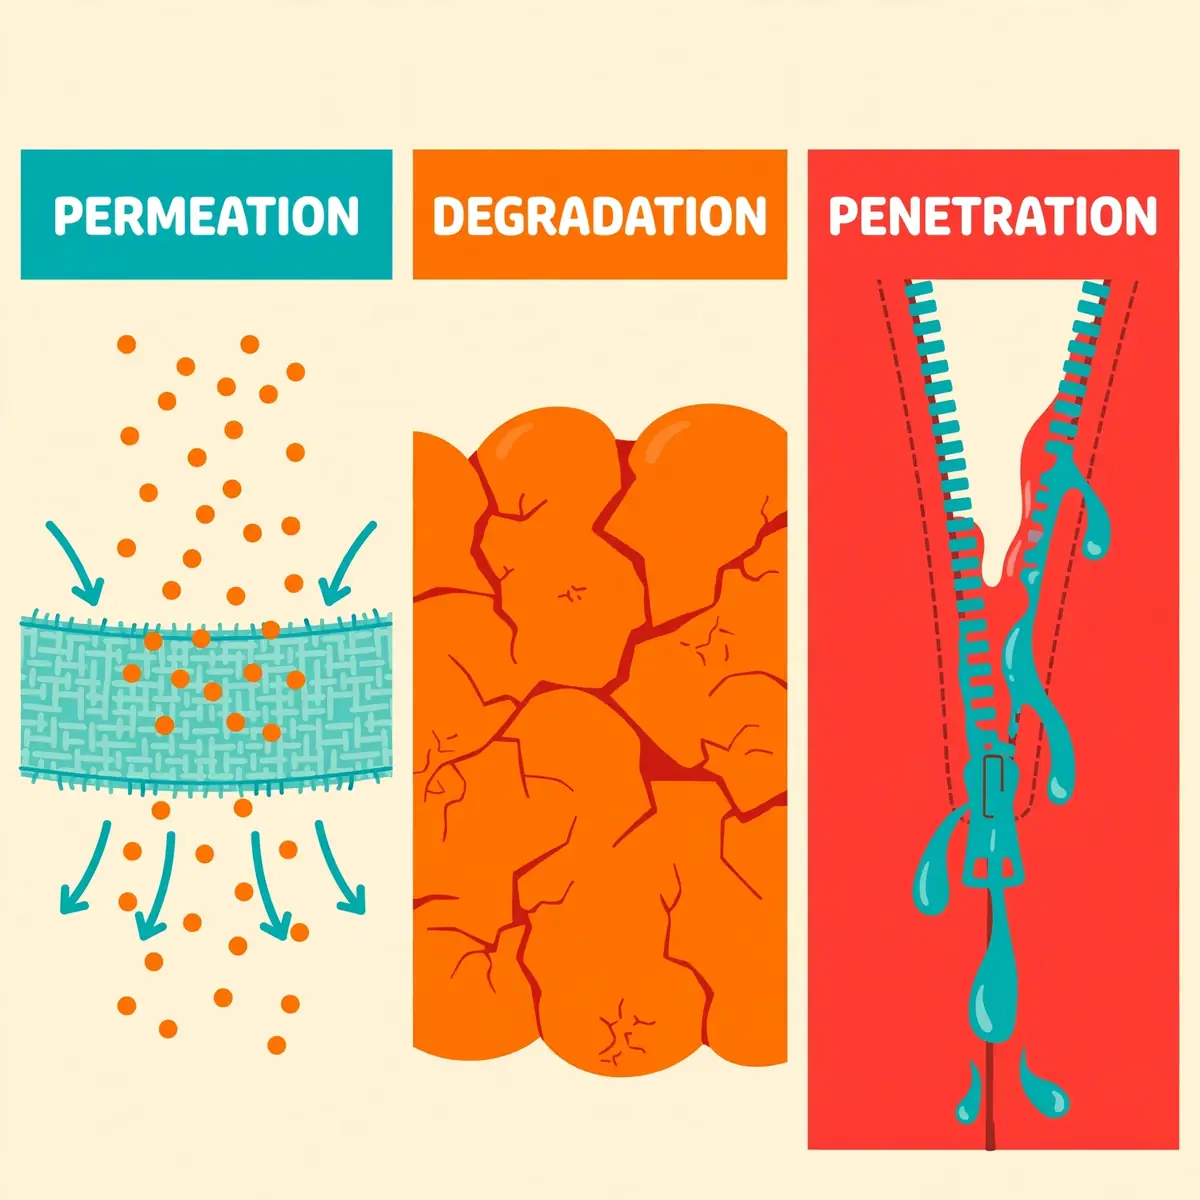
Chemicals get through a garment in three ways, and each way needs a different check. Knowing the three ways helps a buyer read a data sheet instead of trusting a colour or a brand name. The data sheet is the evidence, and the three mechanisms explain what it is measuring.
Permeation, degradation and penetration
Permeation is the chemical passing through the material at the molecular level, with no hole at all. The chemical dissolves into the material on the outside, moves through it, and appears on the inside. Nothing is visible, and the suit can look perfect while the chemical is already reaching the skin. Permeation is the main risk with gases and vapours.
Degradation is the chemical weakening or breaking down the material itself. The signs include swelling, softening, cracking, fading and loss of strength. A degraded suit loses its barrier and its tear resistance at the same time. It can split under normal movement. Penetration is the chemical getting through gaps: zips, seams, pinholes, tears and imperfect seals. A suit can have excellent material and still fail at a zip that was never taped.
Breakthrough time and how to read the data
Breakthrough time is how long it takes a chemical to pass through a material and reach the inside. Manufacturers measure it in the laboratory, usually by the ASTM F739 method, and publish it per chemical and per material. A long breakthrough time means the material holds that chemical for longer. A short one means the chemical gets through fast.
Read the data for the chemical that is actually on the site, not for a similar one. Check the breakthrough time against the planned task duration, with a margin for the unexpected. If the chemical is not in the table, the data does not cover it, and another material or another suit is needed. Penetration data, usually by ASTM F903, and repellency classes under ISO 6530 cover liquids at seams and surfaces, and they matter as much as breakthrough time for splash work.
TipCompare breakthrough times at the same test conditions before choosing between two suits. A time measured at a high temperature or a high concentration is not comparable with one measured at room temperature. The harsher condition is the honest one to plan around.
Common suit materials
Suit materials are chosen for the chemicals they must resist, not for comfort alone. Butyl rubber resists many gases and vapours and is a common choice for gas-tight suits. Neoprene and polychloroprene handle a wide range of industrial chemicals and appear in splash suits and gloves. Multi-layer laminates combine thin films so that each layer blocks chemicals the others cannot. They are used where a single material would fail.
Reinforced nylon composites add tear and abrasion strength where the suit must survive rough work, such as crawling through debris or handling sharp edges. No list of materials replaces the data sheet. The right question for any material is narrow: what is its breakthrough time for the chemical on the site, at the temperature and concentration the work will meet, and does the seam and zip construction match the same standard.
How to choose the right hazmat suit
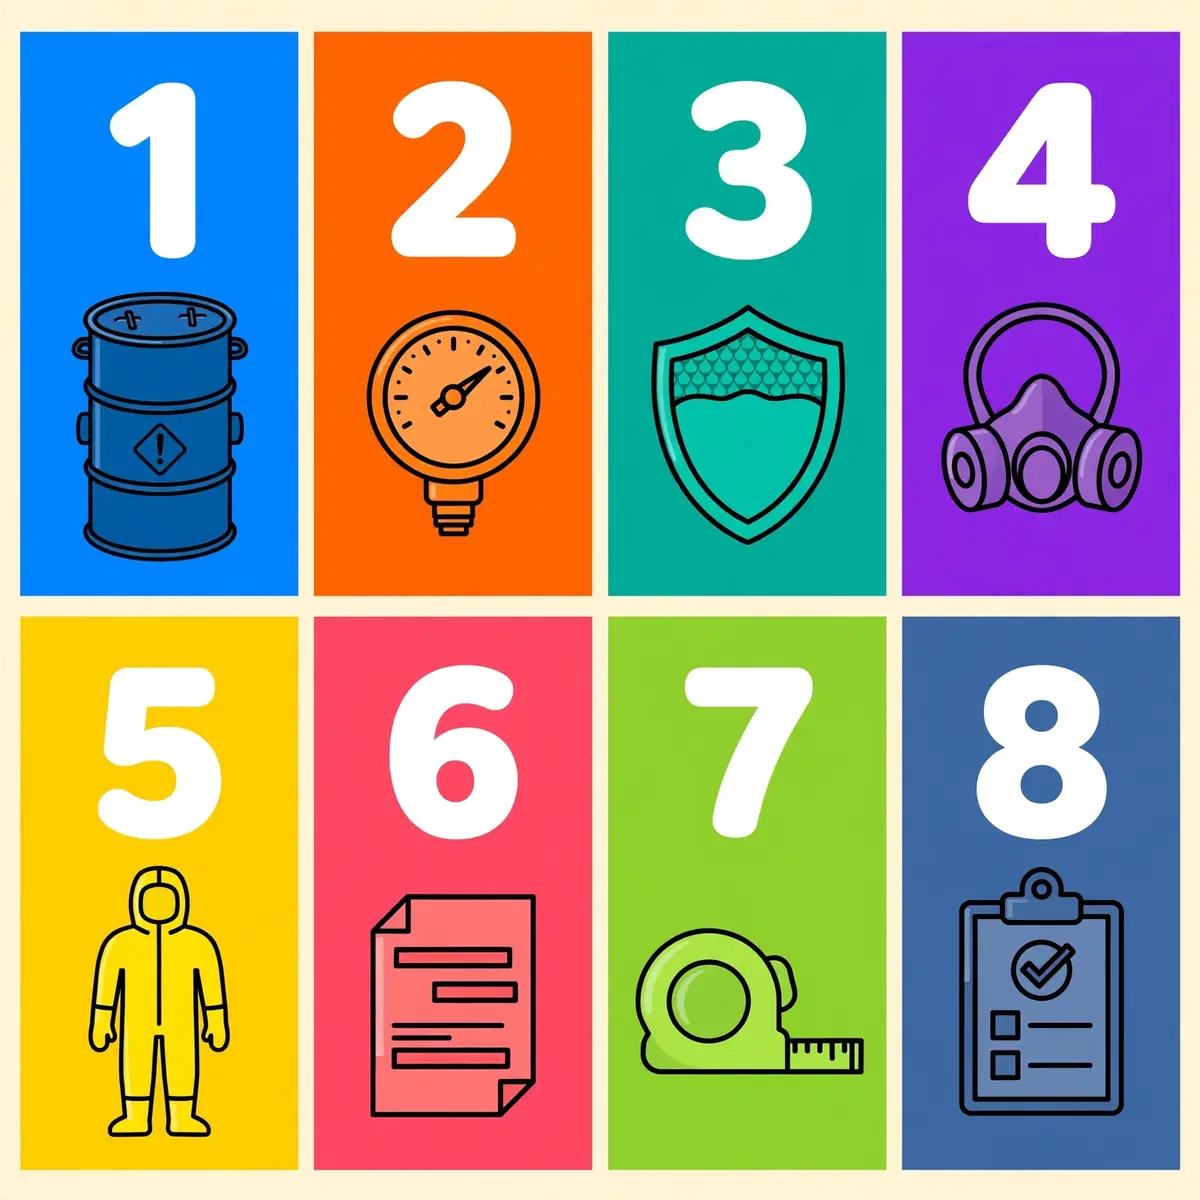
Choosing a suit is a procedure, not a purchase. It starts with the hazard, works through the respirator and the garment, and ends with a recorded decision that can be reviewed when conditions change. The employer owns the decision, and the standard requires it to be based on the performance of the PPE against the hazards identified, the task, and the duration of the work.
The steps below follow the selection logic in 29 CFR 1910.120 and its Appendix B. Each step answers one question, and skipping a step leaves the next one without evidence. A crew that works through the steps in order ends with a suit that fits the hazard, the task and the wearer.
Eight steps to a defensible choice
Work through the steps in order, and record the answer to each one. The record is what makes the choice defensible if it is ever questioned.
- Identify the substance, its state, its concentration and its hazards, including how it enters the body.
- Measure the air: check oxygen, check for IDLH conditions, and note what instruments can and cannot detect.
- Decide whether the substance harms the skin or can be absorbed through it.
- Match the respirator first: SCBA where air is unsafe or oxygen is low, air-purifying only where every Level C condition is met.
- Match the garment type to the form of exposure: gas, jet, spray, dust or light splash.
- Check the material data for the actual chemical: breakthrough time, penetration data and seam construction.
- Check the task, the duration, the fit and the compatibility with gloves, boots and accessories.
- Record the level, the suit, the reasons and the review triggers, and brief the crew before entry.
Step 4 comes before step 5 for a reason. The respirator decides the level, and the level decides the garment. A crew that picks a suit first and then looks for a respirator to match it has the order backwards, and usually ends up with a garment that outranks its breathing protection or a respirator that cannot be worn with the suit.
When the hazard is unknown
Unknown hazards call for the highest protection until monitoring proves otherwise. That is the rule in Appendix B: when instruments show high levels of unidentified vapours, or when highly toxic substances are suspected but the air cannot be tested, Level A is the choice. The first entry team wears it, gathers the monitoring data, and the level is reviewed from evidence.
The same logic applies to mixtures. A spill rarely contains one pure substance, and the mixture can behave differently from any single component. Where the mixture is unknown, treat it as unknown: start high, monitor, and downgrade only when the data supports it. The cost of a Level A entry that turns out to be unnecessary is time and discomfort. The cost of a lower level that turns out to be wrong is exposure.
Who decides, and what the law requires
In the United States, the employer decides the level through the site characterisation and the written PPE programme. The standard requires PPE that protects workers from the hazards they are likely to meet. It requires the level to be raised when new site information shows that more protection is needed. The written programme must cover selection, use and limitations, work mission duration, maintenance and storage, decontamination and disposal, training and fitting, donning and doffing, inspection, evaluation, and limits in temperature extremes and heat stress.
In the United Kingdom, the Control of Substances Hazardous to Health (COSHH) Regulations require the employer to assess the risk from hazardous substances and to control exposure, with PPE as part of that control. The HSE guidance on personal protective equipment at work sets out the employer's duties to provide suitable PPE, maintain it, and train workers to use it. The system differs from the US levels, but the duty is the same: the employer assesses, selects and provides. The worker is trained to use what is provided.
AlertThe employer must raise the level when new information shows more protection is needed. A level chosen in the morning is not fixed for the day, and a worker who reports a new smell, a symptom or a damaged suit triggers a re-check, not a debate.
Getting the fit right
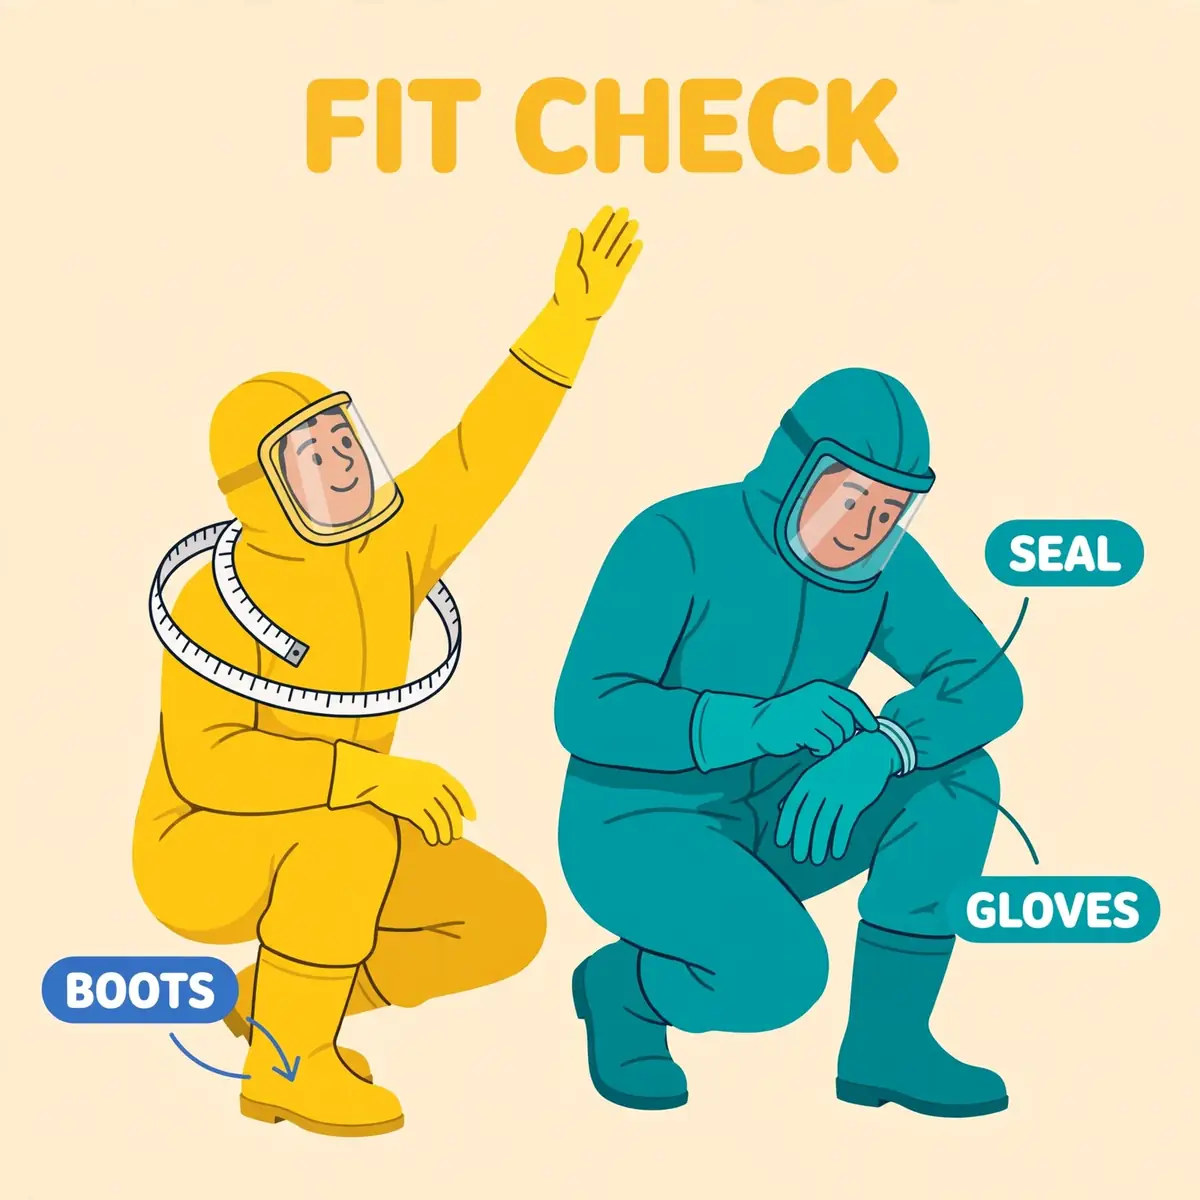
A suit that does not fit does not protect. A suit that is too large catches, folds and tears, and its gloves and boots slip. A suit that is too small restricts movement, strains the seams, and pulls the hood or visor out of place when the wearer reaches or bends. Fit is a safety check, not a comfort preference.
Fit also affects the time a worker can spend inside. A suit that fights the wearer on every movement raises the workload, and a higher workload raises heat stress and air use. A well-fitted suit lets the worker move, see and communicate. It keeps the seals where they belong through the whole task.
Size, fit and movement checks
Size the suit to the wearer, not to the average of the crew. Check the manufacturer's sizing chart against the wearer's height, chest and weight, and try the suit on with the respirator, gloves and boots that will be worn with it. The wearer should be able to reach overhead, crouch, climb and turn the head without the visor lifting, the hood pulling, or a seam straining.
Check the seals with the respirator in place. The facepiece seal, the hood seal and the glove-to-sleeve connection all need to hold through movement, not just while standing still. If the suit needs tape at the wrists or ankles, tape it the same way every time. Check that the tape holds after movement. A fit check that is done sitting down is not a fit check.
Compatibility with the rest of the ensemble
Every piece of the ensemble must work with the others. The gloves must fit over or under the sleeves as the manufacturer intends. They must still allow the wearer to grip tools, operate valves and use a radio. The boots must fit the suit's attached socks or boot covers. They must give grip on the surfaces the work will cross.
Accessories need the same check. A torch, a two-way radio, a personal monitor or a dosimeter must be usable through the suit. Cables or straps must not break a seal. Cooling vests change the fit of the suit and must be tried on with it. If two pieces fight each other, change one of them before entry, not after. The PPE requirements guide covers the general duty to provide compatible equipment.
Putting it on and taking it off
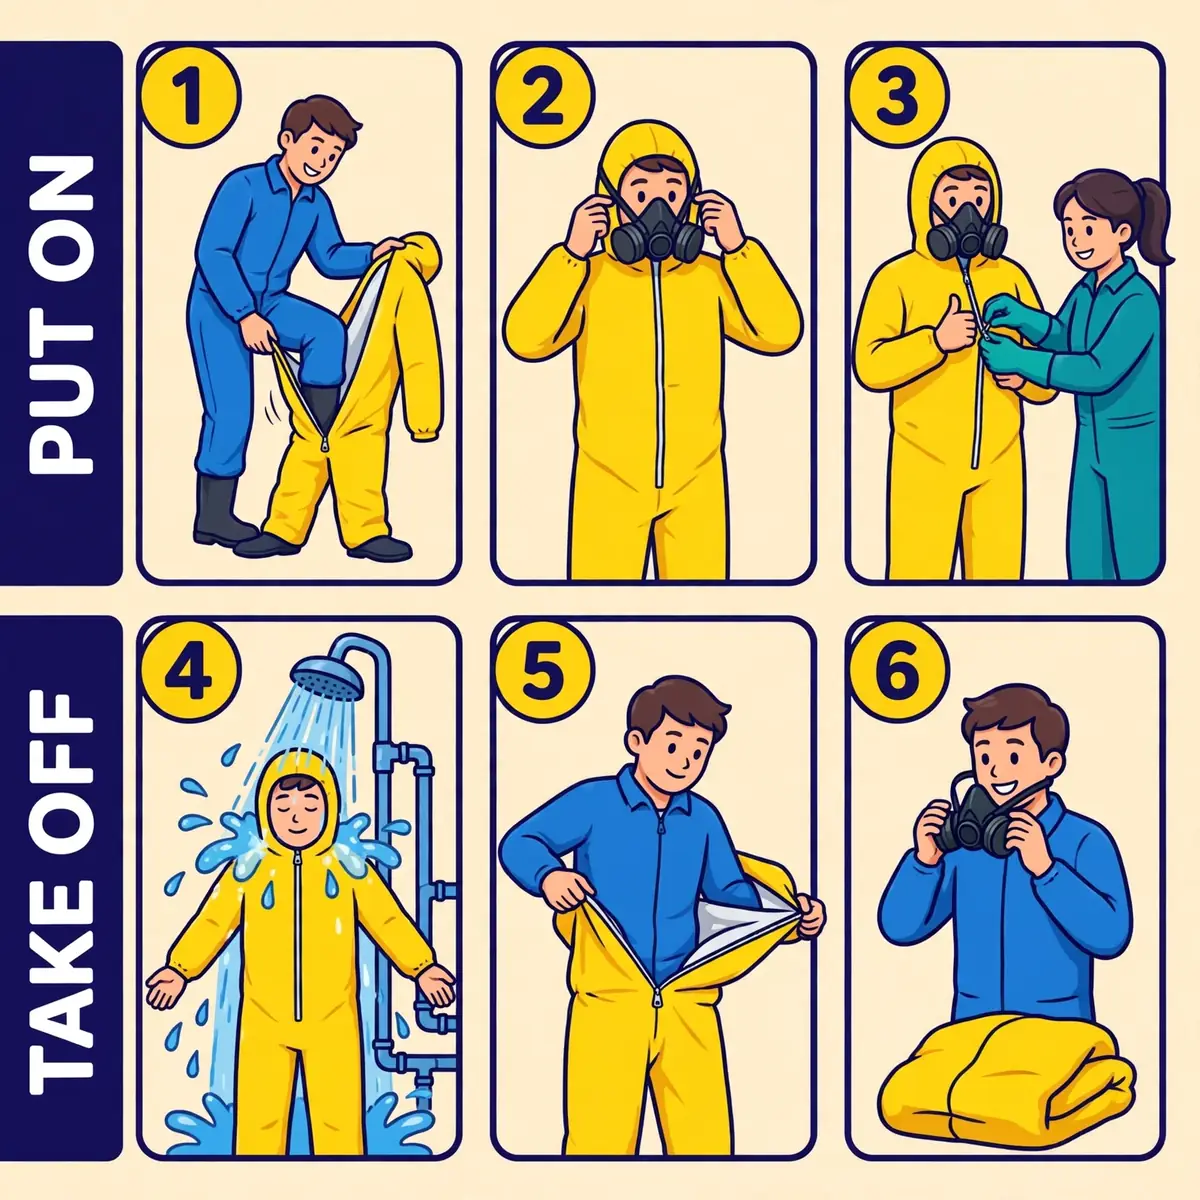
Donning and doffing are part of the safety procedure, not a chore before and after it. A surprising amount of exposure happens while gear is being removed, when a tired worker touches the outside of a contaminated suit with bare hands. Both steps follow a set order, and both are easier with a trained helper.
The order matters because each step protects the next one. The respirator goes on before the suit closes, so the lungs are protected before the skin is sealed in. Decontamination happens before removal, so the outside is as clean as it can be before hands touch it. A crew that repeats the same order every time makes fewer mistakes under pressure.
Donning: the order that works
Inspect the suit before putting it on, and do it with the helper watching. Then follow a fixed order so nothing is missed.
- Check the suit, zips, seams, visor, gloves and boots for tears, cracks or damage.
- Put on inner gloves and any cooling vest, then step into the suit and pull it up.
- Fit the respirator, check its seal, and confirm the air supply is on and full.
- Close the suit, seal the zip, tape the wrists and ankles as the procedure requires.
- Fit outer gloves and boots, and check every connection once more with the helper.
- Confirm communications work, agree the signals, and confirm the entry plan and the exit route.
The helper's job is to watch the back, the seals and the zip, which the wearer cannot see. The helper also checks the air gauge and the time, and stays in contact while the wearer is inside. Never enter alone in a gas-tight suit, and never skip the helper because the job looks quick.
Doffing: where most exposures happen
Remove the suit in the order that keeps its outside away from the skin. Decontamination comes first, while the suit is still on, so the worst of the contamination is washed off before any skin is exposed. Then the suit comes off from the outside in, with the helper guiding each step.
- Go through decontamination while still suited, and let the helper check the result.
- Remove outer gloves and boots, turning them inside out as they come off.
- Open the suit and peel it down and away from the body, without touching the outside.
- Remove the respirator last, once the suit is off and the air is clear.
- Bag the suit for disposal or decontamination, wash hands and face, and report any damage or exposure.
If the suit tears during removal, stop, tell the helper, and treat it as an exposure: finish the removal carefully, wash the affected skin, and report it. A tear that is hidden or ignored is how a small exposure becomes a health problem. Practice emergency procedures regularly, so the donning and doffing order is automatic before it is needed for real.
WarningNever remove a contaminated suit before decontamination, and never touch the outside of the suit with bare hands. The outside is where the hazard is, and the removal step is when it is closest to the skin.
The buddy system
Every entry needs a buddy, and the buddy stays outside the hot zone where they can watch, communicate and call for help. The buddy checks the seals before entry, watches the clock, watches for signs of heat stress or distress, and manages the exit. The buddy also runs the decontamination line when the wearer comes out.
The buddy is not a spare pair of hands. The buddy is the safety system for a worker who cannot see their own back, cannot hear well inside a hood, and cannot judge their own heat stress reliably. A lone entry in a hazmat suit is a failure of planning, not a sign of confidence. If no buddy is available, the entry waits.
Decontamination, inspection, storage and disposal
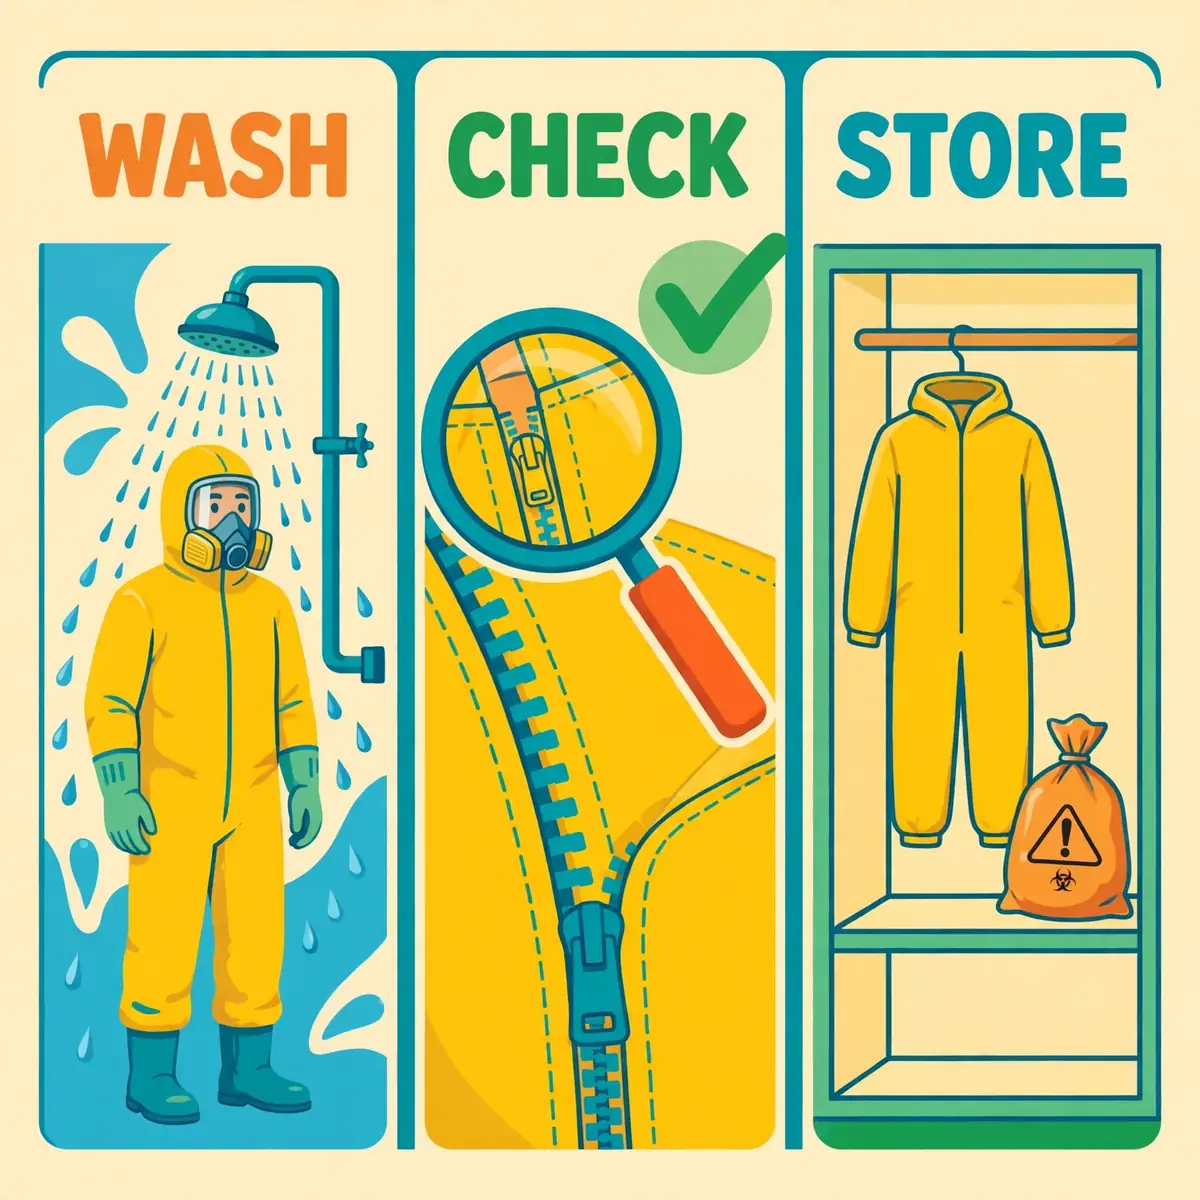
A suit's job does not end when the wearer steps out of the hot zone. The suit carries the hazard out with it, and the next steps decide whether that hazard spreads to the wearer, the crew and the clean areas. Decontamination, inspection and storage are part of the procedure. They are written into the PPE programme for the same reason the selection is.
The standard requires a decontamination procedure for hazardous waste operations. The OSHA Technical Manual covers inspection, storage and maintenance of chemical protective clothing in detail. The practical rule is simple: clean it before it comes off, check it before it goes on. Store it so it is ready next time.
Decontamination before removal
Decontamination removes the hazard from the outside of the suit before the suit is opened. The usual method is a wash and rinse at the decon line, working from the top down so contamination flows away from the face and the zip. The decon solution and the method depend on the chemical, and the site plan names them before entry.
Disposable suits are bagged after decontamination, not decontaminated for reuse. A single-use coverall is bagged rather than washed, and the bag is labelled and disposed of as contaminated waste. Reusable suits are decontaminated, inspected and dried before storage, and any suit that cannot be fully decontaminated is retired. Never take a contaminated suit into a clean area, a vehicle or a rest area.
Inspection before, during and after use
Inspect the suit before every use, during the task where possible, and after decontamination. Before use, check the fabric, seams, zips, visor, valves, gloves and boots for tears, cracks, stiffness or damage. For a gas-tight suit, inflate it and check that it holds air, and listen and feel for leaks at the seams and the zip.
During use, the buddy watches for damage the wearer cannot see, and the wearer reports any tear, loss of air, fogging that will not clear, or smell inside the suit at once. After use, inspect again before storage, and record any damage and any repair. A suit with a repaired seam or a replaced zip needs a fresh leak check before it is used again. A suit that fails inspection is retired, not patched and hoped for.
Storage, service life and disposal
Store suits in a cool, dry place away from sunlight, heat and chemicals, hung or laid flat as the manufacturer directs. Keep them away from sharp objects and away from ozone sources such as electric motors. Check the manufacturer's service life and expiry date, and retire suits that have reached it, even if they look sound. Materials age, and an old suit can fail without visible warning.
Heavier Level A suits are usually designed to be reused after decontamination and inspection. Lighter gear is often limited-use or disposable, and it is thrown away after any contamination or damage. The decision is the manufacturer's: if the maker says single use, it is single use. Disposal follows the site's waste rules for contaminated PPE. The waste is bagged, labelled and removed by the route the plan names.
Heat stress and the limits of a suit
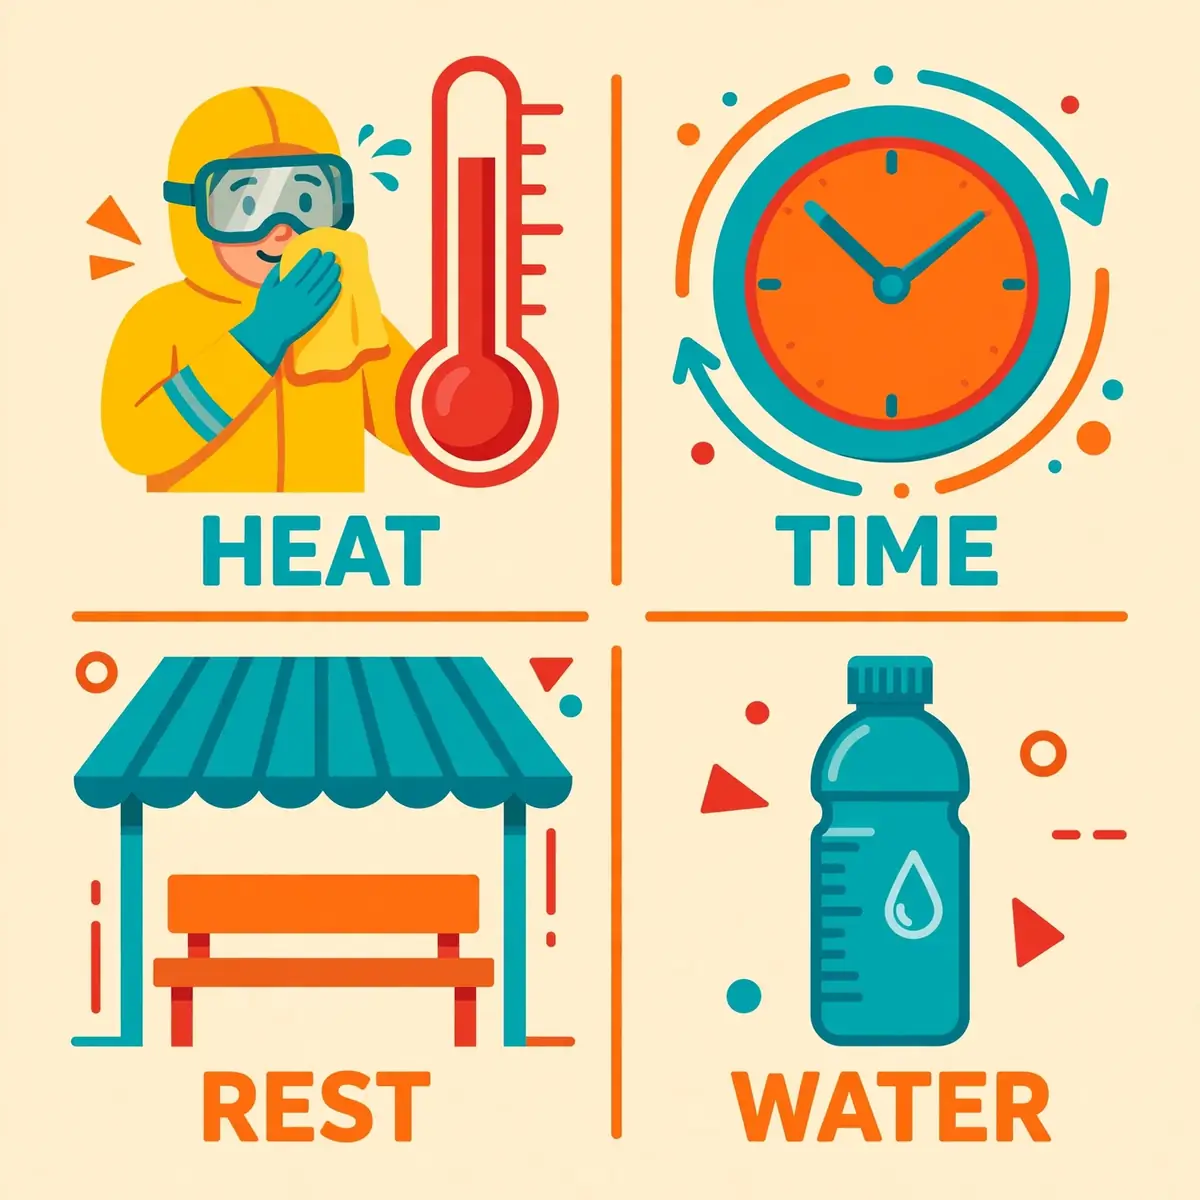
A suit protects by sealing the wearer off from the outside, and the seal is also its biggest drawback. Fully encapsulating suits trap body heat and sweat, and the wearer cannot cool down by sweating into the air. Heat stress is the most common reason a suited entry must stop early. It is the risk that crews underestimate most often.
The risk rises with the level of protection. A Level A suit traps more heat than a Level D uniform, and the SCBA adds weight and breathing resistance on top. The plan must treat heat as a hazard of the work, with the same attention as the chemical itself. OSHA's guidance on heat exposure covers the controls that apply.
WarningHeat stress can build without the wearer noticing. The buddy watches for confusion, clumsiness and unusual behaviour. Any of those signs means the wearer comes out at once. Do not wait for the wearer to ask for a break.
Why suits cause heat stress
The suit blocks the body's main way of losing heat. Sweat cannot evaporate inside a sealed suit, so it pools, and the core temperature rises. Heavy work makes it worse, because the muscles produce more heat. The SCBA makes breathing harder, which adds to the effort. Warm weather, direct sun and a long task push the risk higher still.
Suits also cause other strains that add up: limited vision through a visor, restricted movement, extra weight, and difficulty communicating. The wearer tires faster, makes more mistakes, and judges risk less well as the entry goes on. That is why time inside a suit is planned, not left open-ended, and why the buddy watches the wearer rather than the task.
Work and rest: planning the time inside
There is no blanket safe time for wearing a suit. The time depends on the air supply, the heat, the workload, the suit level and the wearer. SCBA cylinders are rated for a set number of minutes. Heavy work can empty a cylinder faster than the rating suggests. Plan the entry around the shortest limit, not the longest.
Set work and rest cycles based on temperature and workload before the entry starts. Provide shaded or cooled rest areas and plenty of water, and monitor workers' heart rates and body temperatures during breaks. Build the exit time into the plan, including decontamination, so nobody runs out of air or overheats on the way out. If the plan has no rest cycle, it is not finished.
Vision, movement and communication limits
A suit narrows what the wearer can see, hear and do. Visors fog, hoods muffle sound, gloves cut dexterity, and the suit itself limits reach and bending. Tasks that are simple in normal clothes, such as turning a small valve or reading a gauge, become slow and clumsy inside a suit. Plan the task with that in mind, and keep the steps simple.
Agree the communication method before entry. Radios may need a throat microphone or a speaker inside the hood. Hand signals need to be agreed and practised where radios fail. The buddy and the wearer check that communication works before the wearer enters, not after. If the wearer cannot be heard or seen, the entry stops.
What a hazmat suit cannot protect against
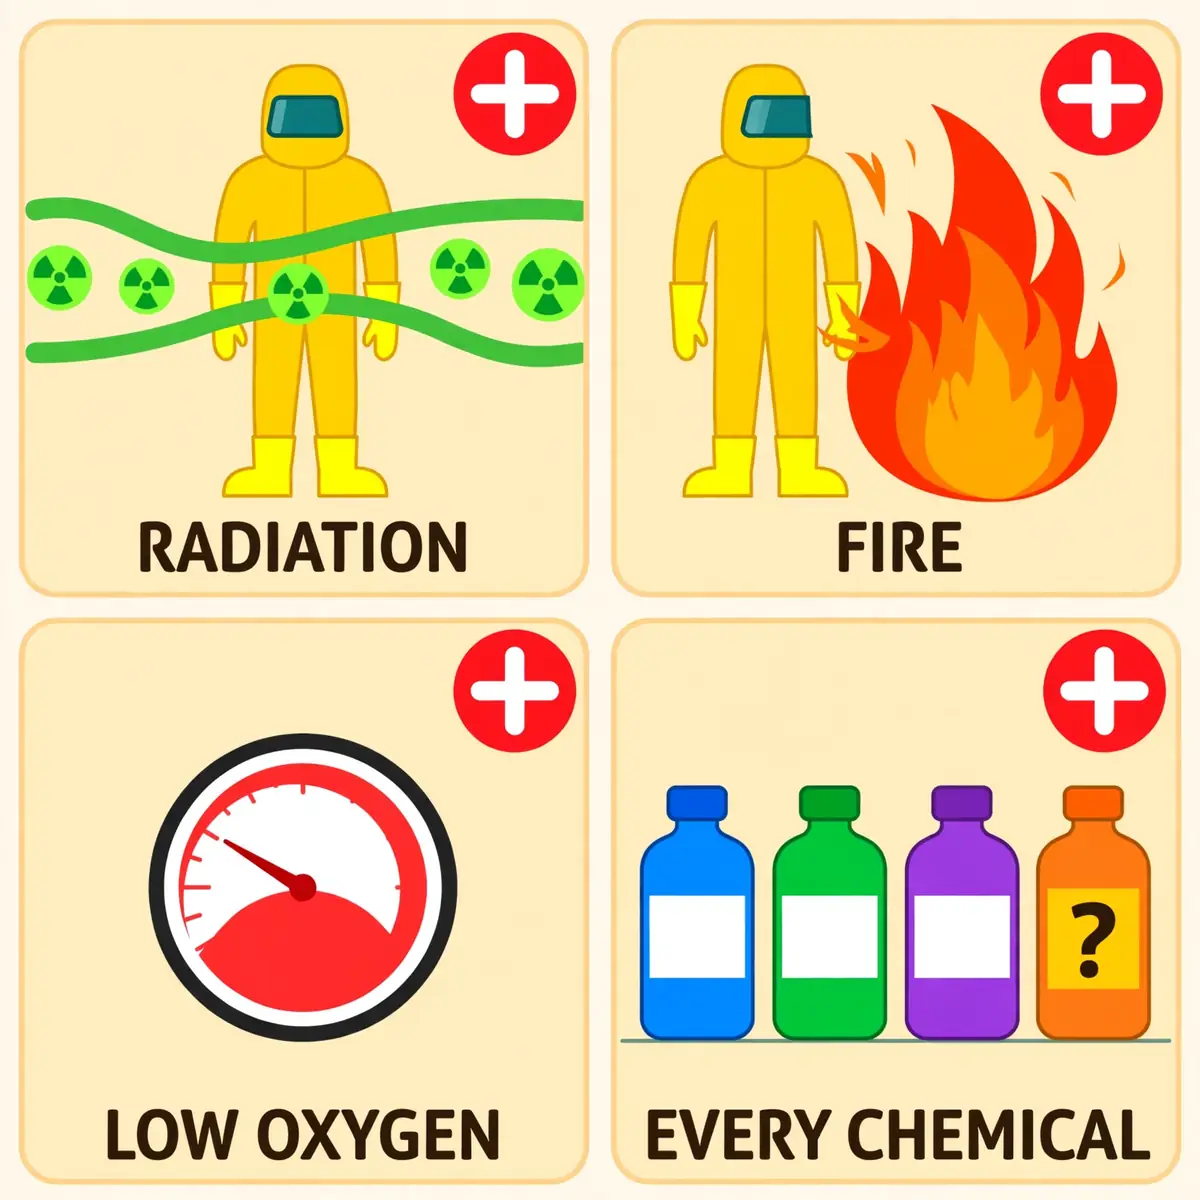
A suit has limits, and knowing them is part of choosing it. No single set of PPE and chemical protective clothing guards against all hazards. The suit can even create its own risks, such as heat illness, fatigue and impaired movement. A crew that knows the limits plans around them. A crew that does not finds them out inside the hot zone.
The limits below are the ones that cause the most confusion. Each one has a control that belongs in the plan. None of them is fixed by buying a heavier suit. The answer is usually a different control: distance, shielding, ventilation, or simply not entering.
Radiation: dust yes, gamma no
A chemical suit keeps radioactive dust and particles off the skin and out of the body, when it is worn with a respirator. It also blocks alpha particles and most beta particles, which cannot pass through the suit material. That makes it useful for contamination control at a radiological incident, where the hazard is dust that can be inhaled or swallowed.
It does not shield the wearer from gamma or neutron radiation, which pass through the suit as if it were not there. For gamma radiation, the controls that matter are time, distance and shielding: spend less time near the source, stand further away, and put dense material between the source and the worker. A suit never replaces those controls, and a crew that trusts it for gamma protection is unprotected.
Fire and heat
A chemical suit is not a fire suit. Most chemical suit materials offer little or no thermal protection, and some melt or burn when exposed to flame or hot surfaces. A suit that resists a chemical can still fail in seconds near a fire, and a melted visor or a burning seam leaves the wearer with no protection at all.
Flame resistance is a separate property, tested separately, and a chemical suit must not be assumed to have it. Where fire is a risk, the plan needs fire-resistant clothing under or over the chemical suit as the manufacturer directs, or a different ensemble altogether. Check the suit's flame rating before entry, and never enter a fire risk area in a chemical suit that has none.
Oxygen deficiency without supplied air
No chemical suit supplies oxygen. A suit that seals the wearer off from a chemical also seals them off from nothing else, and the air inside the suit is the air the wearer brought in. In an oxygen-deficient atmosphere, the wearer needs supplied air from an SCBA or an airline. An air-purifying respirator is useless because there is nothing to filter.
The threshold is 19.5% oxygen. Below that, only Levels A and B, with supplied air, are acceptable. That is why the air is measured before entry, and why the respirator is chosen before the garment. A suit that is perfect for the chemical still kills if the air cannot be breathed. For the rules on oxygen and confined air, see the confined space entry guide, since Level A conditions include confined and poorly ventilated areas.
Every chemical
No material resists every chemical, and no suit is universal. A suit that holds an acid for hours may fail against a solvent in minutes. A material that blocks a liquid may let its vapour through by permeation. The manufacturer's data is per chemical, and a gap in the data is a gap in the protection.
The defence is to check the data for the actual chemicals on the site, including mixtures, and to keep checking as the site changes. Where the data does not exist, the options are to get it, to choose a different material, or to choose a higher level. Buying the most expensive suit on the shelf is not a substitute for that check, and a cheap suit with the right data beats an expensive one with the wrong material.
Common mistakes
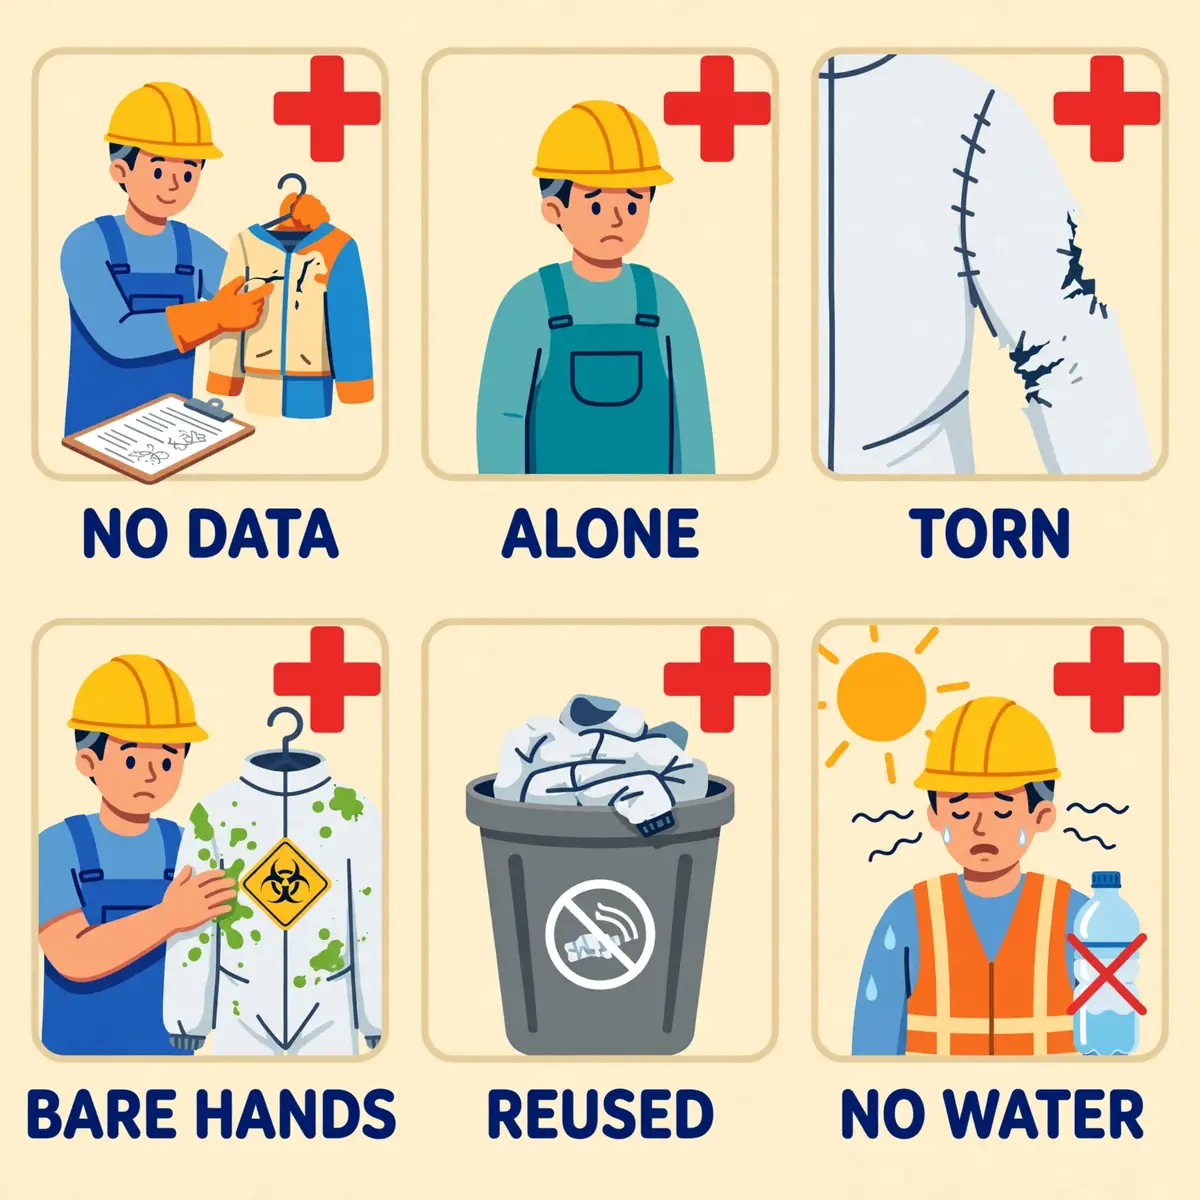
Most hazmat suit failures come from decisions made before entry, not from the suit itself. The mistakes below appear in incident reports and training feedback again and again, and each one has a simple fix. Run through them before the next entry, and check that none of them is hiding in the plan.
- Choosing the suit before identifying the chemical, so the material data is never checked.
- Treating the level as a guarantee, instead of a starting point that site information can change.
- Confusing a garment type with a protection level, and buying a Type 6 suit for a gas hazard.
- Wearing an air-purifying respirator where oxygen is low or the contaminant is unknown.
- Skipping the pre-use inspection, so a torn seam or a cracked visor is found inside the hot zone.
- Removing a contaminated suit before decontamination, and touching the outside with bare hands.
- Entering alone, with no buddy, no agreed signals and no rescue plan.
- Ignoring heat stress until the wearer is confused, clumsy or unable to continue.
- Reusing a disposable suit, or storing a reusable suit wet, dirty or past its service life.
Every one of these mistakes is preventable, and prevention is cheaper than the alternative. The fixes are unglamorous: identify the chemical, read the data, inspect the suit, work with a buddy, decon before removal, and watch the clock and the heat. A crew that does those six things avoids most of what goes wrong with hazmat suits.
Frequently Asked Questions
What level of hazmat suit do I need?
It depends on the hazard, the air and the skin risk. Use Level A when the hazard is unknown or harms the skin, Level B when the air is unsafe but the skin risk is low, Level C only when the contaminant is identified and measured and a filter can remove it, and Level D where there is no known air or splash hazard. The employer decides the level after a hazard assessment, and the level can change as monitoring reveals more.
What is the difference between a Level A and a Level B suit?
The breathing protection is the same: a positive-pressure SCBA or supplied-air respirator with an escape SCBA. The difference is the skin protection. Level A encloses the wearer and the respirator in a totally encapsulating, vapour-tight suit. Level B uses hooded chemical-resistant clothing with the respirator outside it, which stops splashes but not gases and vapours.
What is the difference between hazmat suit levels and suit types?
Levels (A to D) describe the whole ensemble: respirator plus garment, chosen for the hazard at a site. Types (1 to 6) describe one garment: which form of exposure it resists, from gas to light splash. A type never replaces a level, and a level is never a garment rating. Both answers are needed, plus the material data for the actual chemical.
How long can you wear a hazmat suit?
There is no single safe time. It depends on the air supply, the heat, the workload, the suit level and the wearer. SCBA cylinders are rated for a set number of minutes, and heavy work empties them faster. Fully encapsulating suits trap heat, so work and rest cycles are planned from temperature and workload, and the exit time, including decontamination, is built into the plan.
Can you reuse a hazmat suit?
It depends on the suit. Heavier Level A suits are usually designed to be reused after decontamination and inspection. Lighter gear is often limited-use or disposable, and it is thrown away after any contamination or damage. The manufacturer decides: if the maker says single use, it is single use. A reused disposable suit is not a saving, it is a risk.
Does a hazmat suit protect against radiation?
Partly. A chemical suit worn with a respirator keeps radioactive dust and particles off the skin and out of the body. It blocks alpha and most beta particles. It does not shield against gamma or neutron radiation, which pass through the suit. For gamma radiation, the controls are time, distance and shielding.
Do I need training to wear a hazmat suit?
Yes. Workers must be trained before they enter a hazardous site. The training covers how to select and use PPE, its limits, and the donning, doffing and decontamination procedures. In the United States, HAZWOPER training under 29 CFR 1910.120 sets the hours: 40 hours for workers who regularly enter uncontrolled hazardous waste sites, 24 hours for workers with occasional exposure, and an 8-hour refresher each year. The OSHA training guide covers the general training duties.
Sources
- OSHA, 29 CFR 1910.120 Appendix B — General Description and Discussion of the Levels of Protection and Protective Gear
- OSHA, 29 CFR 1910.120 — Hazardous Waste Operations and Emergency Response (HAZWOPER)
- OSHA, 29 CFR 1910.134 — Respiratory Protection
- OSHA, Technical Manual, Section VIII, Chapter 1 — Chemical Protective Clothing
- US EPA, Personal Protective Equipment (Emergency Response)
- NFPA, NFPA 1990 — Standard for Protective Ensembles for Hazardous Materials and CBRN Operations (2022 edition)
- HSE, Personal Protective Equipment (PPE) at Work
- HSE, Control of Substances Hazardous to Health (COSHH)
- OSHA, Heat Exposure