Handle a hazardous material on a construction site in seven moves. Each move has a legal duty behind it in the United States and the United Kingdom. The duty sits with the employer and the supervisor, not with the worker who happens to pick the container up.
- Identify the material and its hazards.
- Read its label and safety data sheet.
- Plan the task and the controls.
- Store it apart from anything it reacts with.
- Move it in a closed and labelled container.
- Use it with the controls and protective equipment its sheet calls for.
- Dispose of the waste through a licensed route.
The Occupational Safety and Health Administration (OSHA) requires a written hazard communication programme, labelled containers, safety data sheets and training for every hazardous chemical on site. In the United Kingdom, the Control of Substances Hazardous to Health Regulations 2002 (COSHH) require a risk assessment and controls that prevent or adequately control exposure. Both systems agree on the order of work: know what is there first, then control it.
What counts as a hazardous material on a construction site
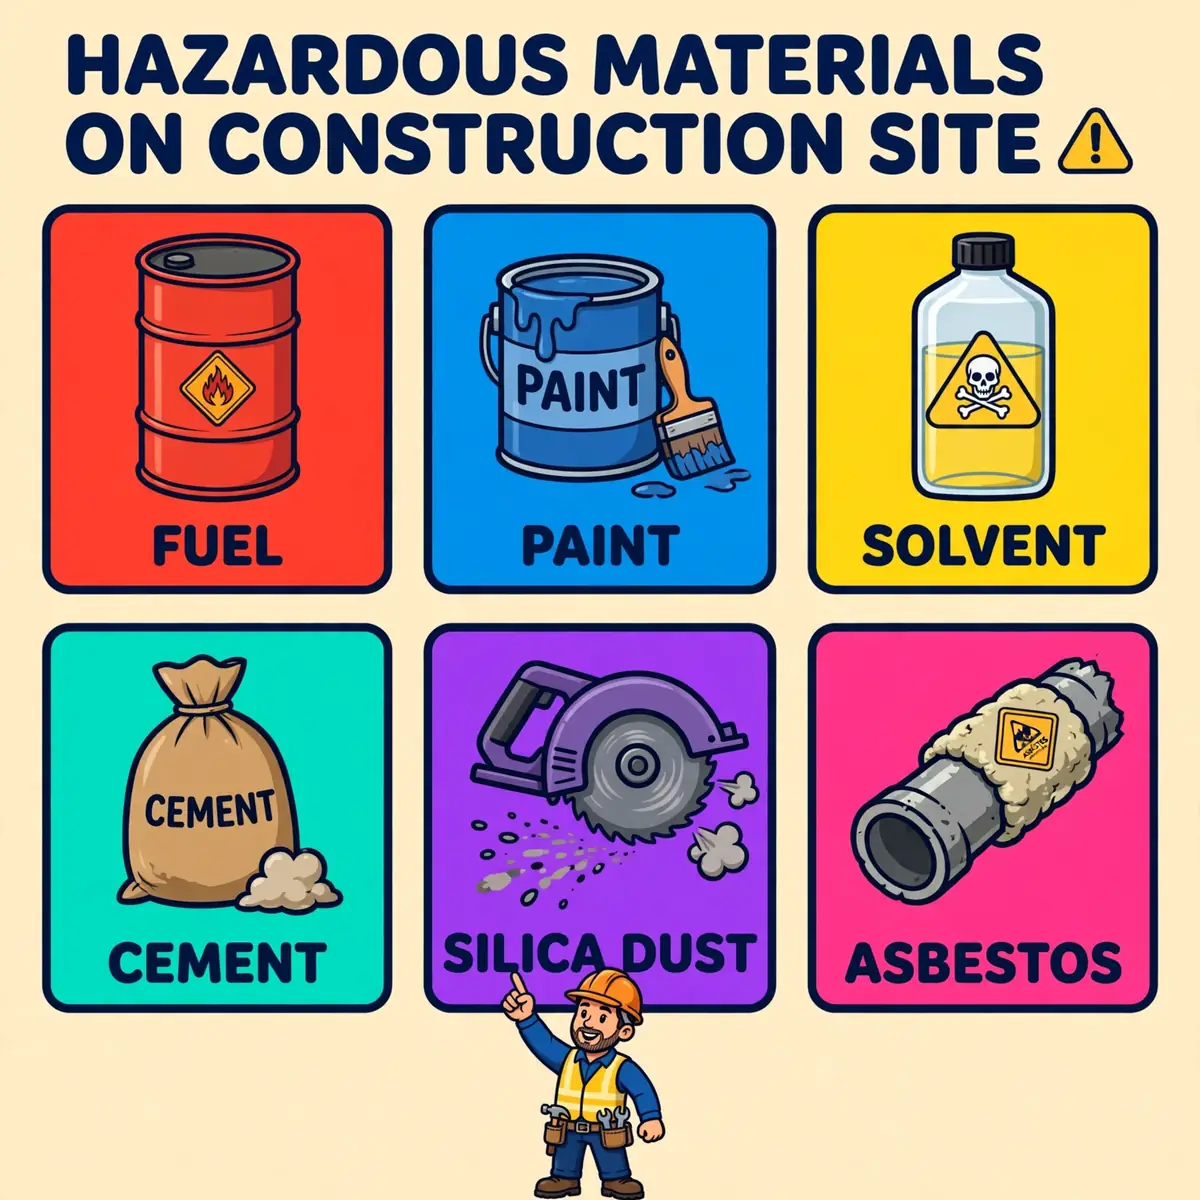
A hazardous material is any substance that can harm people, property or the environment through its chemistry, its dust or its fumes. On a construction site that covers far more than drums marked with a skull. Fuels, solvents, paints, adhesives, sealants, cleaning agents, cement, concrete dust, asbestos, lead paint, welding fume and diesel exhaust all count. Even a familiar material becomes hazardous when the task changes how it behaves: dry cement is a skin irritant, while wet cement can cause chemical burns.
OSHA groups hazardous materials into three broad families. The first covers carcinogens, toxins, irritants and corrosives. The second covers combustible liquids, gases, explosives and reactive agents. The third covers chemicals that produce dusts, gases, fumes or smoke with any of those properties. A single product can sit in more than one family at once, so check the label rather than guessing from the product name.
The materials a site meets most often
Most sites meet the same short list again and again. Asbestos hides in old insulation, floor tiles, roofing and cement products. Lead sits in old paint, pipes and some industrial coatings. Silica dust rises when concrete, stone or masonry is cut, ground or drilled. Solvents and adhesives give off vapours during finishing work. Diesel fuel and oils bring a fire risk and a skin risk at the same time.
Other materials appear less often but cause the worst incidents when they do. Polychlorinated biphenyls (PCBs) sit in old transformers, hydraulic equipment and caulking. Mercury sits in old switches and fluorescent lamps. Mould and biological contaminants grow in damp conditions during renovation. A site survey that only looks for the obvious five will miss these. So the survey must cover the building's history as well as its visible materials.
How a material harms the body
A hazardous material reaches the body through four routes. Inhalation is the most common on construction sites: dust, fumes, gases and vapours enter through the lungs and pass into the bloodstream. Skin absorption follows when corrosive liquids, solvents or oils sit on the skin. Ingestion happens through contaminated hands, food or drink in the work area. Injection is the rarest route, caused by high-pressure equipment or a contaminated sharp object that punctures the skin.
The route decides the control. A respirator helps against inhalation but does nothing for skin contact. Gloves help against skin contact but nothing against fumes. That is why the safety data sheet lists the routes for each product, and why one pair of gloves never covers every chemical on site. The chemical hazard types and the four exposure routes are explained in full on the site's chemical hazards page.
WarningNever transfer a hazardous chemical into an unlabelled container, a drinks bottle or a food container. An unlabelled container is how the next worker gets poisoned.
How to identify hazardous materials before work starts
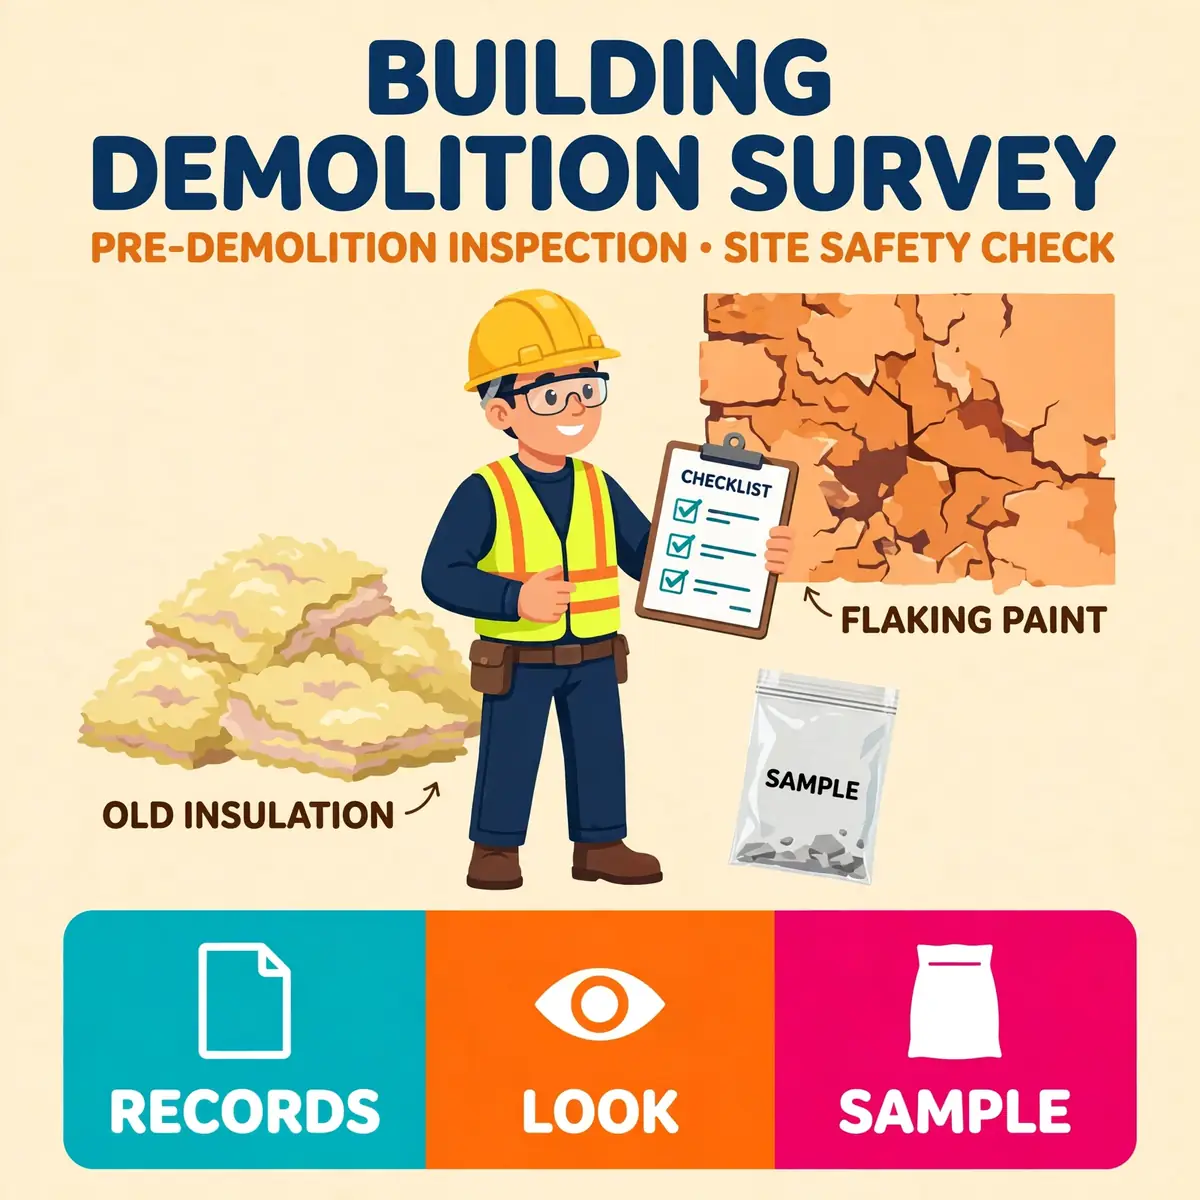
Knowing how to identify hazardous materials on a construction site starts before the first delivery, not when a worker opens a drum. The supervisor walks the site, reads the building records and lists every material that will be brought in, disturbed or uncovered. For a new build, the list comes from the product schedule and the delivery notes. For demolition or refurbishment, the list comes from a survey of the existing building, because the dangerous materials are already there.
Three sources feed the list: the records of what the building contains, a visual inspection of the site, and sampling and testing of anything suspected. Records include old drawings, previous surveys and the client's own information. Visual inspection spots suspect insulation, old paint, damaged lagging and stained ground. Sampling settles what the eye cannot: a laboratory test confirms asbestos, lead or contamination in soil.
Survey the existing building first
On refurbishment and demolition work, the survey is the most important step in the whole procedure. Asbestos and lead were used for decades, and they hide inside walls, floors and roofs. A management survey finds materials that will be disturbed by normal work. A refurbishment and demolition survey goes further and finds materials hidden inside the structure. The survey report names each material, its location and its condition.
Do not start stripping, cutting or demolishing until the survey report is in hand. Disturbing asbestos without a survey spreads fibres through the whole site and turns a controlled removal into an emergency. If the survey finds asbestos, only a licensed contractor removes it in most cases, and the removal follows its own plan. The site team does not improvise around it.
Treat unknown materials as hazardous
Every site finds something nobody expected: a buried drum, a stained patch of soil, an unlabelled can in a locked room, a pipe that does not appear on any drawing. The rule for all of them is the same. Stop work in that area, keep people away, and treat the material as hazardous until sampling proves otherwise. Guessing that an unknown drum is harmless is how exposures happen.
Report the find to the supervisor the same day, and record it in the site log with the location, the time and a photograph. The supervisor arranges sampling and, if the result is hazardous, adds the material to the site inventory and the hazardous materials plan. Work in that area resumes only when the plan covers the new material. A short delay costs far less than a contaminated crew.
AlertA buried drum or a stained patch of soil can hold solvents, fuel or contaminated waste from decades ago. Stop work, keep people away, and sample it before anyone digs further.
Read the label and the safety data sheet
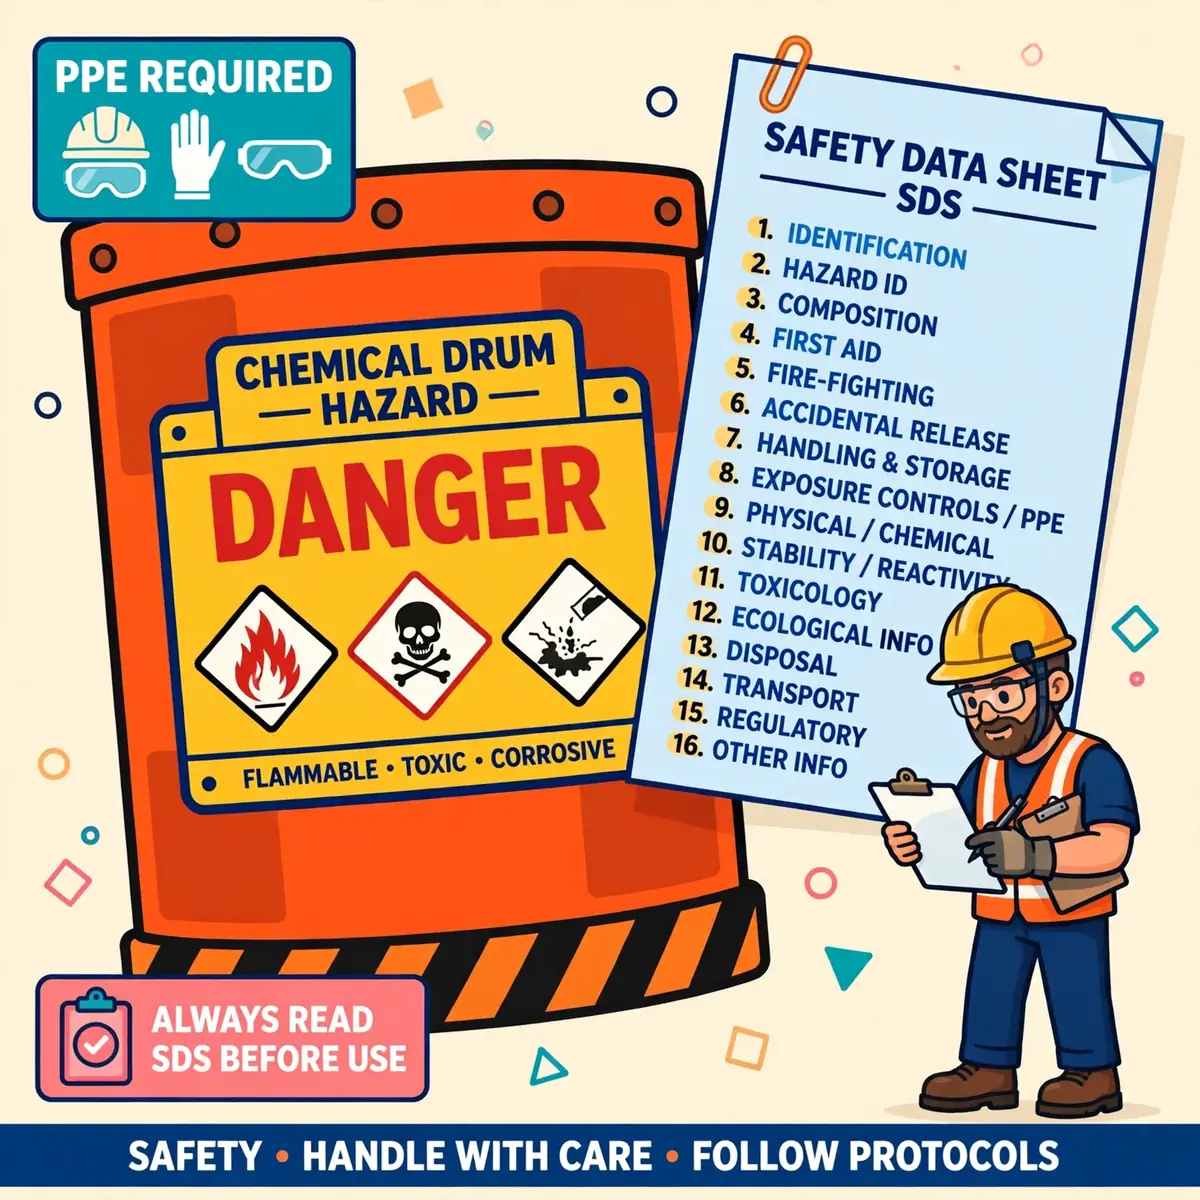
Hazardous materials labeling on construction sites follows the Globally Harmonized System. Every hazardous chemical that arrives on site carries two sources of information: the label on the container and the safety data sheet (SDS) that comes with it. The label is the quick warning. The SDS is the full instruction. Chemical safety depends on both being used together.
OSHA's Hazard Communication Standard, 29 CFR 1910.1200, requires employers to keep labels intact, keep an SDS for each hazardous chemical, and train workers on both. The standard was updated in 2024 to align with Revision 7 of the Globally Harmonized System (GHS) for classifying and labelling chemicals.
A shipped container label carries six pieces of information: the product identifier, a signal word, pictograms, hazard statements, precautionary statements, and the name, address and telephone number of the responsible party. The signal word is either "Danger" for severe hazards or "Warning" for less severe ones. Nine GHS pictograms cover the hazard classes, from the flame for flammables to the skull and crossbones for acute toxicity and the health hazard symbol for carcinogens and sensitisers.
What the label tells the worker
The label answers three questions in seconds: what is it, what harm can it do, and what must I do about it. The pictograms show the hazard class at a glance. The hazard statements describe the harm, such as "Causes severe skin burns and eye damage" or "May cause cancer by inhalation". The precautionary statements give the action, such as "Wear protective gloves" or "Use only outdoors or in a well-ventilated area".
Workplace containers need labels too. When a chemical is decanted from its original drum into a smaller container, that container must carry at least the product identifier and general information about the hazards. The only exception is a container that one worker fills and empties during a single shift for their own immediate use. Anything left overnight, handed to another worker or stored must be labelled.
What the safety data sheet adds
An SDS has 16 sections in a fixed order, and four of them matter most before a task starts. Section 2 names the hazards and the label elements. Section 4 gives first aid measures for each route of exposure. Section 7 gives handling and storage advice, including incompatible materials. Section 8 gives exposure controls and the personal protective equipment the manufacturer specifies. Section 14 carries the transport information, including the proper shipping name and hazard class for the road.
Keep the SDS where the work happens, not in an office a mile away. OSHA requires that workers can reach the SDS for every hazardous chemical in their work area without asking a supervisor to fetch it. A folder at the site office and a second copy at the storage compound covers most sites. Electronic access counts only if every worker can actually reach it during the shift, including workers without a company phone.
TipRead sections 2, 4, 7 and 8 of the safety data sheet before the task starts. Those four sections hold the hazards, the first aid, the storage rules and the protective equipment.
Plan the work before any hazardous material arrives
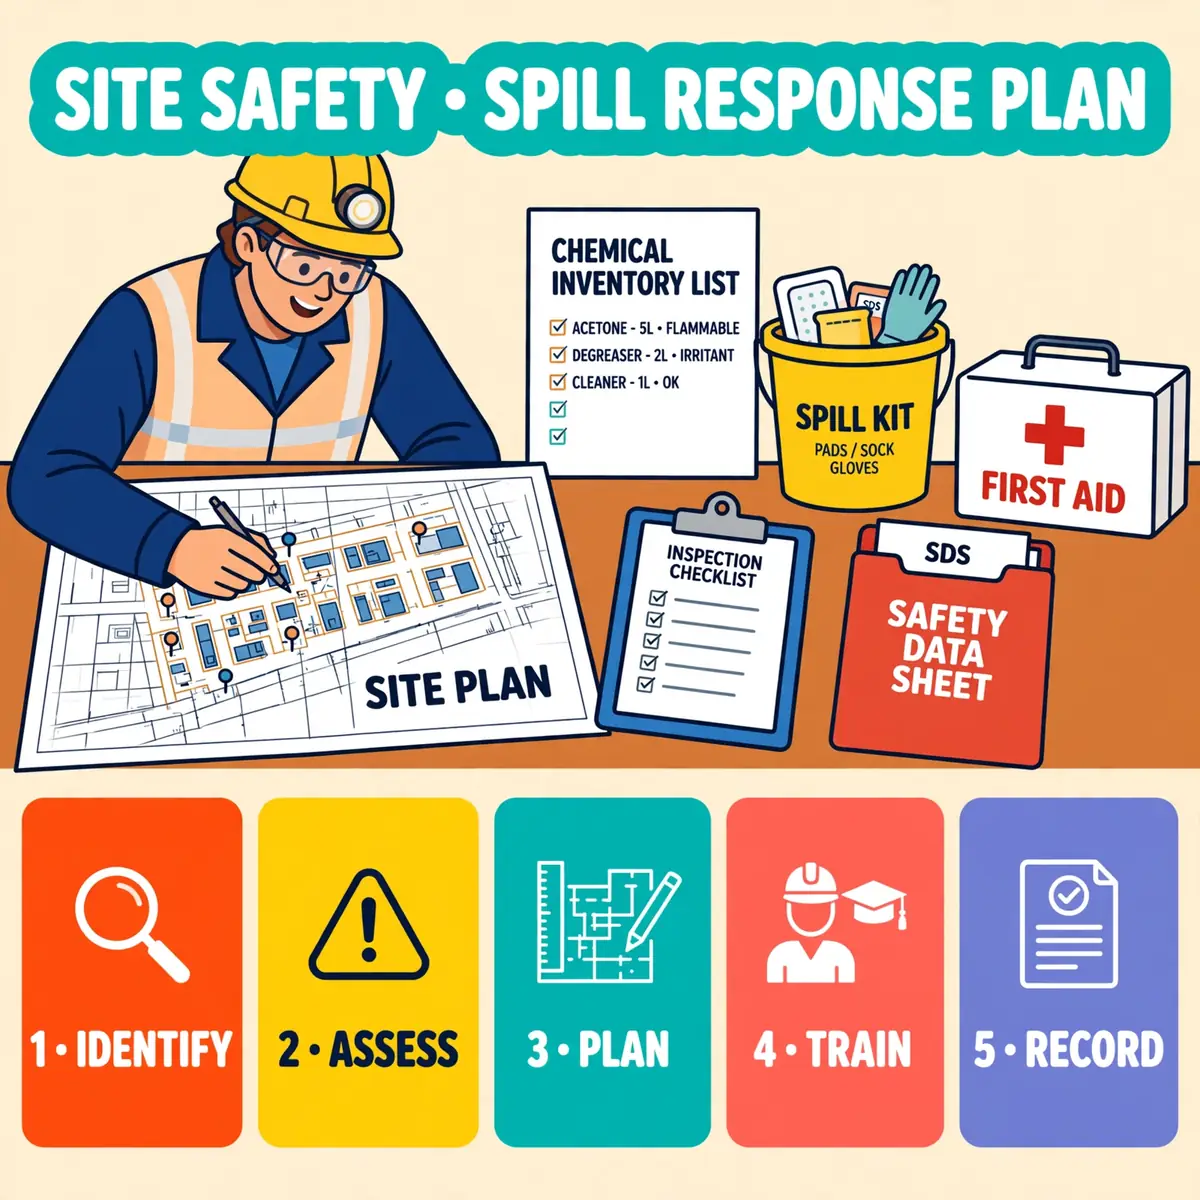
A hazardous materials plan is a short written document that says what is on site, where it is stored, who may handle it, and what happens when something goes wrong. The plan turns how to handle hazardous materials on a construction site from habit into a written procedure. It belongs in the project plan from the start, not as an afterthought when the first drum arrives. The plan names the materials, their risks, the storage and handling procedures, the training each worker needs, the emergency steps and the records the site keeps.
Build the plan from the inventory. List every hazardous material, its quantity, its location and its SDS reference. Add the controls for each one: ventilation, protective equipment, storage rules and the people allowed to use it. Then add the emergency section: the spill kit location, the eyewash station, the first aider, the emergency number and the nearest hospital. A plan that only lists materials without naming the controls is a catalogue, not a plan.
Assess the risk for each task
Every task that uses a hazardous material needs its own risk assessment. The assessment names the material, the quantity, the duration of exposure, the route into the body and the controls that keep exposure below the legal limit. In the United Kingdom this assessment is a legal duty under COSHH Regulation 6. And an employer with five or more employees must record it. In the United States the same thinking sits inside the hazard communication programme and the substance-specific standards.
Start with the risk assessment for the task, then ask what can go wrong with the material itself: a splash, a spill, a leak, a fire, a reaction with another chemical, a dust cloud. For each failure, name the control that prevents it and the control that limits the harm if it happens. The hierarchy of controls ranks those controls: elimination and substitution first, then engineering controls, then administrative controls, with personal protective equipment last.
Substitute the safer product first
The cheapest control is often a different product. A water-based adhesive replaces a solvent-based one. A low-dust mortar replaces a dry mix that must be cut. A pre-mixed sealant replaces a two-part epoxy that needs on-site mixing. Substitution removes the hazard instead of managing it. And it removes the storage, transport and disposal problems at the same time.
Check substitution against the specification before changing anything. Some products are specified for a reason, such as fire resistance or load-bearing strength. And a substitute that fails the specification creates a bigger problem. Where substitution is possible, record the decision in the plan so the next delivery does not bring the old product back by habit.
TipAsk the supplier for a less hazardous alternative before ordering. Suppliers know their range, and a water-based product often costs no more than the solvent version it replaces.
Store hazardous materials safely on site
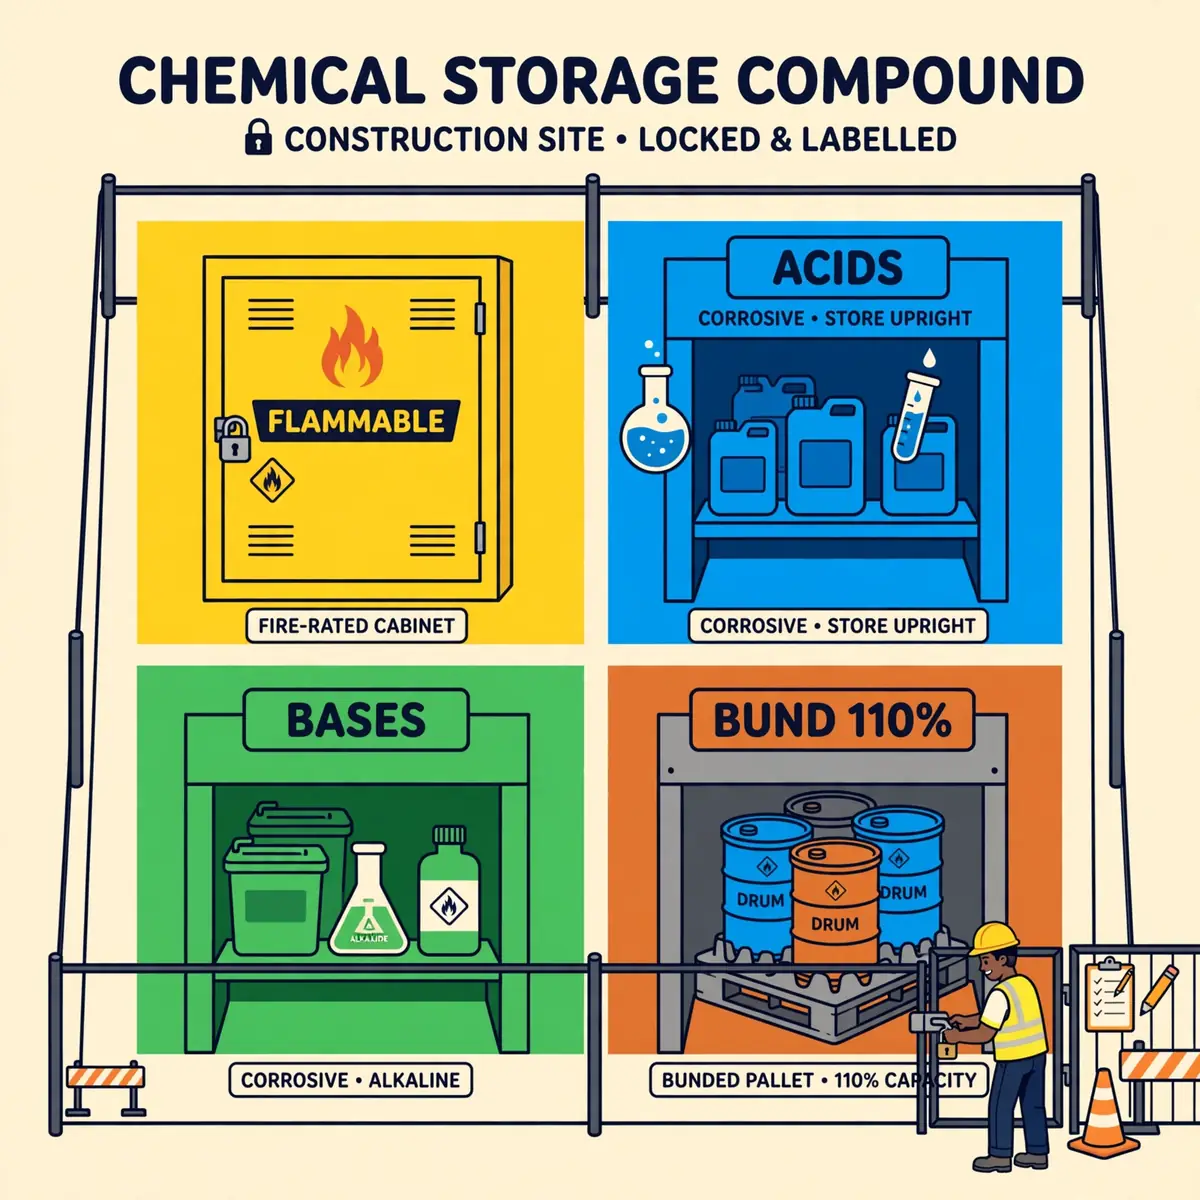
Hazardous materials storage on a construction site follows four rules: keep materials in their original labelled containers, keep incompatible materials apart, keep liquids over secondary containment, and keep the store locked, cool, dry and ventilated. A store that breaks any one of those rules is where the next incident starts. Most chemical fires and reactions on construction sites begin in a store, not at the workface.
Set the store up before the first delivery. Choose a level area away from site offices, welfare facilities and public boundaries, with room for a vehicle to load and unload safely. Mark the area with signs, fence it or lock it, and keep only trained and authorised people inside. Post a list of what is stored there and the SDS folder beside the door, so firefighters and first aiders can see what they are dealing with.
Segregate incompatible materials
Mixing the wrong two chemicals can cause a fire, a violent reaction or a cloud of toxic gas. Segregation is the control that prevents it. The SDS for each product names the materials it must not meet. And the store layout must keep those pairs apart. The table below covers the pairs that cause the most trouble on construction sites.
| Material | Keep away from | Why |
|---|---|---|
| Flammable liquids | Oxidisers, oxygen cylinders, ignition sources | Fire and explosion |
| Acids | Bases, metals that give off hydrogen | Violent reaction, toxic gas |
| Bases (alkalis) | Acids, aluminium | Violent reaction, hydrogen gas |
| Oxidisers | Flammables, organic materials | Fire, sometimes explosion |
| Compressed gas cylinders | Heat, damage, other gas types | Leak, fire, projectile risk |
Give each family its own bay, shelf or cabinet, and label the bay as well as the container. Flammable liquids go in a fire-rated cabinet or a dedicated flammable store, away from heat sources and ignition points. Gas cylinders stand upright, chained or strapped, with valve caps on when not in use, and full cylinders kept apart from empties. Never store chemicals above head height, where a falling container becomes a splash over the person below.
Use secondary containment for liquids
Secondary containment catches a leak before it reaches the ground, a drain or a watercourse. A bunded pallet, a drip tray or a bunded floor all work, as long as the containment can hold the spill. The recognised rule is 110% of the largest container stored inside, or 25% of the total volume stored, whichever is greater. In the United Kingdom, oil storage law requires secondary containment of 110% of the largest container for oil stored above 200 litres.
Check the containment every week and after rain. A bund full of rainwater holds nothing. And a cracked pallet leaks as fast as the drum it was meant to catch. Keep the store floor free of clutter so a leak is visible at once, and keep absorbent material beside the store for small drips. Never let a leaking container sit in the store while a replacement is ordered. Move it to containment and label it as damaged.
WarningNever store a hazardous liquid directly above a drain. One leaking drum can contaminate a watercourse, and the cleanup and the fine will both be larger than the cost of a bunded pallet.
Move hazardous materials around the site
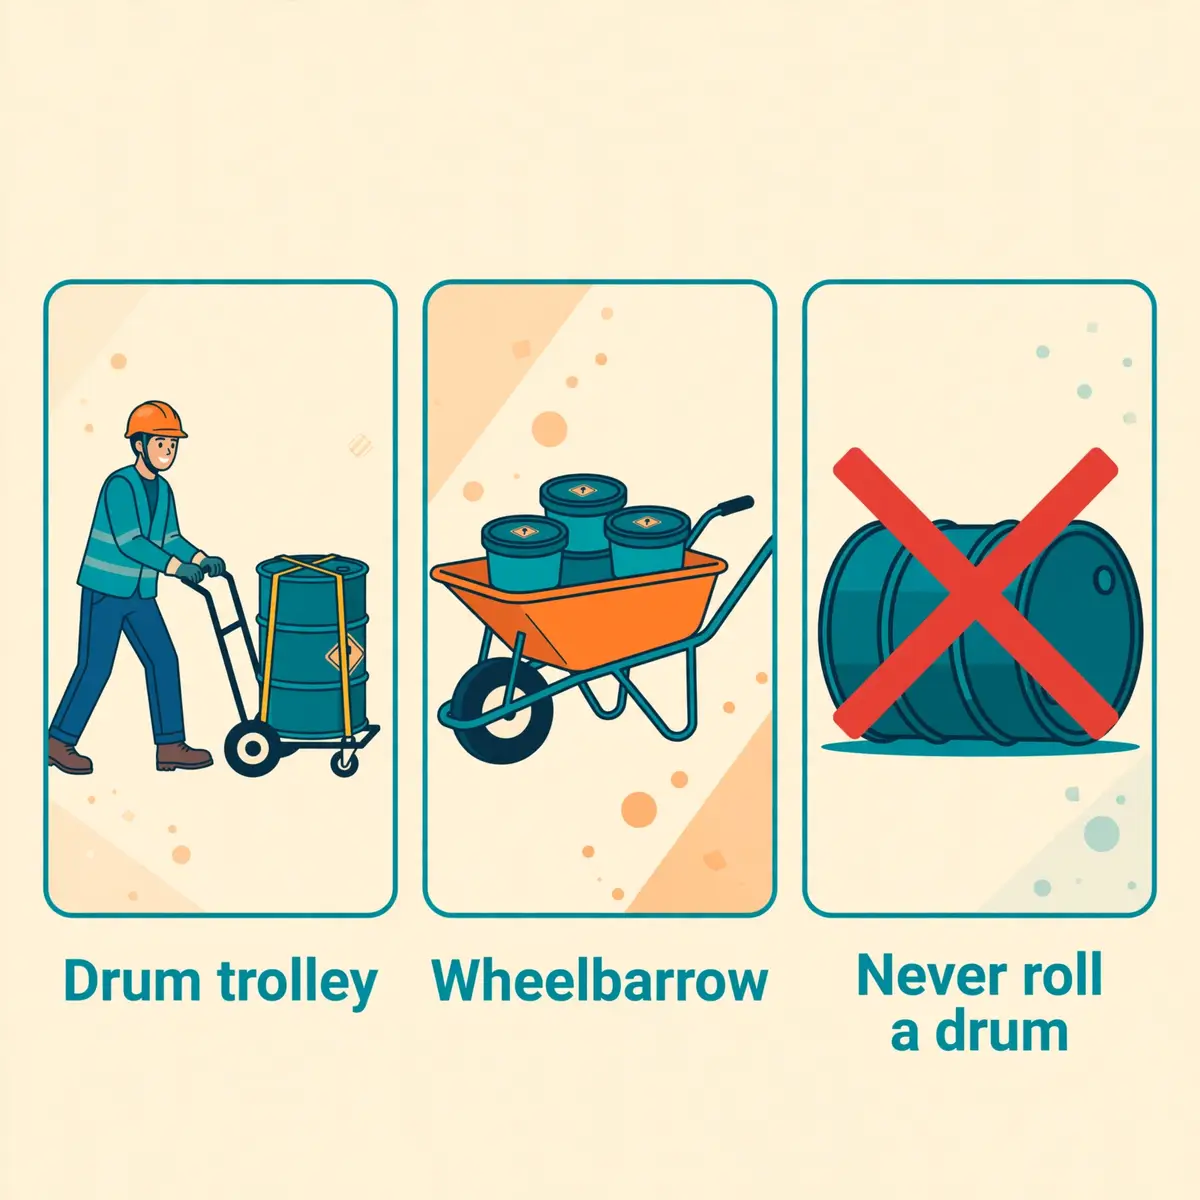
Moving a hazardous material is a task of its own, not a gap between two tasks. The container must be closed, labelled and compatible with its contents. The person moving it must know what it is and what to do if it drops. The route must avoid welfare areas, offices and places where people eat. A drum carried across a busy site in an open bucket is an accident waiting for a trip hazard.
Use the right equipment for the load. A drum trolley or a forklift with a drum clamp moves a full drum safely. A wheelbarrow carries small containers without spilling them. Never roll a drum on its side, never carry a container by its lid or cap, and never stack containers so high that the top one cannot be reached safely. Keep the load low, keep it stable, and keep both hands free for balance where the ground is uneven.
Moving materials on the road is a different set of rules
Once a hazardous material leaves the site on a public road, a second rulebook applies. OSHA's Hazard Communication Standard protects workers. The Department of Transportation (DOT) Hazardous Materials Regulations, 49 CFR Parts 171 to 180, govern transport. The two systems classify differently. And Section 14 of the SDS carries the transport information the driver needs: the proper shipping name, the hazard class and the packing group.
Small loads that a contractor carries for its own work usually fall under the materials-of-trade exception in 49 CFR 173.6. That exception covers hazardous materials carried in direct support of a business other than transport, with an aggregate gross weight limit of 200 kilograms (440 pounds) per vehicle. Larger loads need shipping papers. And a vehicle carrying 454 kilograms (1,001 pounds) or more of Table 2 hazardous materials must be placarded. Drivers who move hazardous materials need the training that 49 CFR 172.704 requires, refreshed every three years.
Hand hazardous waste to a licensed carrier
Hazardous waste leaving the site goes only to a licensed carrier and a permitted facility. The site keeps a record of every load: what it was, how much, who carried it and where it went. In the United States that record is the hazardous waste manifest, and the generator keeps a copy. Never hand waste to an unlicensed carrier, never mix hazardous waste with general site waste, and never let a carrier take a load without the paperwork that describes it.
Check the carrier's licence before the first load, and check the destination facility accepts that waste type. A carrier that takes waste it cannot legally carry leaves the site with the liability. The supervisor signs the manifest, keeps the copy, and chases it if the signed copy does not come back from the disposal facility.
Use hazardous materials safely during the task
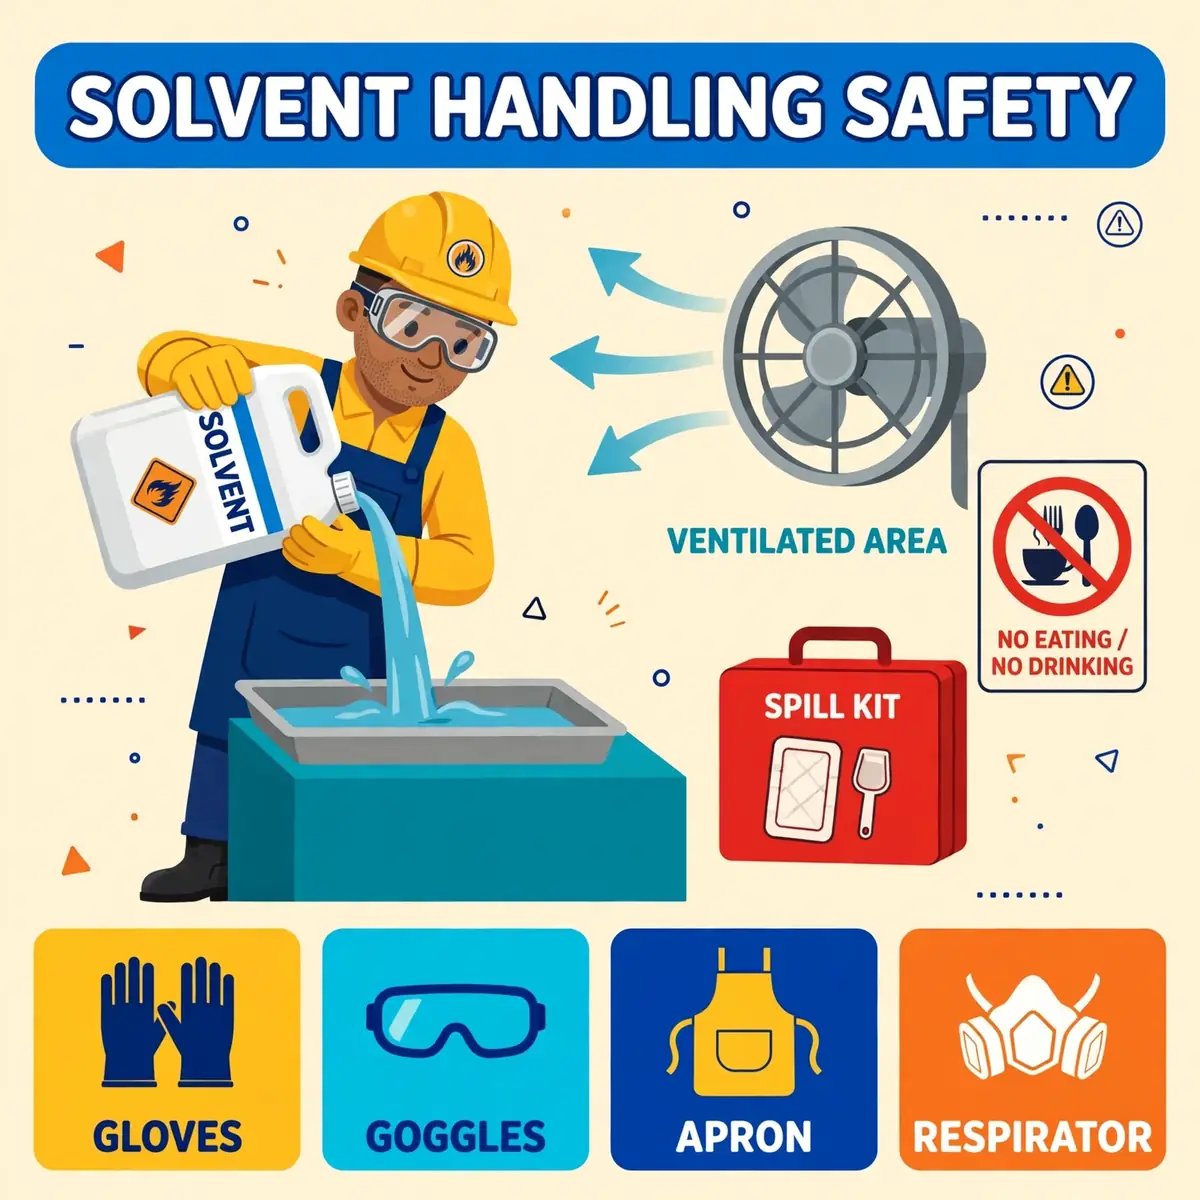
Safe use starts with the pre-task check. Read the label and the SDS sections for the product. Check the ventilation, the protective equipment and the spill kit. Check that the container is undamaged and the label is legible. Check that nobody nearby is doing hot work, grinding or anything else that could ignite a vapour. If any check fails, stop and fix it before opening the container.
Use only the amount the task needs. Open containers stay closed between uses. And a container that is open all day evaporates its contents into the air the crew breathes. Measure and mix in a ventilated area, away from other workers, and follow the manufacturer's mixing ratio exactly. Adding extra hardener to an epoxy to make it set faster changes the chemistry and the hazard at the same time.
Choose protective equipment from the safety data sheet
The SDS names the protective equipment for the product, and that is the starting point for selection. Chemical-resistant gloves must match the chemical: nitrile suits many solvents, neoprene suits others, and butyl rubber suits a third group. A glove that resists one chemical can fail against another in minutes, so check the manufacturer's permeation data for the actual product, not the glove's general rating. Splash goggles protect against liquid splashes, and a face shield adds protection where a splash could reach the face.
Respiratory protection follows the same rule. A dust mask suits nuisance dust but not silica. A half-mask with the right cartridge suits solvent vapours but not oxygen-deficient air. A full-face respirator with the right filter suits higher concentrations. Where the hazard is unknown or the air could be oxygen-deficient, only supplied air or a self-contained breathing apparatus is safe. The hazmat suits page explains the four protection levels and how to choose between them, and the PPE requirements page covers the general rules for protective equipment.
Keep food, drink and cigarettes away from the work
Eating, drinking and smoking in a work area turns a skin or inhalation hazard into an ingestion hazard. Hands that handled a solvent carry it to a sandwich. A cigarette ignites a flammable vapour. A drink left open beside a chemical store collects dust and fumes. Keep food and drink in the welfare area, wash hands before eating, and keep smoking to the designated area away from flammable storage.
Washing matters after the task as well as before a meal. Wash hands and face before eating, drinking or leaving the site, and change out of contaminated clothing before going home. Lead dust and asbestos fibres travel home on clothing and boots. And the family at home did not sign up for the exposure. Provide washing facilities, and make their use part of the routine rather than a suggestion.
WarningNever eat, drink or smoke where hazardous materials are handled. Contaminated hands carry chemicals into food, and a lit cigarette can ignite a flammable vapour.
Control dust and fumes while work runs
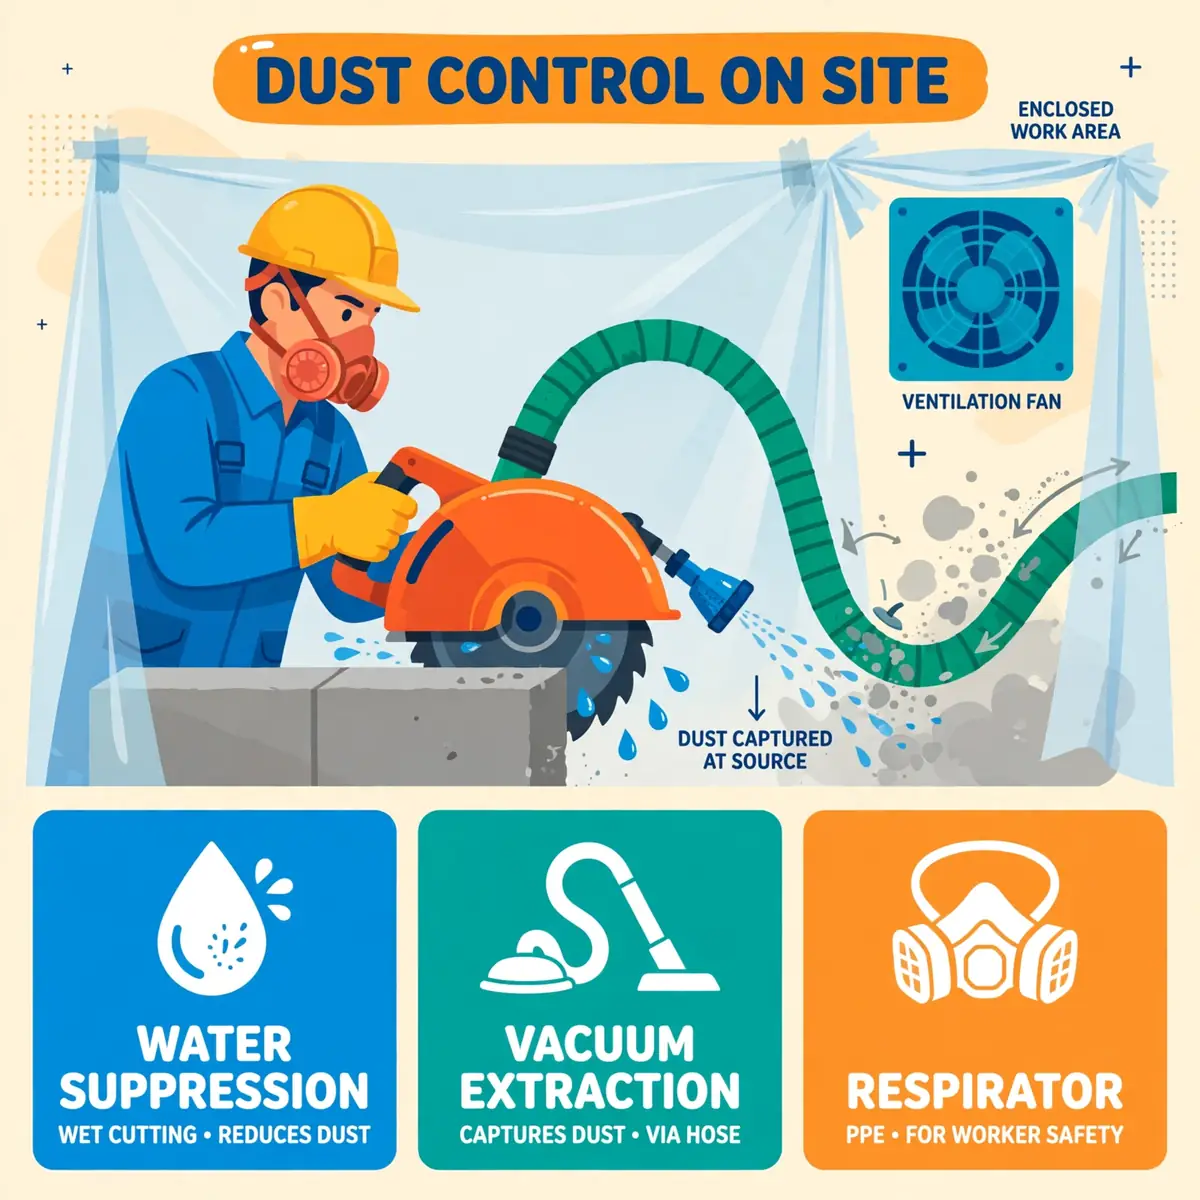
Dust and fumes are the hardest hazardous materials to control because they cannot be seen clearly and they drift beyond the work area. The control follows the same order as everything else: remove the dust at the source first, ventilate second, and rely on respirators last. A respirator is the final line of defence, not the plan. If the only control is a mask, the plan has a gap.
Water suppression is the simplest control for cutting, grinding and drilling. Wet the material before cutting and keep it wet while the tool runs. A vacuum dust collection system on the tool captures dust at the point it is made. Local exhaust ventilation pulls fumes away from the worker's breathing zone in enclosed spaces. Enclosing the dusty operation behind a screen or a sheeted area keeps the dust away from other trades working nearby.
Silica dust has a legal limit
Respirable crystalline silica is the dust that causes silicosis and lung cancer, and it has a hard legal limit. OSHA's construction silica standard, 29 CFR 1926.1153, sets a permissible exposure limit (PEL) of 50 micrograms per cubic metre of air as an 8-hour time-weighted average, with an action level of 25 micrograms per cubic metre. Table 1 in the standard lists 18 common tasks, such as using a masonry saw or a jackhammer, with the engineering controls and respiratory protection that apply to each.
For tasks in Table 1, follow the table: use the water delivery or dust collection it specifies, and wear the respirator it specifies. For tasks outside Table 1, the employer must assess exposure and keep it below the PEL. The standard also requires a written exposure control plan, a competent person to run it, and housekeeping that never uses dry sweeping or compressed air to clean silica dust. Use a HEPA-filtered vacuum or wet methods instead.
Ventilate enclosed spaces before anyone enters
Fumes build up fast in a basement, a tank, a shaft or a room with no windows. Solvent vapours are heavier than air and pool at floor level. Welding fume fills a small space in minutes. Diesel exhaust from a generator in an enclosed area can kill. Ventilate before entry, test the air where the standard requires it, and keep the ventilation running for the whole task.
Where the air cannot be tested or the hazard is unknown, treat the space as a confined space and follow the permit procedure. The confined space entry page covers permits, the three entry roles, air testing and rescue in full. Never send a worker into an unventilated space to "check whether it smells bad": smell is not a test, and some gases have no smell at all.
Asbestos, lead and silica: three materials with their own rules
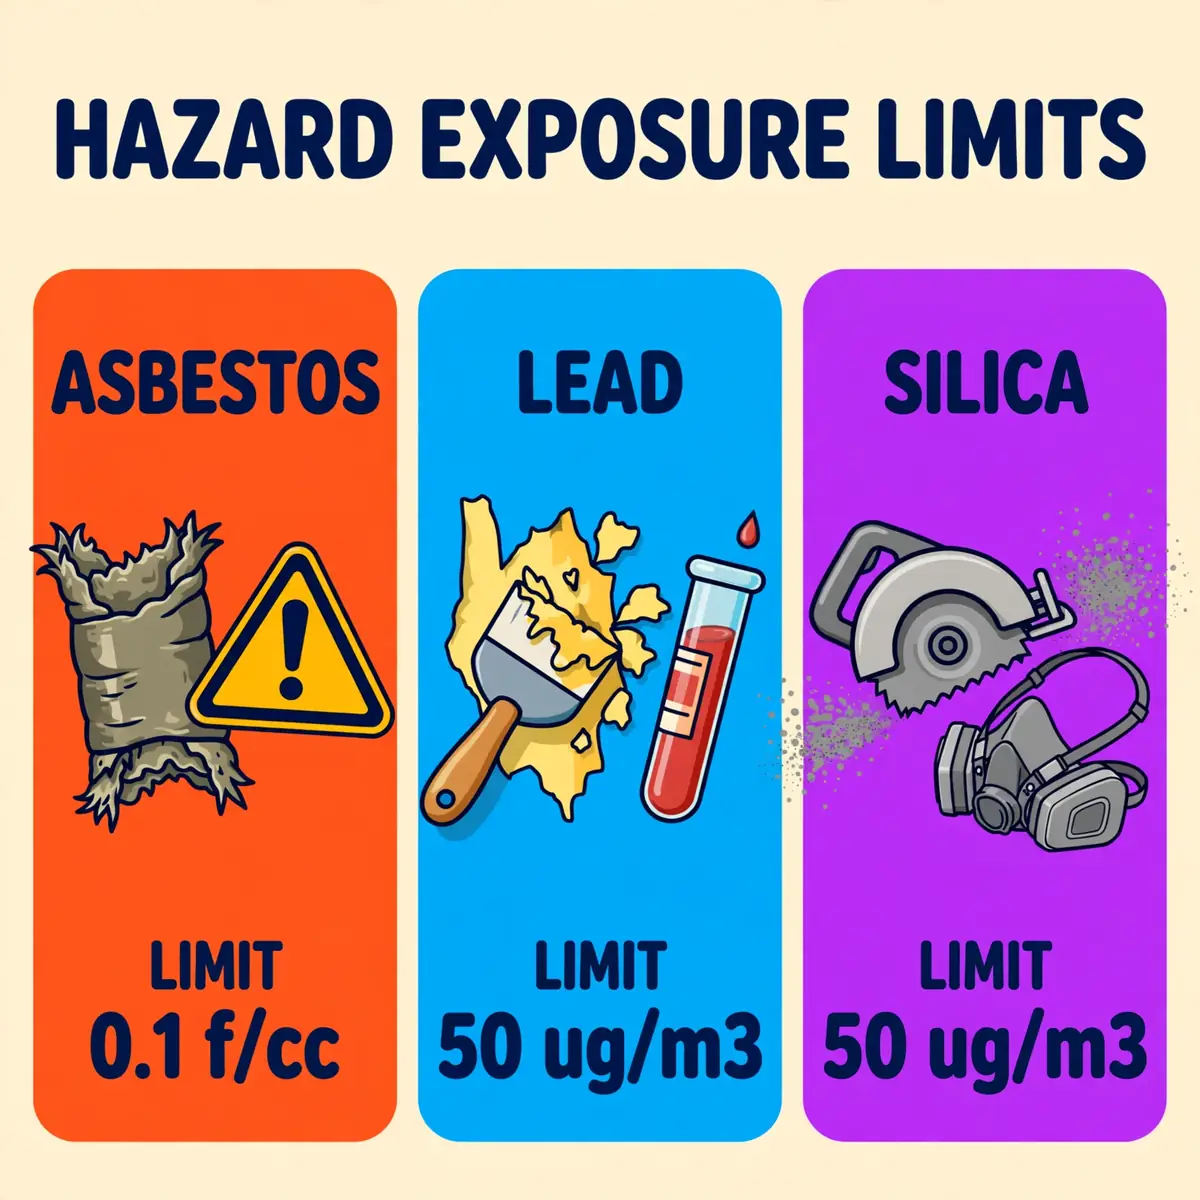
Three materials on construction sites have their own substance-specific standards, and the general handling rules are not enough for them. Asbestos, lead and silica each have a legal exposure limit, a monitoring duty and a medical surveillance duty. The table below puts the three limits side by side. So a supervisor can see at a glance which number applies to which material.
| Material | Standard | Permissible exposure limit | Action level |
|---|---|---|---|
| Asbestos | 29 CFR 1926.1101 | 0.1 fibres per cubic centimetre, 8-hour average | None set |
| Lead | 29 CFR 1926.62 | 50 micrograms per cubic metre, 8-hour average | 30 micrograms per cubic metre |
| Respirable crystalline silica | 29 CFR 1926.1153 | 50 micrograms per cubic metre, 8-hour average | 25 micrograms per cubic metre |
The limits are 8-hour time-weighted averages, which means the average exposure across the shift, not the peak during one task. A short burst above the limit can still be lawful if the shift average stays below it. But the standard expects controls to keep exposure down for the whole shift. Where the shift runs longer than 8 hours, the lead standard reduces the allowable limit with a formula: divide 400 by the hours worked.
Asbestos: do not disturb it without a plan
Asbestos causes asbestosis, lung cancer and mesothelioma, and the fibres stay in the lungs for life. OSHA's construction asbestos standard, 29 CFR 1926.1101, sets the limit at 0.1 fibres per cubic centimetre over 8 hours, with an excursion limit of 1.0 fibres per cubic centimetre over 30 minutes. The standard sorts asbestos work into four classes, and the class decides the controls.
Class I is the most hazardous work, such as removing surfacing material. Class IV is maintenance and cleanup work that contacts asbestos material.
Removal is normally licensed work. And the crew needs training, respiratory protection, protective clothing, a decontamination unit and a regulated area with warning signs. Never dry sweep asbestos debris, never use a household vacuum, and never take asbestos waste home. Waste goes into sealed, labelled bags or containers and to a licensed disposal facility. In the United Kingdom, the Control of Asbestos Regulations 2012 set the same 0.1 fibres per cubic centimetre limit, and most removal needs a licensed contractor.
Lead: watch the dust and the blood
Lead damages the nervous system and the kidneys, and it harms the unborn child, so pregnant workers need particular care around lead work. The construction lead standard, 29 CFR 1926.62, sets the limit at 50 micrograms per cubic metre over 8 hours, with an action level of 30 micrograms per cubic metre. At or above the action level the employer must assess exposure, provide protective clothing and respirators, run medical surveillance with blood lead testing, and provide hygiene facilities.
Lead dust spreads on hands, clothing and boots, so hygiene is the control that matters most after the work itself. Wet methods and HEPA vacuums keep the dust down during paint removal and demolition. Dry sweeping and dry sanding are banned for lead paint work because they throw dust into the air. Workers wash before eating and change out of contaminated clothing before leaving the site. And the employer launders the work clothing rather than letting it go home.
AlertAsbestos, lead and silica each have a legal exposure limit and a monitoring duty. General handling rules alone do not cover them — follow the substance-specific standard for each one.
Spill response: what to do in the first minutes
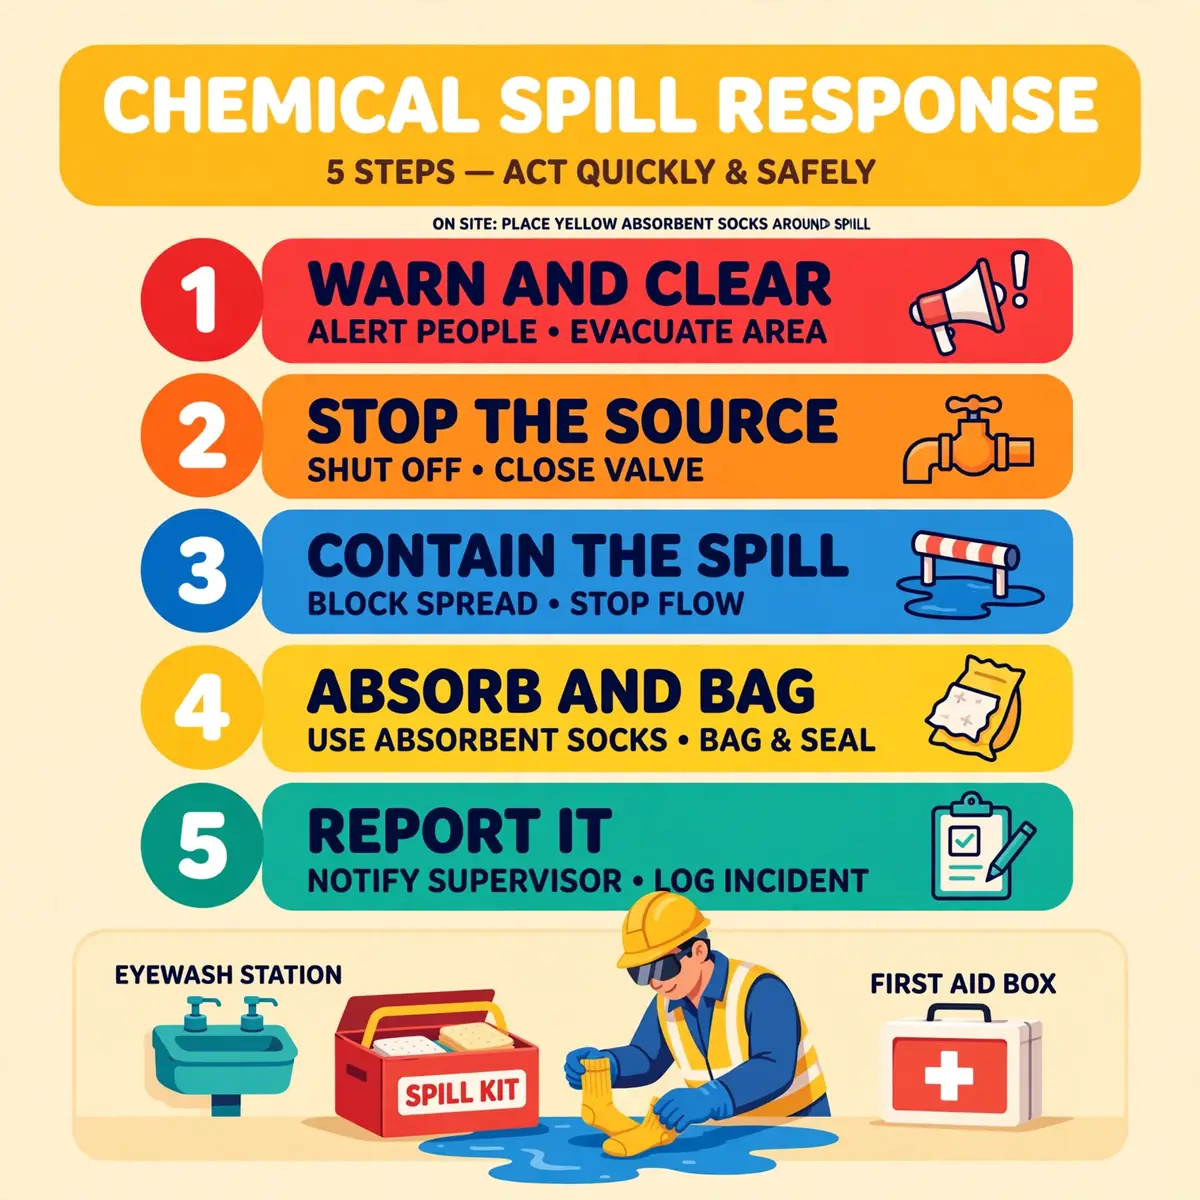
Hazardous materials spill response on a construction site starts before the spill happens, with the kit, the eyewash station and a named person to call. A spill is the moment the plan is tested. The first minutes decide whether it stays a cleanup or becomes an injury, a fire or an environmental incident. The order is always the same: warn people and clear the area, stop the source if it is safe to do so, contain the spill, clean it up with the right materials, and report it. Nobody cleans up a spill they have not been trained to handle.
Every site that handles hazardous materials keeps a spill kit within easy reach of the store and the work area. A kit holds absorbent pads, socks and booms for liquids, heavy-duty disposal bags, and the protective equipment the cleanup crew needs. Neutralising agents for acids or bases belong in the kit only where the SDS calls for them. Check the kit every month and replace anything that has been used, because an empty kit is worse than no kit: it promises a response that cannot happen.
The first five minutes after a spill
Follow these steps in order, and do not skip ahead to the cleanup before the area is safe.
- Warn everyone nearby and move people upwind and away from the spill, keeping the area clear until the hazard is known.
- Stop the source if it is safe: close a valve, upright a fallen drum, or switch off the pump feeding the leak.
- Contain the liquid with absorbent socks or booms, and block drains and gullies so nothing reaches a watercourse.
- Read the SDS for the spilled material and put on the protective equipment it specifies before touching the spill.
- Absorb the liquid, bag the waste, label the bags as hazardous waste, and report the spill to the supervisor the same day.
Never wash a chemical spill down a drain with a hose. Water spreads many chemicals further, and some react violently with water. Never use a sawdust or a general absorbent where the SDS calls for a chemical-specific one. If the spill is large, if the material is unknown, or if anyone feels unwell, leave the area and call the emergency number. That is the right call, not a failure.
First aid after contact with a chemical
Chemical splashes need fast action. Flush skin or eyes with clean water at once, and keep flushing for at least 15 minutes. The eyewash station must be within a 10-second walk of the chemical handling area, on the same level, with a clear path to it. OSHA requires suitable facilities for quick drenching or flushing where eyes or body may be exposed to corrosive materials. And the recognised benchmark, ANSI/ISEA Z358.1, sets the 15-minute flush, tepid water and the 10-second reach.
Remove contaminated clothing while flushing, and keep the SDS with the casualty so medical staff can see exactly what was involved. Call for medical help where the SDS says to, and do not wait to see whether symptoms develop. Some chemical burns deepen over hours. The first aid kit page covers the kit contents and the legal requirements that sit behind it.
WarningDo not attempt to clean up a spill of an unknown material, a large spill, or a spill that makes anyone feel unwell. Leave the area, warn others, and call for trained help.
Dispose of hazardous waste the legal way
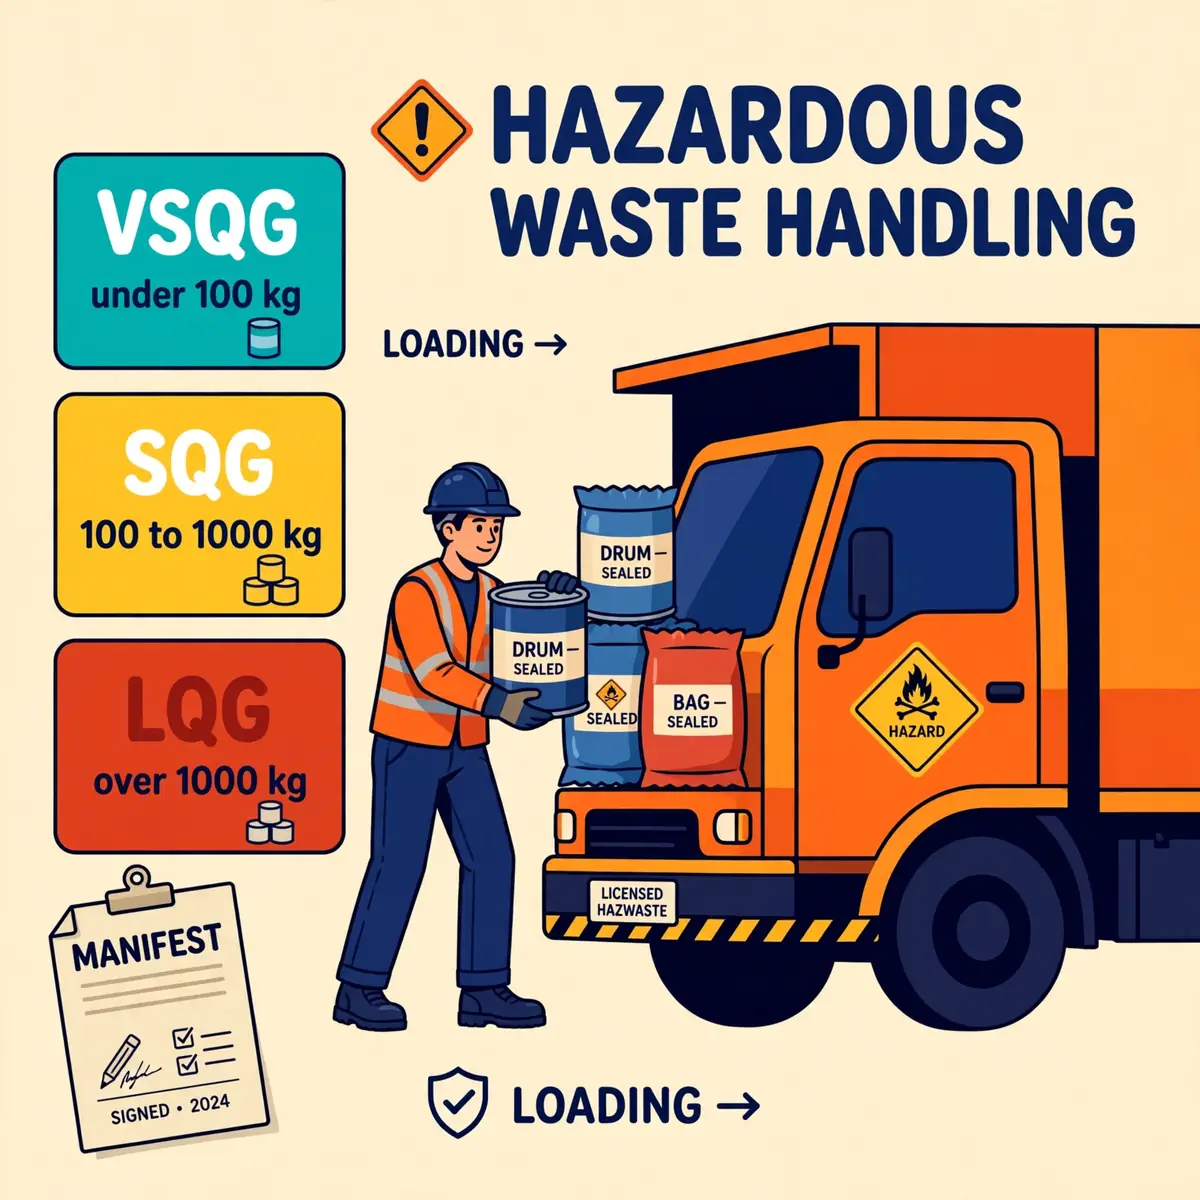
Construction site hazardous waste disposal starts by deciding whether the waste is hazardous. Paints, solvents, adhesives, contaminated soil, asbestos waste, lead paint debris, used oils and chemical containers all need a separate route to a licensed facility. The law follows the waste from the site to its final destination. And the site that produced it stays responsible until it arrives. Pouring waste down a drain, burning it on site or burying it is illegal in both the United States and the United Kingdom.
Start by deciding whether the waste is hazardous. The SDS names the waste classification for the product, and a laboratory test settles waste of unknown composition. Segregate hazardous waste from general waste at the point it is produced, in labelled containers, and keep incompatible wastes apart just as in the store. A container of mixed waste costs more to dispose of than the same wastes kept separate. And some mixtures become more dangerous than either waste alone.
Know the generator category for the site
In the United States, the Resource Conservation and Recovery Act (RCRA) sorts waste producers into three categories by how much hazardous waste they generate each month. And the category decides the rules that apply. Most construction sites fall into the smallest category. But the category can change from month to month as the work changes, so count the waste every month.
| Category | Non-acute hazardous waste per month | Acute hazardous waste per month |
|---|---|---|
| Very small quantity generator (VSQG) | 100 kilograms or less | 1 kilogram or less |
| Small quantity generator (SQG) | More than 100 and less than 1,000 kilograms | 1 kilogram or less |
| Large quantity generator (LQG) | 1,000 kilograms or more | More than 1 kilogram |
The smallest category used to be called a conditionally exempt small quantity generator, and older guides still use that name. The Environmental Protection Agency (EPA) renamed it "very small quantity generator" in the 2016 Generator Improvements Rule. Small and large quantity generators need an EPA identification number, and they must identify the waste codes for their waste. State rules can differ from the federal categories, so check the state programme where the site sits.
Keep the paperwork for every load
Every load of hazardous waste that leaves the site travels with a manifest: a document that names the waste, its quantity, the carrier and the destination facility. The generator signs it, the carrier signs it, and the disposal facility signs it and returns a copy. Keep the signed copies on file, and chase any copy that does not come back, because a missing manifest means the site cannot prove where its waste went.
Keep disposal records for at least three years, and keep training and inspection records for the same period. The site inventory, the waste log and the manifests together tell the story of every hazardous material from delivery to disposal. An inspector who asks where a drum went should get an answer in minutes, not a search through a pile of delivery notes.
AlertNever put hazardous waste in a general site skip, down a drain or on a bonfire. The site that produced the waste stays responsible for it until it reaches a licensed facility.
Training, health checks and records
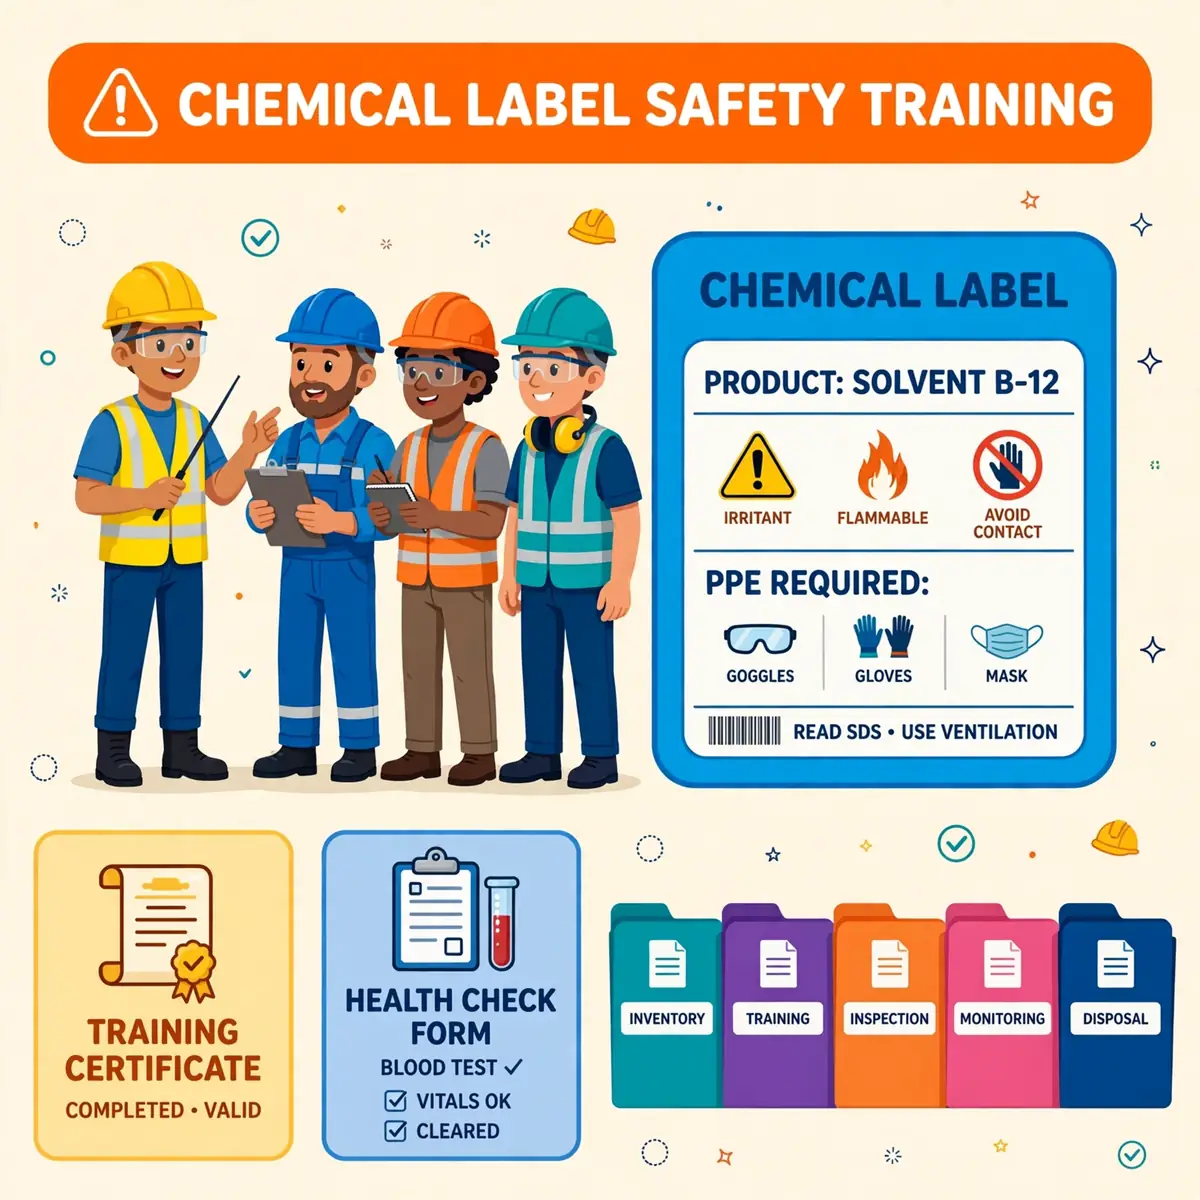
Training is the control that makes every other control work. A worker who cannot read a label, find an SDS or recognise a spill will not use the storage rules or the protective equipment correctly. OSHA's Hazard Communication Standard requires training on the hazardous chemicals in the work area, covering the hazards, the labels, the SDS and the protective measures. Training must happen when a worker starts, and again when a new chemical arrives or a new hazard is identified.
Training must be in a language and a form the worker understands, and it must be recorded. The record names the worker, the date, the topics covered and the trainer. A toolbox talk covers the day's task; a formal course covers the standard itself. Both count, and both need a record. Workers who move hazardous materials on the road need the separate DOT hazmat training as well, refreshed every three years.
Health surveillance for the high-risk materials
Some materials need health checks as well as training. Lead work needs blood lead testing where exposure reaches the action level. Asbestos work needs medical surveillance where exposure reaches the limit. Silica work needs medical surveillance for workers who wear respirators for 30 or more days a year. These checks catch harm early. And they are a legal duty under the substance-specific standards, not a benefit the employer may choose to offer.
In the United Kingdom, COSHH Regulation 11 requires health surveillance where the risk assessment shows it is necessary, or where the regulations set specific requirements. The results stay confidential to the worker and the occupational health professional. But the employer must act on the findings: move a worker away from exposure, improve the controls, or both. A health surveillance result that is filed and ignored is worse than no check at all.
Keep records that prove the system works
Five records prove that hazardous materials are under control on a site. The inventory lists every hazardous material, its location and its SDS. The training records show who was trained, when and on what. The inspection records show the store, the containment and the spill kits were checked. The monitoring records show exposure measurements for silica, asbestos and lead. The disposal records show where every load of hazardous waste went.
Review the records every month and audit the system every quarter. The review asks three questions: is the inventory still accurate, did any incident or near miss reveal a gap, and did any new material arrive without a plan. A plan that is never reviewed goes out of date within weeks on a busy site, because materials, trades and tasks change faster than the paperwork.
TipGive every new worker a short induction on the site's hazardous materials before their first task. Ten minutes on the store, the SDS folder and the spill kit prevents most first-day incidents.
Common mistakes with hazardous materials on site
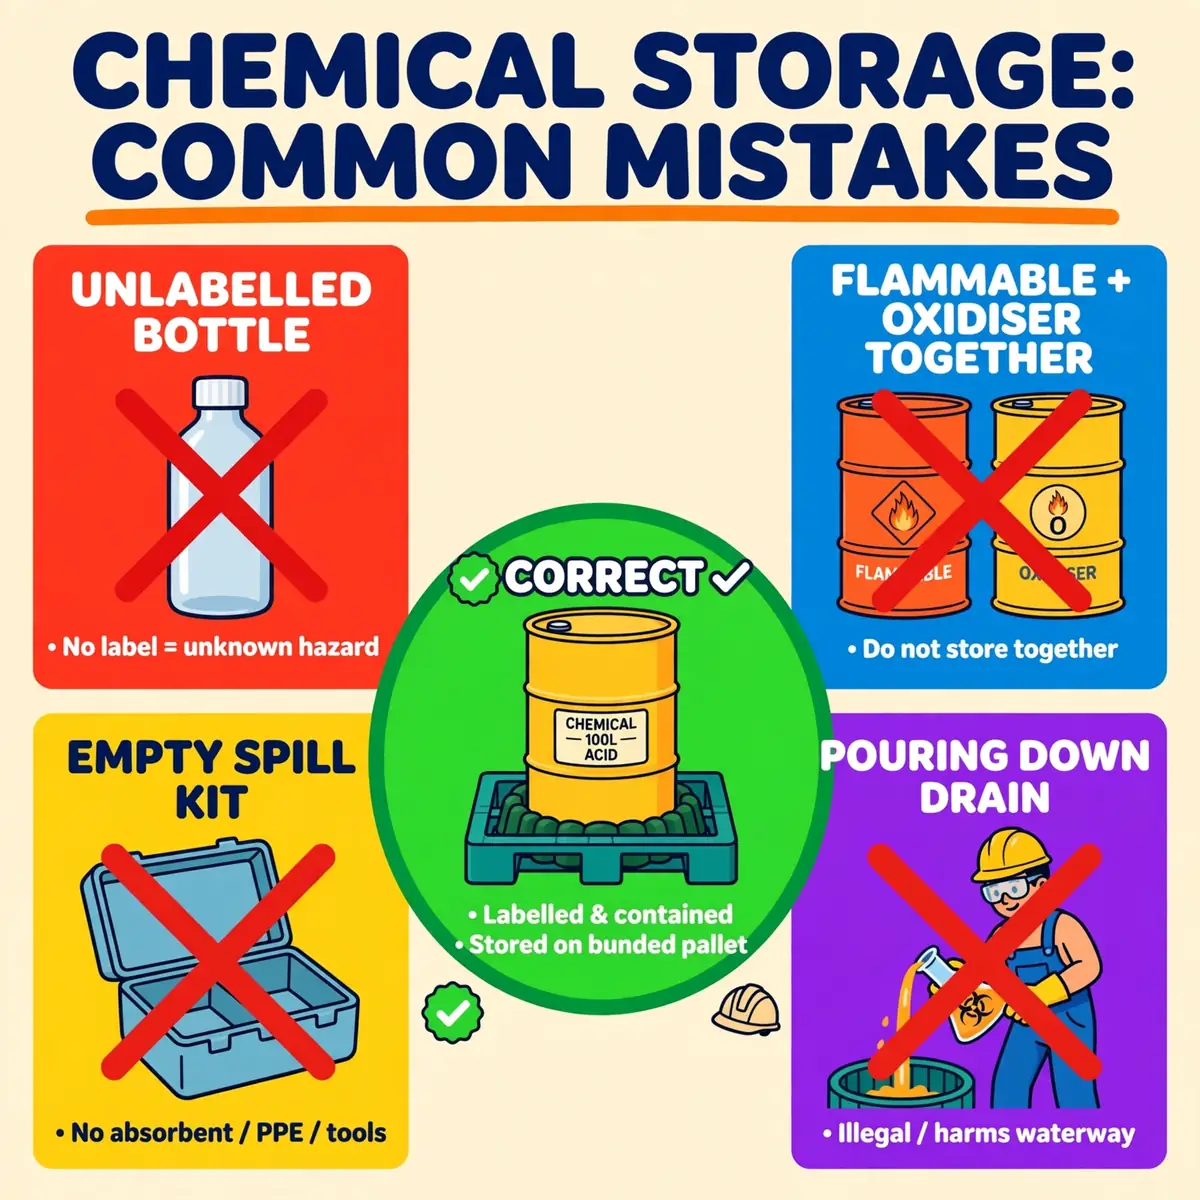
Most hazardous material incidents on construction sites come from a short list of repeated mistakes, not from unusual events. The mistakes are ordinary: an unlabelled container, a store with no segregation, a spill kit that was never checked, a worker who was never trained. Each one is cheap to prevent and expensive to fix after the event. The list below is the one to check against at every site inspection.
The first mistake is treating a familiar product as safe. Diesel, cement and cleaning agents are so common that workers stop seeing them as hazardous. Diesel is flammable and a skin irritant. Wet cement burns skin. A cleaning solvent can damage the liver through the skin. Familiarity is not a safety assessment. And the label and the SDS apply to familiar products exactly as they apply to new ones.
Mistakes that show up at inspection
Construction safety inspectors find the same faults again and again. Unlabelled decanted containers sit beside labelled ones. Flammables sit beside oxidisers in the same cabinet. A bund holds rainwater instead of being empty and ready. Safety data sheets are missing for products that arrived last week. A spill kit is half empty after a small spill nobody recorded. Workers wear the wrong gloves for the chemical they are using.
Each fault has a simple fix, and the fix belongs to a named person with a date. The supervisor owns the inventory and the SDS folder. The storekeeper owns the segregation and the containment. The safety officer owns the spill kit and the inspection record. A fault with no owner and no date is a fault that will still be there at the next inspection.
Mistakes that turn a small problem into a big one
Three mistakes turn a small problem into a big one. The first is hiding a spill instead of reporting it, because the cleanup then happens without the right equipment and the record never exists. The second is washing a spill down a drain, which spreads the chemical and creates an environmental offence. The third is sending an untrained worker to clean up a spill, which puts the least prepared person closest to the hazard.
Report every spill, however small, and record it with the material, the quantity, the cleanup method and the waste route. A small spill that is reported and cleaned up properly is a near miss the site can learn from. A small spill that is hidden is a habit that will one day involve a large spill and an injured worker.
Frequently Asked Questions
What is the first thing to do when an unknown material is found on site?
Stop work in that area, keep people away, and treat the material as hazardous until sampling proves otherwise. Report the find to the supervisor the same day, record the location and time, and do not resume work there until the material is identified and the hazardous materials plan covers it.
Do small sites need a written hazardous materials plan?
Yes, in proportion to the risk. A small site with a few paints and fuels still needs an inventory, labelled storage, safety data sheets, a spill kit and a named person to call. OSHA's hazard communication duties apply regardless of site size, and COSHH requires a risk assessment for any hazardous substance. The plan can be short; it cannot be absent.
How long must safety data sheets be kept?
Keep the SDS for every hazardous chemical while it is on site and accessible to workers during their shift. OSHA requires employers to keep records of exposure monitoring and medical surveillance for 30 years. And the SDS is the record that explains what workers were exposed to. Keep the SDS even after the product leaves the site.
Can hazardous waste go in a normal site skip?
No. Hazardous waste must be segregated, labelled and sent to a licensed facility with a manifest. Paints, solvents, asbestos waste, lead paint debris and contaminated soil all need the hazardous route. Mixing hazardous waste into a general skip makes the whole skip hazardous and more expensive to dispose of.
What protective equipment do workers need for hazardous materials?
It depends on the product. The safety data sheet names the gloves, eye protection, clothing and respiratory protection for each chemical. Chemical-resistant gloves must match the chemical, splash goggles cover liquid splashes, and respirators must match the hazard: dust, vapour or oxygen deficiency. Where the hazard is unknown, only supplied air or a self-contained breathing apparatus is safe.
Who is responsible for hazardous materials on a construction site?
The employer and the principal contractor carry the main duties: the inventory, the plan, the training, the storage and the disposal route. The supervisor runs the plan day to day. Workers must follow the plan, use the protective equipment provided, and report spills, damaged containers and unknown materials at once.
How do I know if a dust needs a respirator?
Check the substance and the task. Silica dust, asbestos fibres and lead dust all have legal exposure limits and need respiratory protection where controls cannot keep exposure below the limit. OSHA's silica standard Table 1 names the respirator for 18 common tasks. If the dust type is unknown or the exposure cannot be measured, treat it as hazardous and wear respiratory protection until monitoring shows otherwise.
Sources
- OSHA — Steps to an Effective Hazard Communication Program
- 29 CFR 1910.1200 — Hazard Communication (eCFR)
- OSHA — Silica, Crystalline: Construction Information
- 29 CFR 1926.1153 — Respirable Crystalline Silica (eCFR)
- OSHA — Significant Changes in the Asbestos Standard for Construction, 29 CFR 1926.1101
- 29 CFR 1926.62 — Lead (eCFR)
- US Environmental Protection Agency — Categories of Hazardous Waste Generators
- 40 CFR 262.13 — Generator Category Determination (eCFR)
- Health and Safety Executive — Control of Substances Hazardous to Health Regulations 2002, Approved Code of Practice L5
- Health and Safety Executive — A Step by Step Guide to COSHH Assessment
- US Department of Transportation, PHMSA — Interpretation 13-0052R: Shipping Papers and Placarding